How to Remove Someone on Life360 Using The Correct Method
 Updated by Lisa Ou / November 19, 2024 16:30
How do you remove someone from Life360? We recently added our new friend to our Life360 circle, but after hanging out for a while, we noticed she monitors our locations too much. It even gets to a point where she randomly comes to our home uninvited, making us uncomfortable. So, please give me some pointers about how I can remove her from our Life360 circle. Thank you!
Life360 has been built with the developers' good intentions in mind. It mostly caters to family members, letting parents monitor their children's whereabouts to ensure their safety. However, Life360 is not only exclusive for family use. Friend groups and other circles also use it for certain purposes. The problem is that others can take advantage of the app and use it for negativity.

Thankfully, removing someone from your Life360 circle is possible if you no longer feel safe and comfortable about them knowing your location. Hence, we encourage you to explore the information we provided below instead of browsing the web without certainty. All the needed details have already been prepared in each part, so you only have to perform them correctly.

Guide List
Part 1. What to Do Before You Remove Someone from Life360
Removing someone isn’t something users do in a snap. Like your other decisions, it needs preparation, especially since it involves removing a person from a group. So, you must first communicate with the user you intend to remove, whether or not you’re close to the person.
Tell them your plan to avoid conflicts later. Also, they will have a chance to back up information and data they may need from the circle. You and the other members can also back up the data the person has sent because it may disappear once you remove the user from the group.
Aside from that, we suggest checking out Life360’s Privacy and Security Settings. This way, you will understand how removing someone affects the circle. It will help you prepare and adjust to the changes when the person is removed. You can also modify the settings if needed.

FoneLab Location Changer enables you to modify locations on iPhone, iPad or iPod Touch easily.
- Set your location on iOS devices to anywhere accordingly.
- Move your iPhone with your desired routes with or without starting and ending spots.
- Various iOS devices are supported.
Part 2. How to Remove Someone from Life360 Properly
Despite being a significant decision, removing someone from your Life360 circle is hassle-free. It is done in the app’s Settings section, which can take less than one minute. It is also possible to remove multiple members simultaneously, but no worries. The process won’t differ much, regardless of the number of users you intend to remove. The only requirements are the internet connection and your Life360 account. Then, the person you wish to remove will quickly be eliminated from the circle. However, don’t forget the reminders and preparations we have given in the prior part. They will ensure a smooth and successful process to achieve your goal.
Take to heart the basic procedure below to determine how to remove someone off Life360:
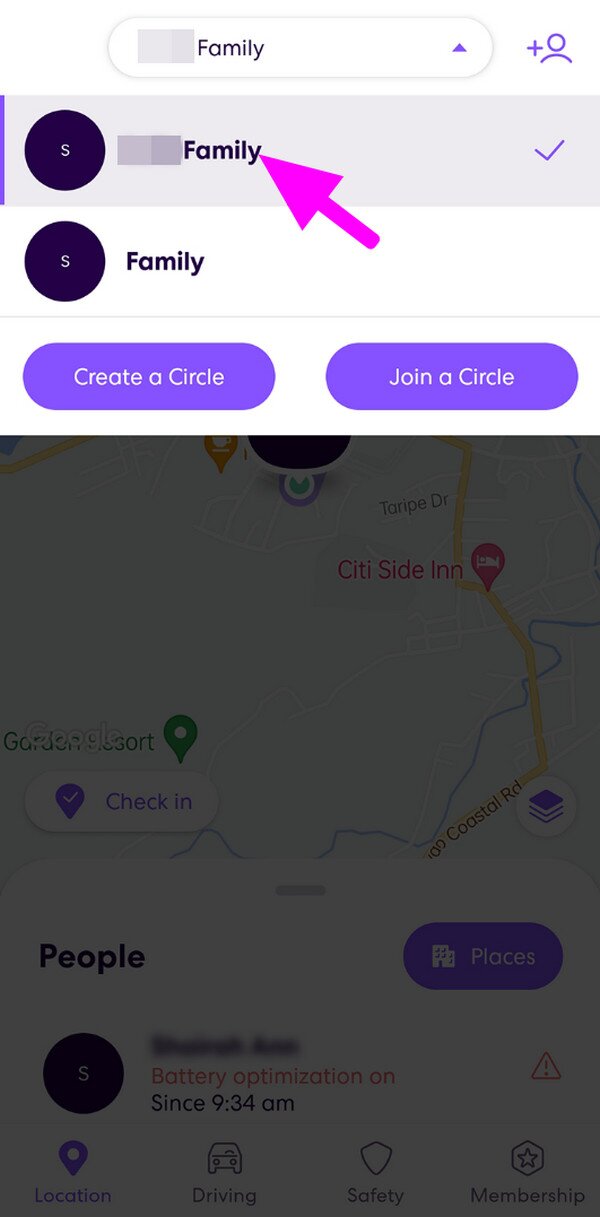
Step 1First, open the Life360 app on your device and ensure your account is signed in. The main interface has a map-like design, but select the bar at the top first. Then, choose the name of the circle where the person you plan to remove is included when the options appear.

Step 2Once you have picked the designated circle, tap the gear symbol on the upper left to view the app’s Settings section. After that, open the Circle Management tab and tap Delete Circle Members. When your circle members are displayed, tick the checkbox aligned to the user’s name you intend to remove. Finally, select Delete on the uppermost right to finish.

As mentioned, some people take advantage of the Life360 app’s usage and excessively monitor your location. However, what would be the best thing to do if you don’t want to create bad blood by removing anyone from your circle? Easy. Fake your location using our suggested tool below.

FoneLab Location Changer enables you to modify locations on iPhone, iPad or iPod Touch easily.
- Set your location on iOS devices to anywhere accordingly.
- Move your iPhone with your desired routes with or without starting and ending spots.
- Various iOS devices are supported.
Part 3. Bonus Tip - Top Location Changer for iOS and iPadOS Devices
Unfortunately, removing someone from the circle can offend them even if you’re uncomfortable with their presence in your Life360 group. In this case, you can use the help of a professional program, FoneLab Location Changer. This way, even if you don’t remove them, they won’t be able to track your real location. Yes, that’s right! This tool lets you set your desired place as your iOS or iPadOS device’s location, preventing others from knowing where you truly are.
Meanwhile, many have guaranteed that the FoneLab Location Changer is safe, and you can ensure it is hassle-free. Thanks to its clean and intuitive interface, you will immediately grasp how its functions work, making it easy to fake your location. On the other hand, you may also make others believe you are going from one place to another, even if you’re only in the comfort of your home. Thus, keeping it on your computer will be advantageous even in later situations.

FoneLab Location Changer enables you to modify locations on iPhone, iPad or iPod Touch easily.
- Set your location on iOS devices to anywhere accordingly.
- Move your iPhone with your desired routes with or without starting and ending spots.
- Various iOS devices are supported.
Discern the trouble-free steps underneath as a model for faking your location with FoneLab Location Changer if you can’t remove someone from Life360:
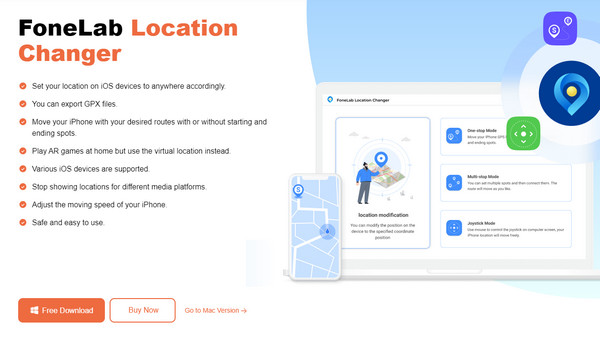
Step 1Save FoneLab Location Changer’s installer. The Free Download button is on its official site, so click it to acquire the file in your Downloads. Once saved, start installing the location changer by opening the file and clicking Install when shown. The process won’t take long, but you can watch its status with the bar at the bottom. Then, the Start tab will let you open the tool.

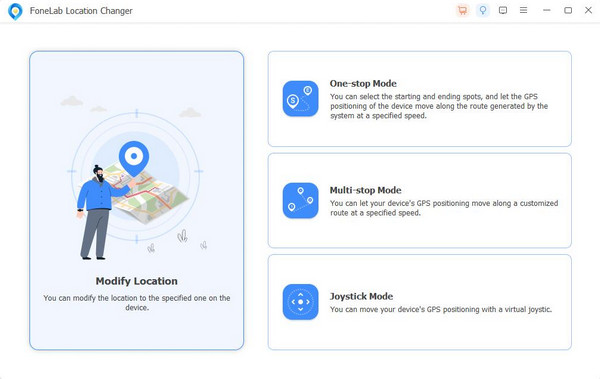
Step 2Displaying on the main interface is another Start button, but ensure you agree to the disclaimer before clicking it. The key features, including the Modify Location box, will be shown on the next interface. Select it, and a map-like screen will be displayed next, although you can still return to use the other functions later. Meanwhile, your device must link with a USB cord.

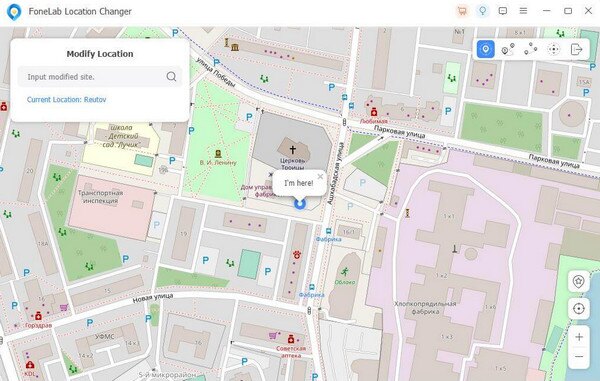
Step 3Next, focus on the Modify Location dialogue on the upper left interface. Click its text field to input the location where you wish to set the iOS or iPadOS device. It will then be shown on the map; if someone tries to track your device, they will see it.


FoneLab Location Changer enables you to modify locations on iPhone, iPad or iPod Touch easily.
- Set your location on iOS devices to anywhere accordingly.
- Move your iPhone with your desired routes with or without starting and ending spots.
- Various iOS devices are supported.
Part 4. FAQs about How to Remove Someone from Life360
1. Can I block someone from Life360?
No, you can't. Unfortunately, Life360 doesn't offer a block feature, so it won't be possible to do that on the app. As an alternative, why don't you try FoneLab Location Changer instead? It lets you fake your location, preventing others from closely monitoring your whereabouts. It is the perfect solution to hide your location without anyone knowing.
2. Is it possible to freeze my location on Life360?
Yes, it is. You may turn your device location off or use a program like FoneLab Location Changer to freeze Life360 from tracking and updating your whereabouts. On the other hand, turning your device off will also be effective.

FoneLab Location Changer enables you to modify locations on iPhone, iPad or iPod Touch easily.
- Set your location on iOS devices to anywhere accordingly.
- Move your iPhone with your desired routes with or without starting and ending spots.
- Various iOS devices are supported.
Prevent anyone from tracking and monitoring your location using the trusted methods in this post. The given steps are ready to assist you in smoothly finishing the processes.
