fix iPhone/iPad/iPod from DFU mode, recovery mode, Apple logo, headphone mode, etc. to normal state without data loss.
Comprehensive Guide about Do Not Disturb on iPhone
 Updated by Lisa Ou / Aug 18, 2023 17:30
I have a scheduled meeting in a few days, and I'm afraid my iPhone will cause disruption when an unexpected notification suddenly comes up. Thus, my co-worker advised me to learn how to put an iPhone on Do Not Disturb, but I'm unfamiliar with this iPhone feature. Can someone explain what it is about and how I should utilize it? Thanks in advance.
Are you new to the Do Not Disturb mode on an iPhone or other Apple devices? If so, you must learn its function and how to set or turn it off. Fortunately, you have found this article, bringing you one of the most trusted guides for using this specific mode on your iPhone. As a bonus, a technique for system repair will also be introduced in the later parts. This way, you can fix the device immediately if sudden issues prevent you from navigating the Do Not Disturb feature on the iPhone. The instructions are simplified, so please move forward and check each part to use the mode on your device.


Guide List
Part 1. What Does Do Not Disturb Do on iPhone
Do Not Disturb mode on iPhone is one of the modes on Apple devices that allows you to put the device on mute. As the mode’s name suggests, activating this mode silences anything that may cause disruption, including calls, alerts, notifications, vibrations, or visual disturbances. Hence, it is primarily used when you are in a strict environment, such as an important meeting, class, etc., that doesn’t allow any interruptions.
Aside from that, it also helps when you’re trying to focus on something and don’t want anything to distract you. For instance, you’re in the middle of reviewing for an exam. You can put your iPhone on Do Not Disturb mode to avoid interruptions, such as calls or texts from friends who might interfere with your review by chitchatting. Or notifications from the games on your iPhone that may tempt you to play instead.
FoneLab enables you to fix iPhone/iPad/iPod from DFU mode, recovery mode, Apple logo, headphone mode, etc. to normal state without data loss.
- Fix disabled iOS system problems.
- Extract data from disabled iOS devices without data loss.
- It is safe and easy to use.
Part 2. How to Set Do Not Disturb on iPhone
There are 2 ways to set the Do Not Disturb function on your iPhone. You can access either the Control Center or Settings, depending on the method you’re more comfortable with. But don’t worry; both ways are hassle-free and only take a few taps to navigate.
Comply with the untroubled instructions below to determine how to set Do Not Disturb on iPhone:
On Control Center:
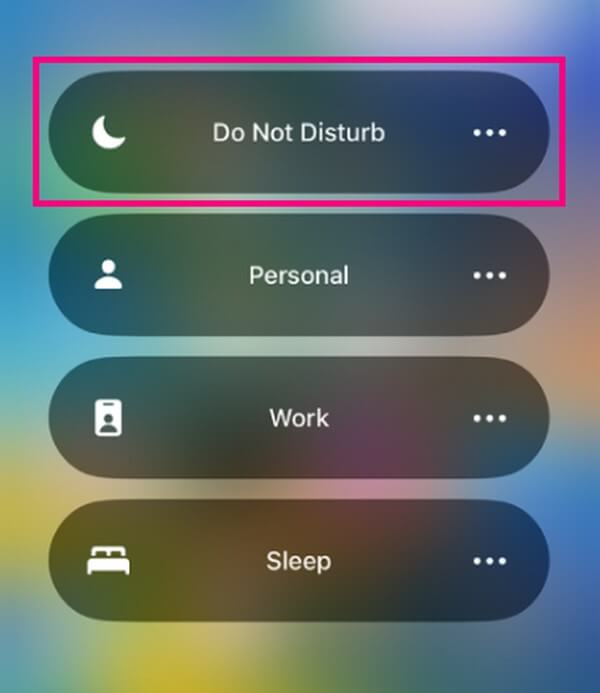
Step 1Slide your finger from your iPhone’s bottom or top screen to display the Control Center. Then, tap the Focus tile on the left portion to reveal more options.
Step 2Choose the Do Not Disturb tab on the upper part to set your iPhone in Do Not Disturb mode. The crescent moon icon will be shown in the status bar, meaning you have completed the process successfully.
On the Settings app:
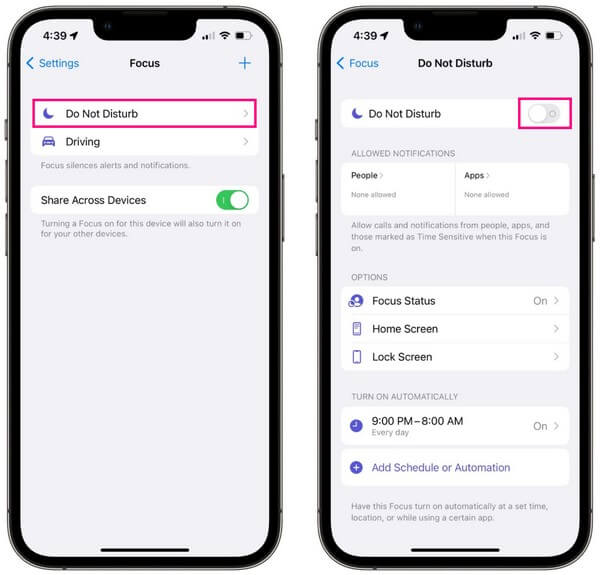
Step 1Hit the Settings icon on your iPhone Home screen to display the app’s interface. Next, hit the Focus tab on the options shown on the screen.
Step 2Hit the Do Not Disturb tab and enable its slider to activate the mode on your iPhone. Afterward, you may set up the options below, including the allowed notifications and schedule.
Part 3. How to Turn Off Do Not Disturb on iPhone
Turning the Do Not Disturb mode off on your iPhone has almost the same steps as turning it on. Hence, if you have turned the mode on with the help of the instructions in Part 2, you will find this method much easier. Like the previous part, you can deactivate Do Not Disturb in 2 ways, which are on Control Center and Settings.
Bear in mind the comfortable guidelines underneath to master how to turn off Do Not Disturb on iPhone:
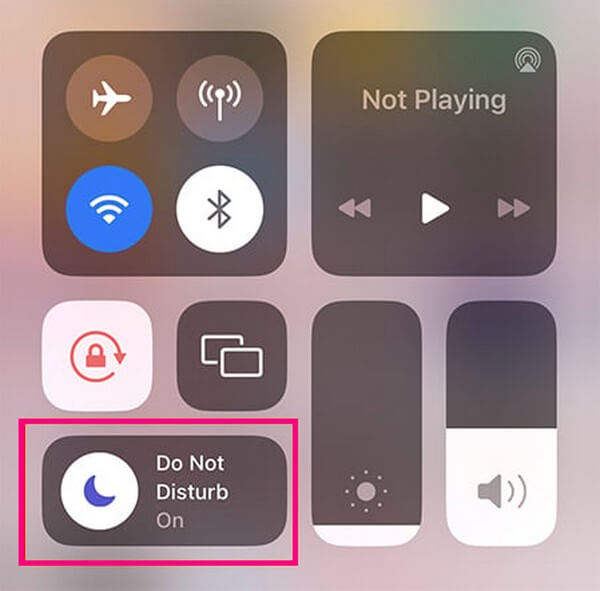
On Control Center: Display the Control Center by sliding the screen from the top or bottom of the iPhone. After that, tap the Do Not Disturb tab with a crescent moon icon to turn the mode off.
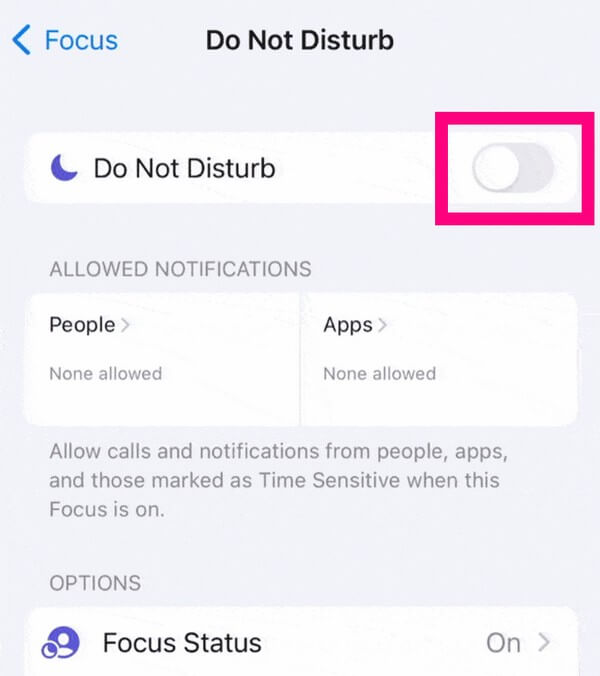
On the Settings app: Get into the Settings screen and tap the Focus option. Following that, choose Do Not Disturb, then toggle its slider off on the following screen to deactivate the mode on your iPhone.
Part 4. What to Do If Do Not Disturb on iPhone is Not Working
On the other hand, if the Do Not Disturb mode is not turning on, turning off, or doesn’t function on your iPhone, use FoneLab iOS System Recovery. When such situations happen, it usually means your device is facing an issue. And installing this repair tool is a method you can use as a solution besides rebooting iPhone, factory resetting your iPhone, or something else. It is a program for fixing almost any abnormalities you might be experiencing on your iOS device, so trust it to mend the issue that causes the Do Not Disturb mode not to work on your iPhone.
FoneLab enables you to fix iPhone/iPad/iPod from DFU mode, recovery mode, Apple logo, headphone mode, etc. to normal state without data loss.
- Fix disabled iOS system problems.
- Extract data from disabled iOS devices without data loss.
- It is safe and easy to use.
Grasp the straightforward steps below as a pattern of fixing iPhone issues with FoneLab iOS System Recovery if the Do Not Disturb mode on iPhone is not working:
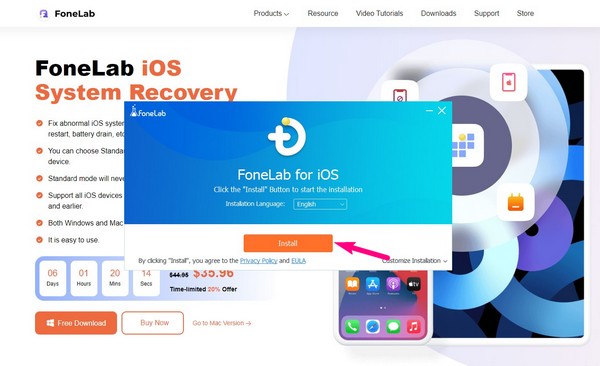
Step 1Explore the FoneLab iOS System Recovery website, and you will see the program’s features listed on the left portion of the page. Then, below them is the Free Download button, which you will click to acquire its installer file. Once downloaded, hit Install on the program window after clicking the file and managing the permissions to run the tool after.
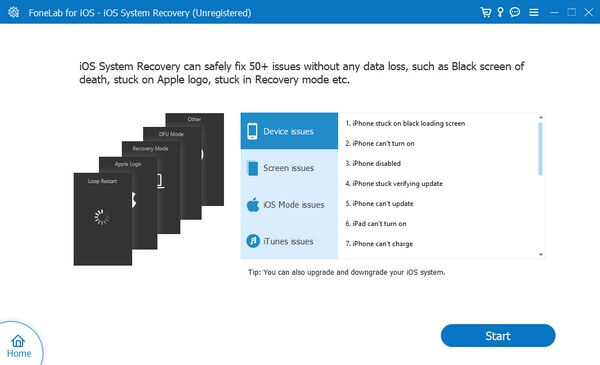
Step 2When the program’s initial interface is shown, hit the iOS System Recovery option on the top right to open the feature. The following screen contains the resolvable problems the tool can fix. It includes device issues like an iPhone that can’t turn on, is disabled, and others that may be causing the Do Not Disturb mode to malfunction. Click Start to move on.
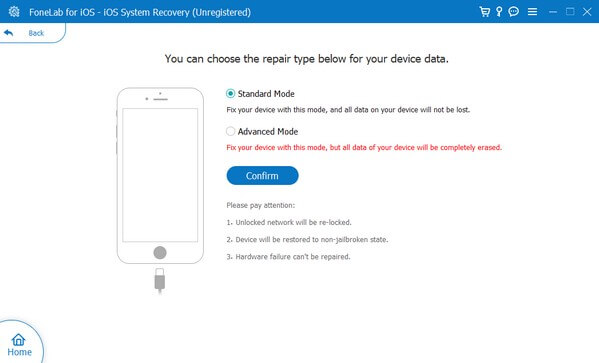
Step 3Afterward, you must link your iPhone to the program using a USB cable, then choose the repair mode you want. If you select Standard Mode, the repair will be a regular process without data loss. But if you choose Advanced Mode, the program will clean your device by erasing all the data on your iPhone. Once selected, hit the Confirm button.
Step 4Enter the Recovery mode by complying with the designated instructions for your iPhone model. They will be on the following screen, so ensure to perform them correctly to download the firmware package you will use to repair the problem with your iOS. When fixed, try using the Do Not Disturb mode properly again.
FoneLab enables you to fix iPhone/iPad/iPod from DFU mode, recovery mode, Apple logo, headphone mode, etc. to normal state without data loss.
- Fix disabled iOS system problems.
- Extract data from disabled iOS devices without data loss.
- It is safe and easy to use.
Part 5. FAQs about Do Not Disturb on iPhone
1. Will my alarm work on Do Not Disturb on iPhone?
Yes, it will. Even if your put your iPhone in Do Not Disturb or Silent mode, it will not affect the alarms you have set on your iPhone.
2. Why do I still receive calls on my iPhone in Do Not Disturb mode?
You may have allowed some specific contacts to call even in Do Not Disturb mode. Get to Settings > Focus > Do Not Disturb and set up the options to change this.
You now have the proper guidelines for utilizing your iPhone's Do Not Disturb mode. If something goes wrong and you encounter issues, don't hesitate to install the FoneLab iOS System Recovery tool to help you repair the problem.
FoneLab enables you to fix iPhone/iPad/iPod from DFU mode, recovery mode, Apple logo, headphone mode, etc. to normal state without data loss.
- Fix disabled iOS system problems.
- Extract data from disabled iOS devices without data loss.
- It is safe and easy to use.
