Easily erase all contents and settings on iPhone, iPad or iPod completely and permanently.
- Clear iPhone Junk Files
- Clear iPad Cache
- Clear iPhone Safari Cookies
- Clear iPhone Cache
- Clear iPad Memory
- Clear iPhone Safari History
- Delete iPhone Contacts
- Delete iCloud Backup
- Delete iPhone Emails
- Delete iPhone WeChat
- Delete iPhone WhatsApp
- Delete iPhone Messages
- Delete iPhone Photos
- Delete iPhone Playlist
- Delete iPhone Restrctions Passcode
How to Delete A Group on Facebook [Straightforward Ways]
 Posted by Lisa Ou / July 15, 2024 09:00
 Hi! My account was 9 years ago, and it is still working fine. How do I delete a group on Facebook? There are many of them, and I do not remember creating them. Maybe because I was still young when I started using the mentioned social media platform. Please help me with my concern. Thank you so much in advance!
How do you delete a group on Facebook? Do you want it to be performed on an app or browser? You can choose both of them because they are posted in this article! See them as you scroll down below.
![How to Delete A Group on Facebook [Straightforward Ways]](/images/iphone-cleaner/how-to-delete-a-facebook-group/how-to-delete-a-facebook-group.jpg)

Guide List
Part 1. How to Delete A Facebook Group on App
If you are aiming to delete a Facebook group on the app, this section is indeed the one that can help you quickly. Using Facebook on its app is the top way to access the account with its associated information, including groups. The good thing about it is that you do not need a strong internet connection to do that compared to when you access it on web browsers. This is mainly because the app saves caches whenever you use your phone. The only disadvantage is that its storage space consumption will be higher.
Learn how to delete a group on Facebook via the app. Follow the detailed steps below.
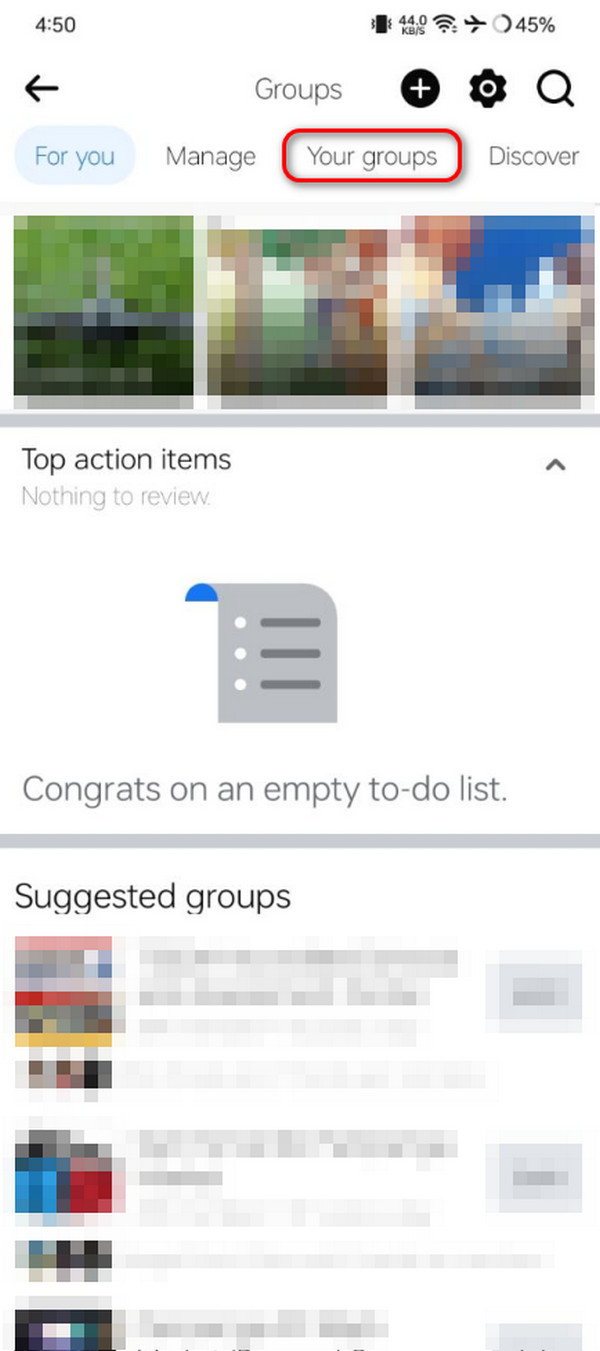
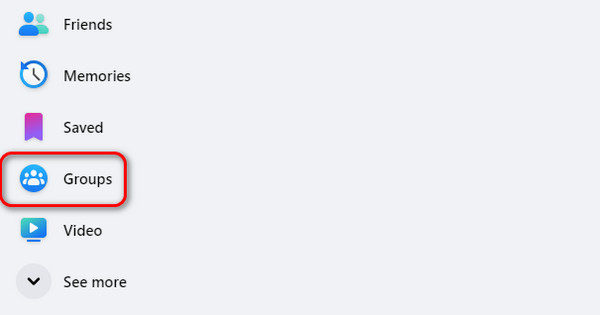
Step 1Access the Facebook application and log in to your account where the group is created. Then, tap the Profile icon at the top right of the app’s main interface. Go to the Groups section to see more options. At the top, you will know the classification tabs where you joined groups. Tap the Your Groups button among all of them.
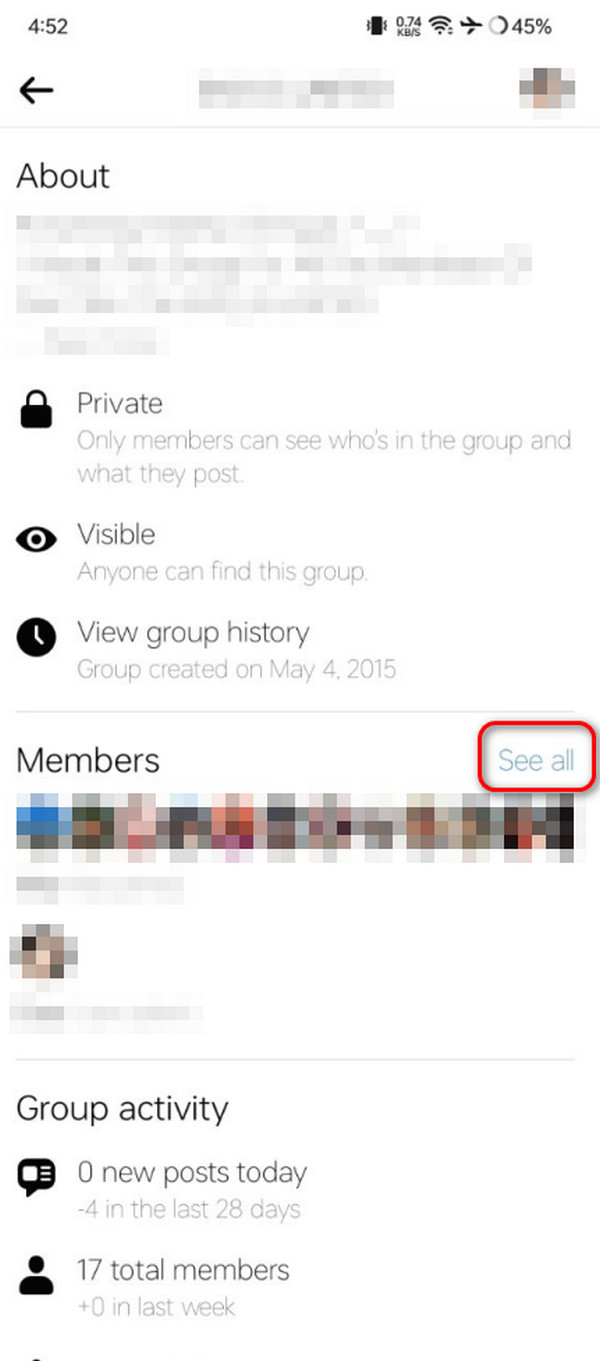
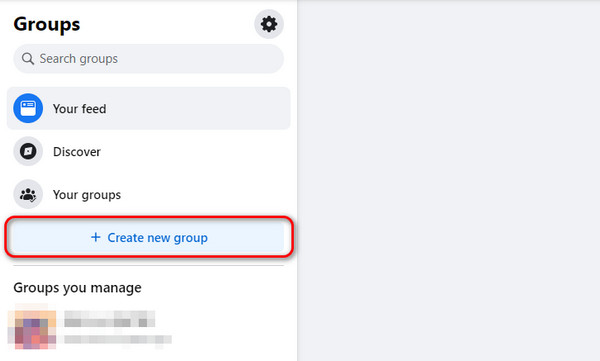
Step 2Navigate to the Groups You Manage section. Tap the group you prefer to delete. Then, choose the Number of Members section under the group name. Tap the See All button to manage the members of the mentioned group.
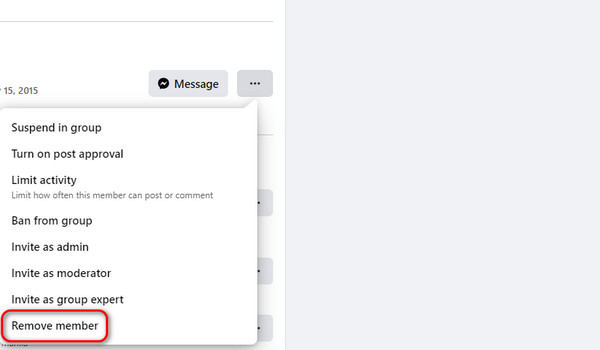
Step 3Choose one of the members and tap the Three Dots icon on the right. Drop-down options will appear on the screen. Afterward, tap the Remove Member button. Please apply the process to all the members of the group. Once done, tap the Delete Group button to delete the Facebook group.

Part 2. How to Delete A Facebook Group on Browser
How about learning how to delete groups on Facebook through a web browser? It is possible! The procedure is almost the same as the previous method, with only a few differences in the buttons and interface. In addition, ensure that the internet connection is fast because web pages require it.
Delete group on Facebook in web browsers by following the detailed steps below. Move on.
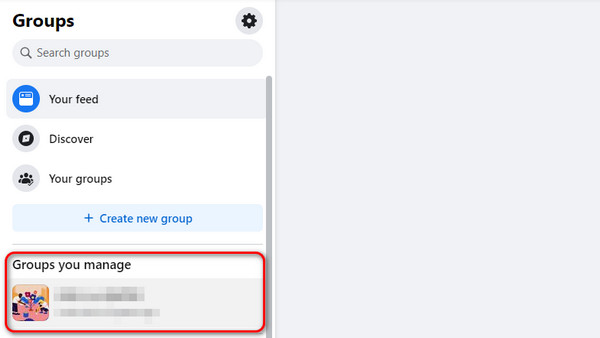
Step 1Open the web browser on your device and search for the facebook.com website. Then, enter the Facebook account email, phone number, and password. Select the Login button to sign in afterward. On the left, choose the Groups button. The screen will load and go to the Groups You Manage section. Select the group you want to delete.
Step 2Select the number of members at the top center. Then, all the members of the group will be shown. Next, choose the Remove Member button next to the members' names. You need to do this procedure for each one. The Delete Group button will be shown once you are the only group member. Select it to delete the Facebook group.
FoneLab iPhone Cleaner is the best iOS data cleaner which can easily erase all contents and settings or specific data on iPhone, iPad or iPod Touch.
- Clean unwanted data from iPhone, iPad or iPod touch.
- Erase data quickly with one-time overwriting, which can save you time for plenty of data files.
- It is safe and easy to use.
Part 3. How to Create A Facebook Group
After you delete a Facebook group, you might want to create a new one. The deletion and creation of groups on Facebook are almost the same process. Below, see their differences and learn how to make a group on Facebook.
Step 1Open the Facebook app or its official website on a web browser. Then, enter the Facebook account credentials on the first interface. Select the Login button to sign in with the mentioned account. Then, select the Groups section on the left side of the main interface. You will be directed to a new window.
Step 2At the top left, select the Create New Group button with the Plus icon. The website will load and last, depending on the strength of your internet connection.
Step 3Please enter the group information. You only need to enter the group name, privacy, and invite friends. Then, the preview of the group will be shown on the right. Then, tap the Create icon at the bottom right to complete the process and save the group.

Part 4. How to Delete A Facebook App
What if you also decided to delete the Facebook app on your iPhone? This section is a bonus tip on how to do that. You will see the 2 easiest ways below.
Option 1. Use Built-in Way
iPhone has a built-in way to delete the Facebook application. It can be executed on the Home Screen. Please see the detailed instructions below on how to perform it.
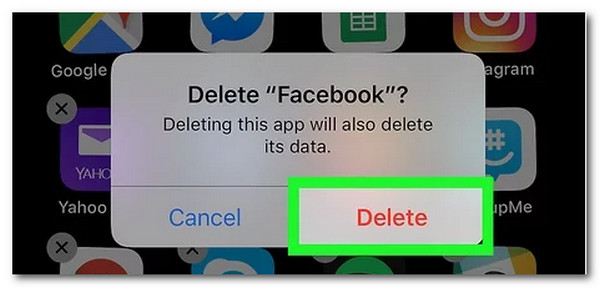
Open your iPhone, and you will see the Home Screen interface. Locate the Facebook app and long-press it. Then, drop-down options will be displayed. Choose the Delete button and confirm it in the dialog box.
Option 2. Use FoneLab iPhone Cleaner
The best alternative for the built-in way to delete the Facebook app is the FoneLab iPhone Cleaner. It can delete the mentioned application, including its associated data and information on your iPhone. If so, you will have more free storage space on the Apple device. See how to use the tool with the detailed steps below.
FoneLab iPhone Cleaner is the best iOS data cleaner which can easily erase all contents and settings or specific data on iPhone, iPad or iPod Touch.
- Clean unwanted data from iPhone, iPad or iPod touch.
- Erase data quickly with one-time overwriting, which can save you time for plenty of data files.
- It is safe and easy to use.
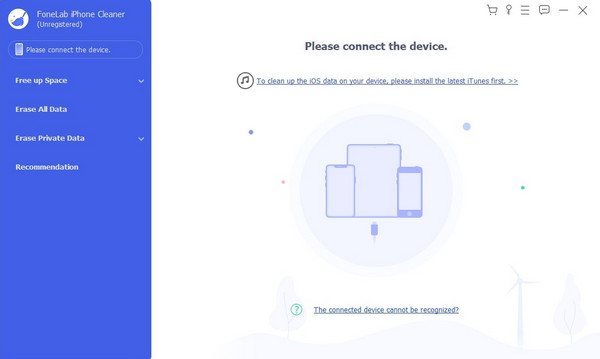
Step 1Tick the Free Download button to download the FoneLab iPhone Cleaner. Then, set it up and launch it.

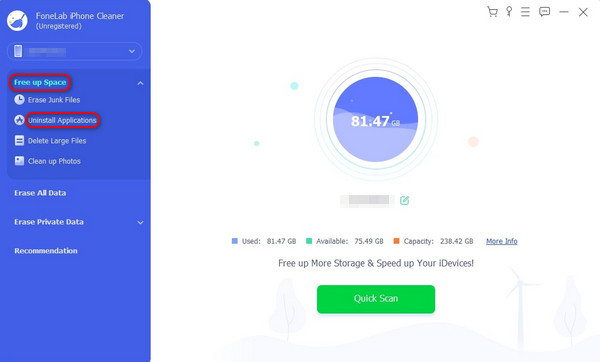
Step 2Get a USB cable. Use it to plug the iPhone into the computer. Then, choose the Free Up Space button.
Step 3Choose the Uninstall Applications button. The software will scan your iPhone's apps, including Facebook. Wait for the results and click the Erase button at the bottom right.
FoneLab iPhone Cleaner is the best iOS data cleaner which can easily erase all contents and settings or specific data on iPhone, iPad or iPod Touch.
- Clean unwanted data from iPhone, iPad or iPod touch.
- Erase data quickly with one-time overwriting, which can save you time for plenty of data files.
- It is safe and easy to use.
Part 5. FAQs about How to Delete A Facebook Group
1. Is there a way to recover a deleted Facebook group?
Unfortunately, no. There are no possible ways to recover a Facebook group once deleted. Thinking for a long time is recommended before you perform the technique mentioned. This is to preserve the Facebook group and its members. If you already deleted a group on Facebook, the only choice is to create a new one.
2. Will members be notified if I delete a Facebook group?
Yes. The Facebook group members will be notified once the group is deleted. The main reason is that they must be removed from the group before you can entirely delete it. If so, Facebook will send them notifications when they are kicked out.
How do you delete a Facebook group? Is it with the help of the application or browser? We hope you learned both techniques with this post! It contains detailed procedures about them. It also added 2 bonus tips for the topic. One of them is creating a new group. Lastly, the software also teaches you how to delete the Facebook app with the help of FoneLab iPhone Cleaner. Do you have more questions? Leave them in the comment section below. Thank you!
FoneLab iPhone Cleaner is the best iOS data cleaner which can easily erase all contents and settings or specific data on iPhone, iPad or iPod Touch.
- Clean unwanted data from iPhone, iPad or iPod touch.
- Erase data quickly with one-time overwriting, which can save you time for plenty of data files.
- It is safe and easy to use.