How to Record Video on iPhone Using Functional Ways
 Posted by Lisa Ou / Nov 21, 2023 16:00
Hello! My friend posted a video of mine on one of her social media accounts, and I want to save it to my iPhone. Unfortunately, there is no option to download it, so I'm having difficulty saving the video. Hence, I decided to use a recording method instead, but I didn't know the correct process. Please help me learn how to record screen videos on iPhone. Thanks!
Having skills in recording videos on an iPhone screen is helpful in many situations. It will help you do several tasks, whether for professional or personal use, like the above scenario. For instance, if a video has caught your attention online, but the platform doesn't allow downloading videos, you can easily record it instead. It is even more convenient, after all.
Apart from that, recording is also advantageous when doing a tutorial. If your work is related to teaching procedures, documenting the process will make your viewers learn more easily. Therefore, join us today by scrolling through this article to explore the helpful approaches for recording videos on an iPhone screen. Each method also comes with simplified guidelines.


Guide List
Part 1. How to Record A Video on iPhone through Built-in Screen Recorder
When recording a video on an iPhone screen, the primary technique most users rely on is the built-in recording feature. It can be found once you access the Control Center, so it’s very convenient to navigate. It also takes only a few taps to record and doesn’t require any installation. But as much as you like its simplicity and convenience, it is only a basic recorder with limited features, which may not be suitable for users who need more than recording.
Stick to the stress-free directions underneath to screen record video on iPhone through the built-in screen recorder:
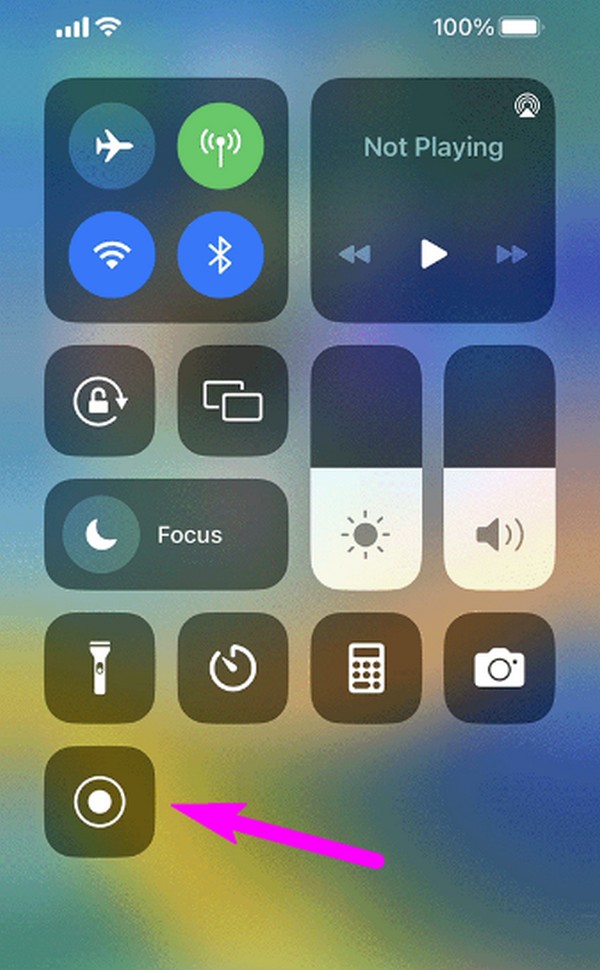
Step 1Access the Control Center by swiping your finger from the top or bottom of your iPhone screen. The tiles containing the features will then be displayed. To record, tap the tile with a circle or record icon.
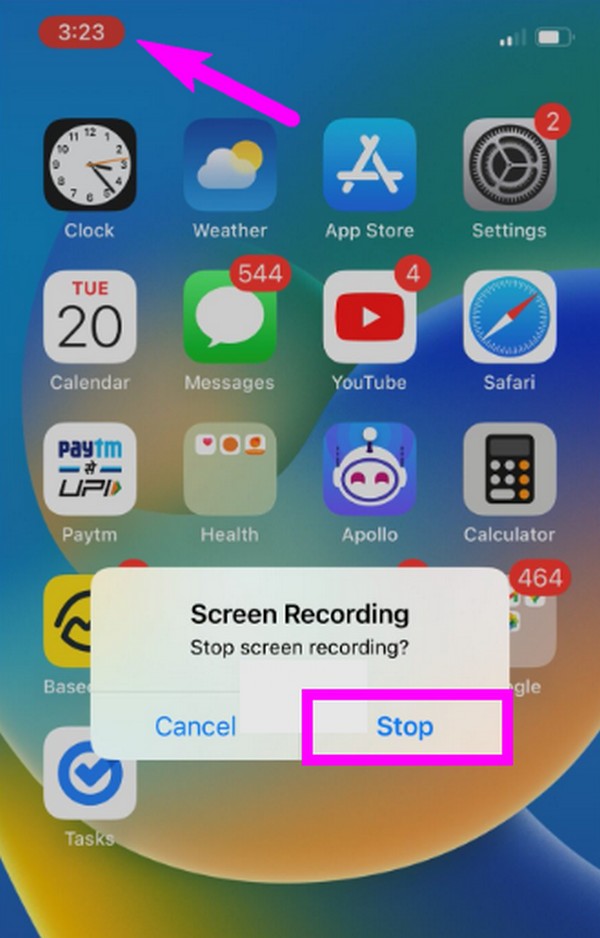
Step 2A 3-second countdown will transpire, so ensure the video you desire to record is presented on the screen to begin recording it. Later, when done, tap the uppermost left screen’s red status bar, then tap Stop on the confirmation dialog to finish the recording.
If you need a screen recorder that can do more than capture videos, kindly move to the following parts, as they are more advanced in features, unlike the built-in iPhone recorder.
Part 2. How to Record A Video on iPhone with FoneLab Screen Recorder
Next is the FoneLab Screen Recorder. As previously mentioned, this program is more than just a basic recorder. Aside from being able to record videos on your iPhone screen, it also offers different recording types, including a video recorder on a computer, an audio recorder, a window recorder, a game recorder, and more. Meanwhile, before recording videos on your iPhone screen, you are free to enable this tool’s noise cancellation function to make the video quality even better. Then, an editing section will automatically appear after you record.
FoneLab Screen Recorder allows you to capture video, audio, online tutorial, etc on Windows/Mac, and you can easily customize size, edit the video or audio, and more.
- Record video, audio, webcam and take screenshots on Windows/Mac.
- Preview data before saving.
- It is safe and easy to use.
Furthermore, FoneLab Screen Recorder provides extensive options of format you can choose from for your video outputs. Besides, it doesn’t only work for iPhone users. It is also available to record Android screen, so it will be more advantageous if you have an Android device.
Take the painless instructions beneath as a pattern of how to screen record video on iPhone with FoneLab Screen Recorder:
Step 1Get the FoneLab Screen Recorder program on your computer by downloading its installer from the official site. To do that, click on the Free Download button. Once saved, continue with the installation and wait for the essential components to download before launching the recording program on the screen.
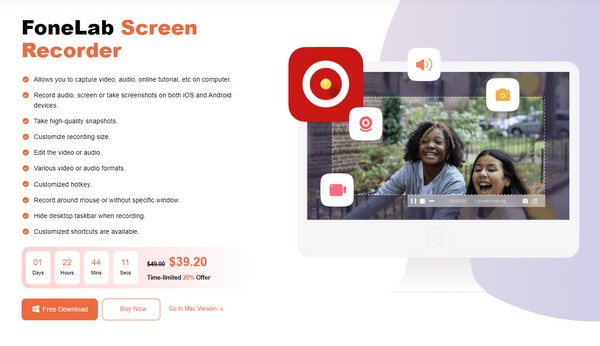
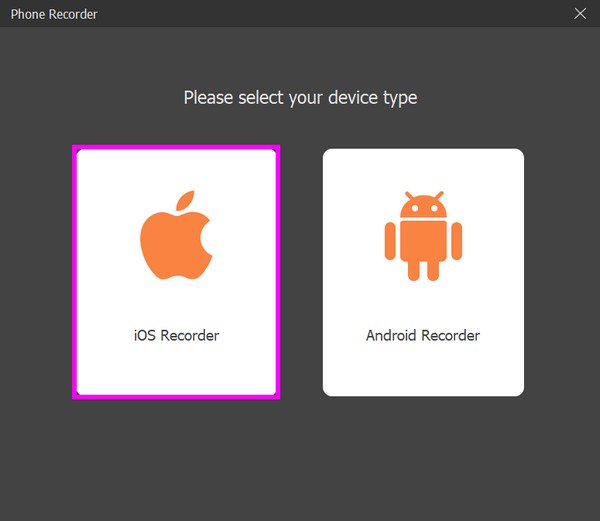
Step 2The tool will launch with the key recording functions on its main interface. On the leftmost side, click the small Phone box, then select the iOS Recorder tab as your device type on the following interface. Expect the instructions to connect your iPhone to materialize on the next screen.
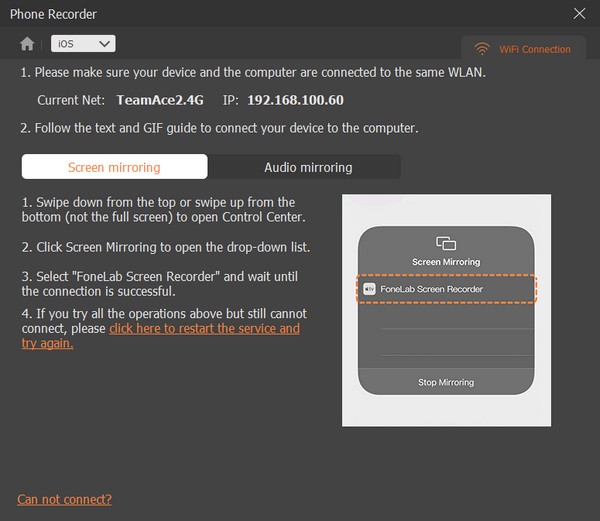
Step 3Ensure your iPhone and computer are first connected to the same WLAN. Afterward, proceed to your device’s Control Center and tap Screen Mirroring. From the pop-up list, select FoneLab Screen Recorder to exhibit your iPhone screen on the computer program.
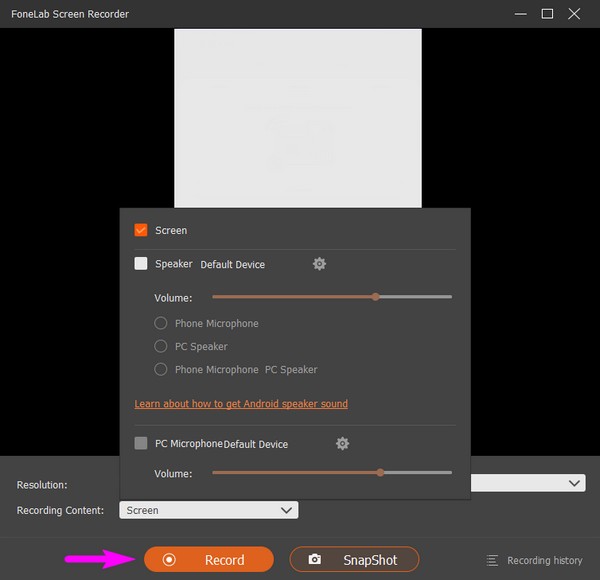
Step 4Once you see your iPhone screen on the program interface, feel at ease modifying the options in the lower section. You may change the resolution, adjust the settings on Recording Content, and more. Afterward, click the Record tab to record your iPhone screen.
FoneLab Screen Recorder allows you to capture video, audio, online tutorial, etc on Windows/Mac, and you can easily customize size, edit the video or audio, and more.
- Record video, audio, webcam and take screenshots on Windows/Mac.
- Preview data before saving.
- It is safe and easy to use.
Part 3. How to Record A Video on iPhone via A Third-party App
Try Screen Recorder - V Recorder if you prefer using a third-party app. It is a screen recorder from the App Store that is useful in multiple situations. It enables you to record your iPhone screen while watching videos or movies, playing games, making calls, etc. Additionally, it offers editing features, such as adding filters, music, text, and more.
Abide by the comfortable procedure below to record video on iPhone screen via the third-party app Screen Recorder - V Recorder:
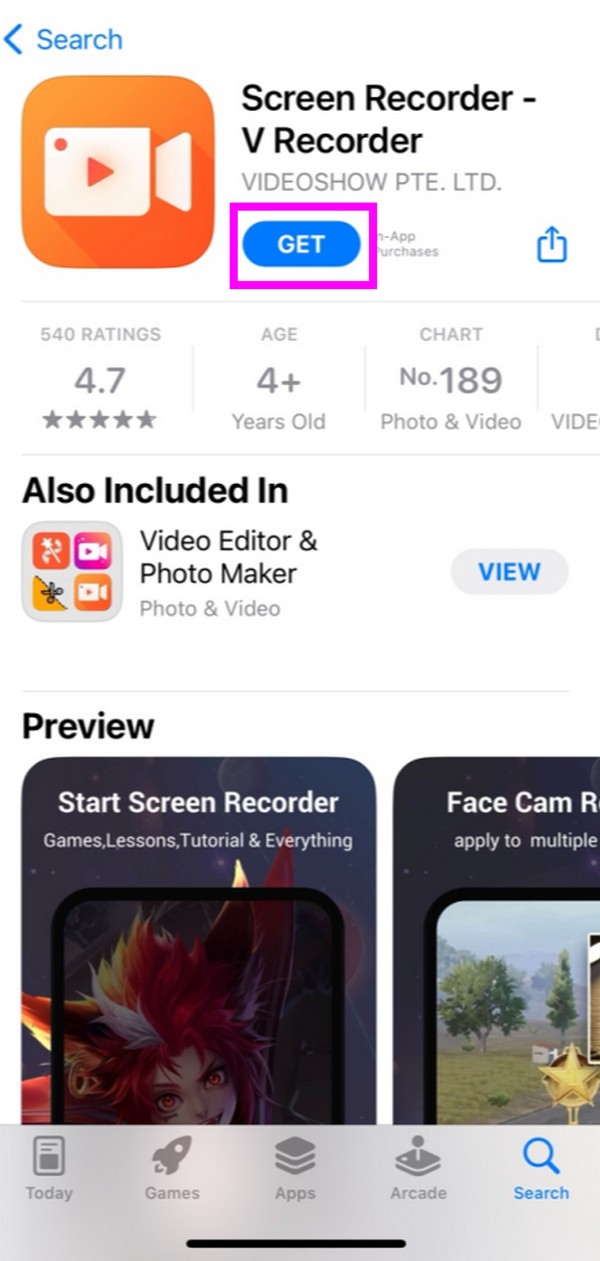
Step 1Enter the App Store to locate the Screen Recorder - V Recorder app and get it on your iPhone. Afterward, set up and authorize the app requirements to allow the recorder to run on the device.
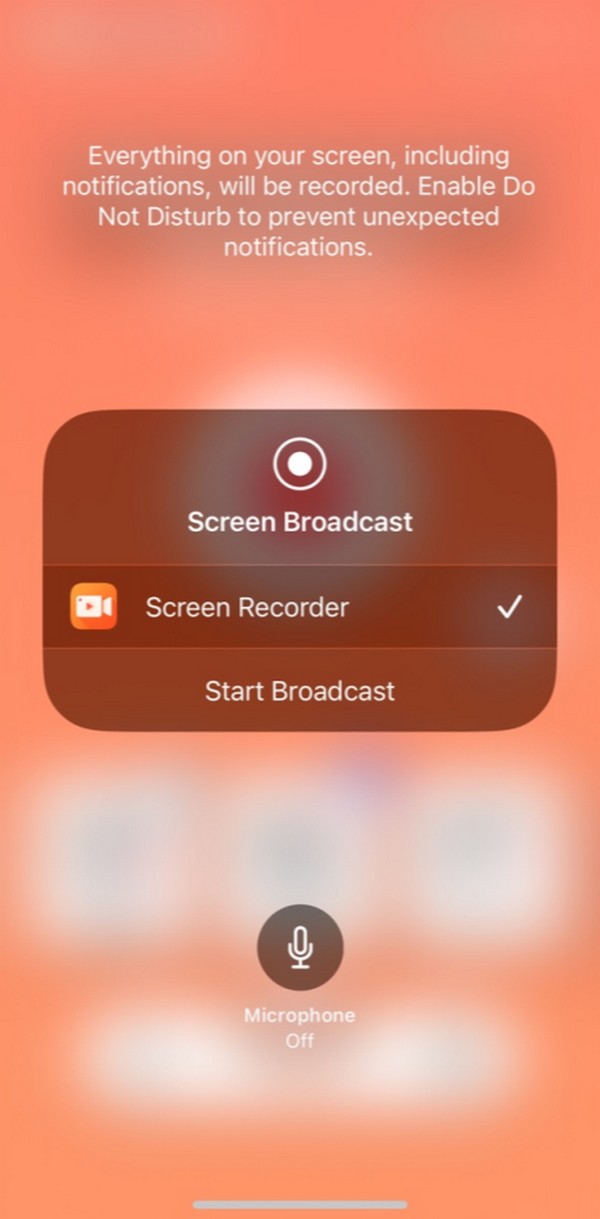
Step 2Once on the app’s initial interface, hit the red Record icon at the center. A dialogue containing the Screen Recorder tab will appear. Tap it, and you may choose whether or not to turn the microphone on. Then, select Start Broadcast to record your iPhone screen.
Screen Recorder - V Recorder is an incredible screen recording app, but be aware of its ability to track you through your Device ID. But if you’re okay with this, you’re good to go.
Part 4. FAQs about How to Record A Video on An iPhone Screen
1. How to record YouTube videos on iPhone?
You can record the video you like on YouTube using the techniques mentioned in this article. It doesn't matter which method you choose since they are all effective, but if you'd like a recommendation, try FoneLab Screen Recorder. Kindly refer to Part 2 to see why it's worth installing, and the guidelines to navigate it are already presented if you want to begin recording immediately.
2. Can you capture the screen on an iPhone while video recording?
It depends on the screen recording method you use. Unfortunately, most don't offer this feature, but lucky for you, FoneLab Screen Recorder, included in the techniques mentioned above, does have it. When you start recording, you will see the camera icon near the stop button of its lower interface. Click it anytime you wish to capture the screen while recording.
Hopefully, you were able to pick up some beneficial information for recording a video on your iPhone. For more informative articles like this, kindly access the FoneLab Screen Recorder webpage.
FoneLab Screen Recorder allows you to capture video, audio, online tutorial, etc on Windows/Mac, and you can easily customize size, edit the video or audio, and more.
- Record video, audio, webcam and take screenshots on Windows/Mac.
- Preview data before saving.
- It is safe and easy to use.
