Correct Guidelines to Put iPad in Recovery Mode Easily
 Posted by Lisa Ou / Feb 20, 2024 09:00
 Greetings! I'm having issues with my iPad's performance, so a friend advised me to put it in Recovery mode. However, I'm unfamiliar with the mode and fear it will only do more bad than good. Can someone please elaborate on what it is all about? And if it truly helps, how do I put my iPad in Recovery mode? I hope you can enlighten me. Thank you in advance!
Recovery mode is a well-known mode on many devices, like an iPad. It is mainly used when experiencing problems or needing an update. Thus, if you have previously faced issues on your device, you must have already heard about it. But if this is your first time learning about Recovery mode, no problem. This article will present the essential information you should know about the mode. This way, you can optimize its usage in needed situations. Afterward, the later parts will uncover the proper processes for putting an iPad into Recovery mode.


Guide List
FoneLab enables you to fix iPhone/iPad/iPod from DFU mode, recovery mode, Apple logo, headphone mode, etc. to normal state without data loss.
- Fix disabled iOS system problems.
- Extract data from disabled iOS devices without data loss.
- It is safe and easy to use.
Part 1. Why Put The iPad in Recovery Mode?
There are two main reasons users put an iPad into recovery mode. First is a system update. If your iPad runs outdated software, entering this mode can help you upgrade it to the latest version. With the iTunes or Finder program, your device will be booted with a fresh operating system. Doing this improves the iPad’s performance and lets users enjoy new features.
On the other hand, Recovery mode is also developed for mending various issues you may encounter on a device. For instance, your iPad is stuck on a specific screen, lags too much, crashes, can’t update, etc. In short, it is a failsafe feature you can rely on when the device’s performance, features, apps, and other aspects malfunction.
Therefore, Recovery mode is among the most essential features of an iPad. But the question is, how will you be able to enter it, especially as a beginner? Kindly proceed to find out.
FoneLab enables you to fix iPhone/iPad/iPod from DFU mode, recovery mode, Apple logo, headphone mode, etc. to normal state without data loss.
- Fix disabled iOS system problems.
- Extract data from disabled iOS devices without data loss.
- It is safe and easy to use.
Part 2. How to Put iPad in Recovery Mode
Although it is a crucial feature, the Recovery mode may be unfamiliar to many users who have never experienced an issue on their device. Meanwhile, if it’s your first time entering it, it would be best to perform the correct steps even on your first try. This way, you won’t face any more complications it might cause if you push the device buttons incorrectly. That said, see the proper process for putting your iPad into recovery mode, depending on its version.
Put iPad in Recovery Mode without A Home Button
The iPad without a Home button model has two designs so far. The one with the Volume buttons is on the side of the iPad, and the one with the Volume buttons is at the top. Meanwhile, you will find the Power key on either at your iPad’s top right.
Conform to the correct process below to determine how to put an iPad in Recovery mode without a Home button:
Step 1Launch iTunes or Finder on your computer with your iPad connected through a lightning cable. Afterward, press the device’s Volume button nearest the Power key and the Volume button farther to the Power key subsequently.
Step 2Right after, long-press the device’s Power key for seconds to enter Recovery mode. Afterward, you will see the options on the Finder or iTunes interface. Thus, manage them according to what you need.

Put iPad in Recovery Mode with A Home Button
Unlike the previous process, putting your iPad with a Home button in Recovery mode doesn’t require the Volume buttons. You only need the Power key at the top right of the device and the Home key at the bottom center.
Comply with the proper guidelines underneath to put iPad in Recovery mode with a Home button:
Step 1Run Finder or iTunes, then link your computer to the iPad via a lightning cable. Next, long-press the iPad’s Top and Home keys simultaneously.
Step 2You can release it when the screen is in Recovery mode. Meanwhile, the options will be presented on the iTunes or Finder interface, like the previous method.

For users with a later macOS version, Finder is the available and appropriate program to enter Recovery mode. Meanwhile, iTunes is for users with a Windows or older macOS version. But don’t worry; the step-by-step instructions above are applicable regardless of the program you use, as they only have the same procedure for entering Recovery mode.
Part 4. Bonus Tip - Repair Tool You Must Not Miss for iPad
No matter how effective the Recovery mode is, it still has limitations and may not be capable of fixing other issues on the iPad, requiring an advanced solution. Hence, here’s a bonus repair tool on computers, FoneLab iOS System Recovery. Like Recovery mode, it is also specialized for repairing device damages, specifically iOS system damages. But its advantage is that you no longer risk losing your iPad data, as it lays out Advanced and Standard modes.
FoneLab enables you to fix iPhone/iPad/iPod from DFU mode, recovery mode, Apple logo, headphone mode, etc. to normal state without data loss.
- Fix disabled iOS system problems.
- Extract data from disabled iOS devices without data loss.
- It is safe and easy to use.
These are repair modes that give you the privilege of choosing to delete or keep your data. Additionally, it is supported on both macOS and Windows computers, eliminating the possible difficulties you may face regarding compatibility. Meanwhile, FoneLab iOS System Recovery doesn’t only cater to iPad problems but also iPhone and iPod Touch issues.
Perceive the user-oriented procedure below as a pattern for repairing iOS and iPadOS issues with FoneLab iOS System Recovery:
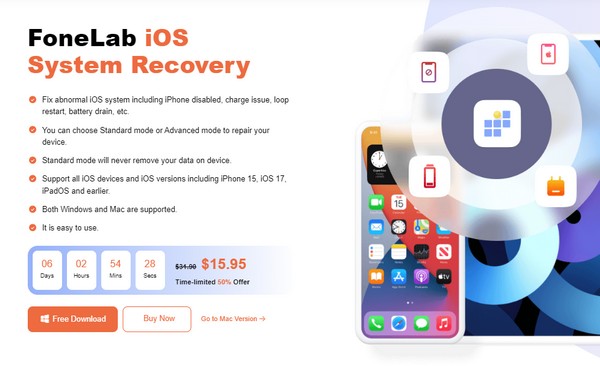
Step 1Save FoneLab iOS System Recovery’s installer through the program’s Free Download button on the official webpage. When the file is downloaded, click it, and the installation will automatically transpire. It will be completed in less than a minute, so launch it afterward to use the system recovery tool.

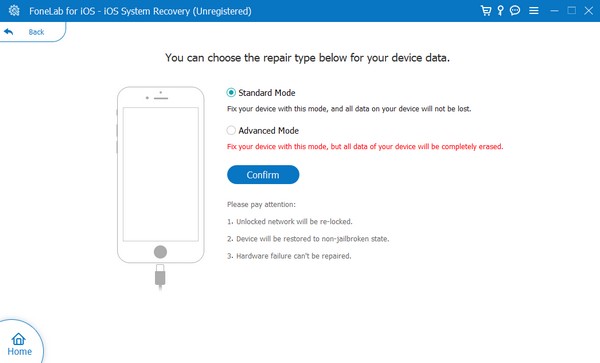
Step 2Next, enter the iOS System Recovery feature to view the Start button and click it. Later, the Advanced and Standard modes will be exhibited. Understand their respective functions, and pick the repair type you need to want. Then, click Confirm underneath them to proceed. Additionally, your iPad must be linked to the computer program with a USB cord.

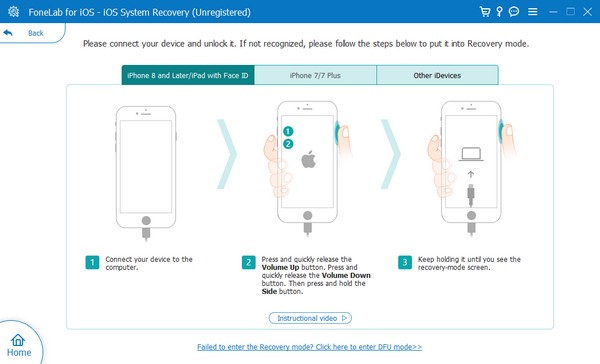
Step 3Detailed instructions for putting a device into Recovery mode will be shown. However, you must choose the designated directions for your iPad model through the options in the upper section. This way, the firmware package to fix your iPadOS will be downloaded and handle your device.

FoneLab enables you to fix iPhone/iPad/iPod from DFU mode, recovery mode, Apple logo, headphone mode, etc. to normal state without data loss.
- Fix disabled iOS system problems.
- Extract data from disabled iOS devices without data loss.
- It is safe and easy to use.
Part 5. FAQs about How to Put iPad in Recovery Mode
How to put an iPad in Recovery mode when disabled?
Use the same proper procedure in part 1 to put an iPad in Recovery mode. But if it doesn't work, you might need a repair tool, like FoneLab iOS System Recovery, to fix the problem. If so, kindly check Part 4 for more information and learn its guidelines.
Will everything get erased if I restore my iPad through Recovery mode?
Yes. Restoring your iPad while in Recovery mode won't erase only a portion or a few of your data. It will wipe the device, including all its content and settings.
Putting your iPad in Recovery mode may be an unfamiliar process. Still, once you figure out the proper method with the help of the guidelines above, you will no longer encounter difficulties the next time.
FoneLab enables you to fix iPhone/iPad/iPod from DFU mode, recovery mode, Apple logo, headphone mode, etc. to normal state without data loss.
- Fix disabled iOS system problems.
- Extract data from disabled iOS devices without data loss.
- It is safe and easy to use.
