Screen Audio Recorders: 5 Most Reliable Techniques
 Posted by Valyn Hua / Sept 27, 2024 16:00
Screen recording on devices is commonly used for capturing screen activities, including demonstrations, tutorials, gaming, and more. Aside from that, audio recording can also be executed to capture the microphone and system sound. These recording modes are often performed separately.
The thing is that can they be performed in one process? Definitely, yes! There are countless audio screen recorders for your devices. Another good news is that this post gathered the 5 most straightforward techniques for the recording procedure. It could be done on your Windows, Mac, iPhone, and Android phone. Please proceed below by scrolling down to see them and achieve your recording goal.


Guide List
Part 1. Best Screen Recorder with Audio - FoneLab Screen Recorder
Most individuals use Windows, Mac, iPhone, and Android phones to capture their audio and screen. Here is an interesting fact. The FoneLab Screen Recorder can record the screen and audio of the devices mentioned. In addition, this software is also built to take screenshots on your devices using its Snapshot tool.
FoneLab Screen Recorder allows you to capture video, audio, online tutorial, etc on Windows/Mac, and you can easily customize size, edit the video or audio, and more.
- Record video, audio, webcam and take screenshots on Windows/Mac.
- Preview data before saving.
- It is safe and easy to use.
Another good thing about this tool is that you can customize the recording size of the session. Also, it supports various audio and video file formats. It includes MP4, 3GP, MOV, MP3, WMV, AAC, AIFF, and more. Also, it enables you to customize the shortcuts for the operations for your convenience. See how to use FoneLab Screen Recorder that records internal audio, including the external audio.
Step 1Click the Free Download section on the main website of FoneLab Screen Recorder. Then, set up and launch the tool on your computer. After that, the main interface will be shown.

If you want to take a screen and audio recording on your computers, click the Full or Custom button on the left. Then, select the screen you want to record. Turn on the System Sound or Microphone section to include their audio. Then, click the REC button on the right to start the recording.

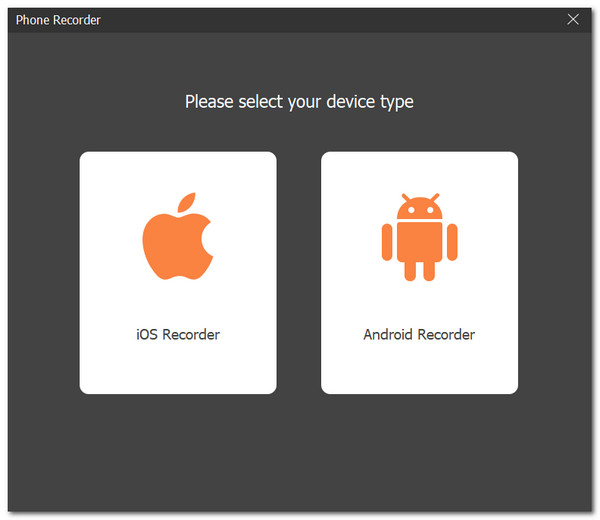
In contrast, choose the Arrow-down button at the top left and the Phone Recorder button. The screen will show you 2 options. Choose between the iOS Recorder or Android Recorder button. Follow the connecting procedure afterward. Later, go to the Speaker section at the bottom left and enable the speaker. Later, click the Record button to start recording.
Part 2. Screen Recorder with Audio on Android
Before, Android phones had limited features regarding screen and audio recordings. Fortunately, the latest smartphone versions have built-in audio and screen recordings. Please follow the steps below.
Step 1Swipe down the Notification Center and tap the Screen Recording button. Tap the Microphone button to include the audio. After that, the feature will be activated, and the session will start automatically. Later, the recording time will appear at the top left. You only need to tap it to see more options.
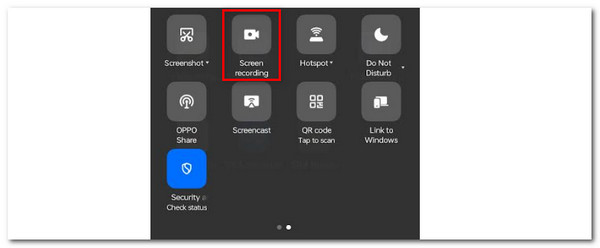
Step 2If you want to pause the recording session, tap the Pause button. Tap the Done button at the top to stop the recording session. Later, the Android phone will save the screen and audio recorded file on your Android phone.
FoneLab Screen Recorder allows you to capture video, audio, online tutorial, etc on Windows/Mac, and you can easily customize size, edit the video or audio, and more.
- Record video, audio, webcam and take screenshots on Windows/Mac.
- Preview data before saving.
- It is safe and easy to use.
Part 3. Screen Recorder with Audio on iPhone
iPhones have built-in screens and audio recorders, too! However, it is not activated automatically. If so, you need to set it up first manually. In addition, this built-in screen recorder of the iPhone captures high quality. If that's the case, it consumes much of your storage space. See below for instructions on how to use the built-in screen recorder.
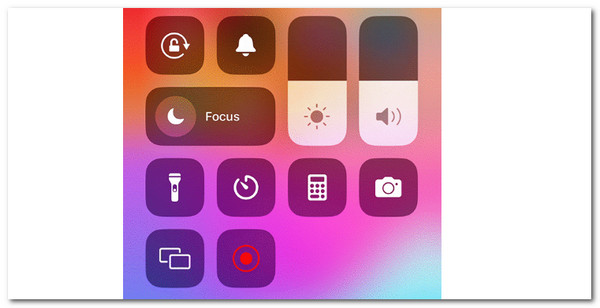
Step 1Open your iPhone and go to Settings. Then, tap the Control Center button on the next screen. Later, swipe at the end of the screen and tap the Screen Recording button to add it to the active tiles.
Step 2Finally, tap the Record button on the Control Center by swiping down the top of the iPhone screen. Please tap the Microphone button on the main interface to add the iPhone audio to the screen recording.
FoneLab Screen Recorder allows you to capture video, audio, online tutorial, etc on Windows/Mac, and you can easily customize size, edit the video or audio, and more.
- Record video, audio, webcam and take screenshots on Windows/Mac.
- Preview data before saving.
- It is safe and easy to use.
Part 4. Screen Recorder with Audio on Windows
How about a Windows screen recorder with audio? Game Bar will be the best screen and audio recording tool. The tool can be easily accessed because it supports hotkeys in the procedure. Please follow the instructions on how to use it.
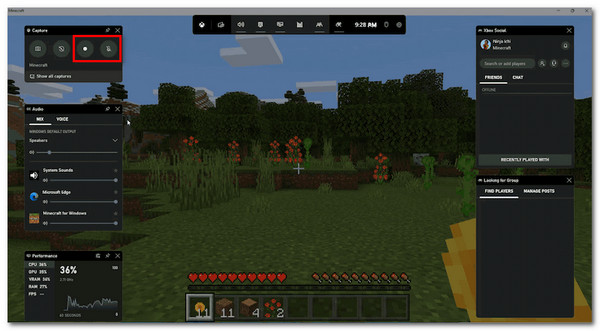
Step 1Please press the Windows + G keys on your PC keyboard. Then, all the features of the Game Bar will appear on the screen. Please click the Record button at the top left of the screen to start the audio recording.
Step 2Please also click the Microphone button on the right to add the audio. The audio and screen recording will begin. Then, wait for the recording session to end and keep the recorded file on your computer.
FoneLab Screen Recorder allows you to capture video, audio, online tutorial, etc on Windows/Mac, and you can easily customize size, edit the video or audio, and more.
- Record video, audio, webcam and take screenshots on Windows/Mac.
- Preview data before saving.
- It is safe and easy to use.
Part 5. Screen Recorder with Audio on Mac
If there is a screen and audio recorder on Windows, Mac has, too! QuickTime Player is a built-in program that is built to play media files. The good thing is that you can also use it for screen and audio recording. Please see how below.
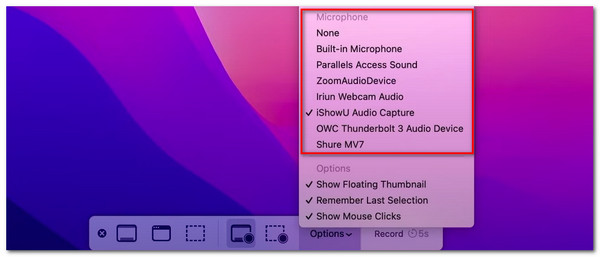
Step 1Launch QuickTime Player and choose the File button at the top left corner. Choose the New Screen Recording option on the drop-down list.
Step 2Click the Options button at the bottom. Later, select the Microphone option on the tool. Choose the one you prefer to use. Then, select the portion you like for the audio and screen recording. Then, keep recording and stop the recording procedure when you are done. Save the recorded file afterward to complete the process.
FoneLab Screen Recorder allows you to capture video, audio, online tutorial, etc on Windows/Mac, and you can easily customize size, edit the video or audio, and more.
- Record video, audio, webcam and take screenshots on Windows/Mac.
- Preview data before saving.
- It is safe and easy to use.
Part 6. FAQs about Screen Recorder with Audio
Can you screen-record call audio?
The call sessions are mostly performed on smartphones. Their recording call sessions differ from the audio recordings posted in this post. You need a built-in call recorder for your smartphone. Luckily, iPhone and Android have the feature for call recording. However, they are only available on the latest versions they provide.
Can I screen-record for 4 hours?
Most audio and screen recording tools are not limited to the recording sessions. The limit will depend on the available storage space on your devices. The more available storage space there is, the longer the screen recording can be. If you plan to perform 4 hours of screen recording, cleaning up your device's storage space is suggested. If you use an iPhone, we recommend you use FoneLab iPhone Cleaner.
In conclusion, this post has the 5 top picks for screen recorders with internal audio, including external microphones. It includes ways to audio and screen record your Windows, Mac, iPhone, and Android phone screens. The interesting thing is that the FoneLab Screen Recorder can do that all! Do you have more questions? Leave your insights and questions at the end of this article. Thank you!
FoneLab Screen Recorder allows you to capture video, audio, online tutorial, etc on Windows/Mac, and you can easily customize size, edit the video or audio, and more.
- Record video, audio, webcam and take screenshots on Windows/Mac.
- Preview data before saving.
- It is safe and easy to use.
