Transfer Files from Mac to iPad: 4 Excellent Techniques
 Updated by Lisa Ou / May 05, 2022 12:30
 Apple's iPad is famous and used by many users nowadays as they can play games, edit videos, draw, and watch movies on a bigger screen with an iPad. Although Mac has a bigger screen, the iPad is more considerable to use because of its portability and convenience. So, some people would like to transfer their files from Mac to iPad for comfortable viewing and editing.

Good thing that you have landed in the right place. There are a lot of methods that you can see on the internet. But, in this post, we have shared the 4 top-notch and proven ways that you can use to transfer your files from your Mac to your iPad. Keep reading and select the best approach that you can use.

Guide List
Part 1. How to Transfer Files from Mac to iPad with iCloud Drive
iCloud Driveis a part of Apple's iCloud storage. It allows the users to keep their documents and files up to date across all their Apple devices. This approach is the best choice for those who want to transfer their documents wirelessly since iCloud won't require a USB connection to save them. And here's how you can transfer your files from Mac to iPad using it.
Steps on How to Transfer Files from Mac to iPad with iCloud Drive:
Step 1First, on your Mac browser app, search and visit iCloud.com. Then, sign in to your Apple ID.
Step 2Next, click the iCloud Drive icon from the options. Then, click the Upload icon from the menu tab.
Step 3Now, choose all the files you wish to transfer on your iPad.
Step 4Finally, log in to the same Apple ID account you used on your Mac. And check from your Files app the ones you have uploaded, see if it is synced successfully. That's it!
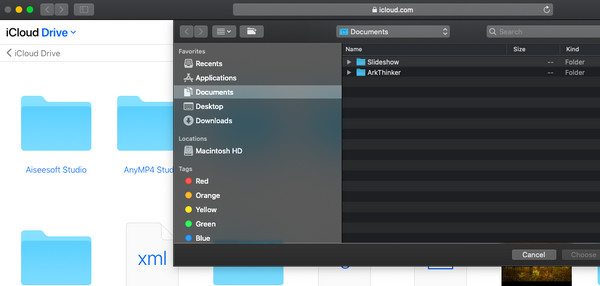
This is how you can use iCloud Drive to transfer your files from Mac to Android, one of the easiest ways how to do it. However, note that iCloud only offers a 5GB free storage. If you have many files to store or transfer with it, you have to upgrade to their plan to accommodate all your files in it.
With FoneTrans for iOS, you will enjoy freedom to transfer your data from iPhone to computer. You can not only transfer iPhone text messages to computer, but also photos, videos and contacts can be moved to PC easily.
- Transfer photos, videos, contacts, WhatsApp, and more data with ease.
- Preview data before transferring.
- iPhone, iPad and iPod touch are available.
Part 2. Transferring Files from Mac to iPad using iTunes/Finder
Another Apple form of transferring files from Mac to iPad is through iTunes/Finder. It is actually one of Apple's famous and official tools to transfer files between iOS and Mac devices. Note that if you still use an older version of macOS, you can still access iTunes. But, for the new macOS version users, iTunes has been replaced with Finder. Yet, they have the same process for transferring files. Follow the guide below.
Steps on How to Transfer File from Mac to iPad using iTunes/Finder:
Step 1Firstly, open iTunes/Finder on your Mac. Then, tap the device icon from the tab on iTunes. On Finder, click your iPad's name.
Step 2Then, choose the file type you like to transfer or be synced on iTunes. And on Mac, click Files.
Step 3Last but not least, click the Sync button. And there you have it!

This is how you can transfer files from Mac to iPad via Finder or iTunes. You can also transfer photos, contacts, calendar, and more with them. One more Apple service that can help you transfer your files from Mac to iPad is Airdrop. Move on to the next part to learn how.
Part 3. Send Files from Mac to iPad via Airdrop
If you are an iOS and Mac devices users, you are probably familiar with Airdrop. It is an Apple service and built-in feature that allows the users to send and receive media files quickly and efficiently wirelessly. Remember that Wi-Fi and Bluetooth must be open while sharing your files. Learn how to send your files using this method.
Steps on How to Transfer from Mac to iPad via Airdrop:
Step 1First of all, open your iPad's Airdrop by going to Control Center. Then, tap and hold the Wi-Fi, and you'll see the Airdrop option. Tap it to open it. And enable both Wi-Fi and Bluetooth.
Step 2After which, open the Airdrop of your Mac, click Go from the menu tab and choose Airdrop from the list. Turn on Wi-Fi and Bluetooth as well. Ensure that you can see your iPad from the devices nearby.
Step 3Then, select the file/s you wish to transfer from Mac to your iPad. And drag the file to the iPad's name or icon.
Step 4Finally, on your iPad, click the Accept option to receive the files like photos, videos, documents, and more. There you go!

However, transferring a bunch of files through Airdrop is time-consuming. That is why in the following part of this post, we have introduced the best tool that you can use for your transferring necessities.
Part 4. Transfer Files from Mac to iPad with Mac FoneTrans for iOS
Mac FoneTrans for iOS is a professional and versatile tool where you can transfer almost all kinds of file types. With it, you can manage your photos, videos, contacts, music, etc. It also enables users to share their files between iOS devices, from PC or Mac to iPhone/iPad and vice versa. It is an easy-to-use and easy-to-comprehend program that even beginners can utilize very well. Now, use the guide to learn how to transfer files from Mac to iPad using this alternative tool.
With FoneTrans for iOS, you will enjoy freedom to transfer your data from iPhone to computer. You can not only transfer iPhone text messages to computer, but also photos, videos and contacts can be moved to PC easily.
- Transfer photos, videos, contacts, WhatsApp, and more data with ease.
- Preview data before transferring.
- iPhone, iPad and iPod touch are available.
Steps on How to Transfer Files from Mac to iPad with Mac FoneTrans for iOS:
Step 1First off, download the tool on your Mac. And run it after.
Step 2Afterward, launch the tool and connect your iPad device to the Mac.
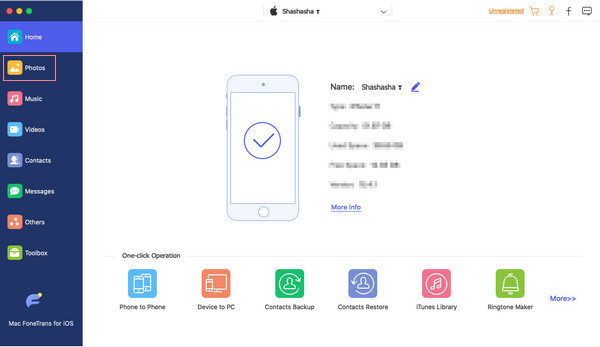
Step 3Then, select a category from the left pane of the main interface that you want to transfer a file into.
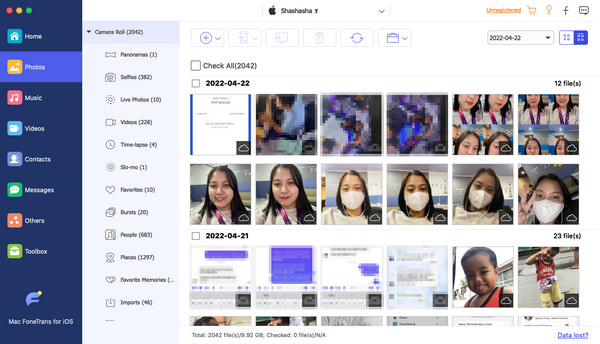
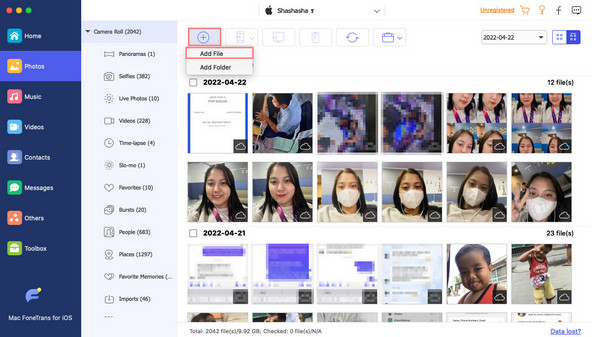
Step 4Subsequently, click the Add icon on the menu tab. And choose Add File from the drop-down list.
Step 5Finally, choose the file/s you wish to transfer. The transporting process will start immediately after selecting your desired files. Just wait for a few seconds to finish it. And that's it!
This is how you can use Mac FoneTrans for iOS in transferring files from Mac to iPad and even from different iOS devices. In fact, this tool can do more than that. Just download it for free and enjoy its full features.
Part 5. FAQs About Transfer Files from Mac to iPad
Is it possible to view the Airdrop sent history?
Unfortunately, you cannot view or perform them right now. iOS devices have no storage for the transferring of files' records.
Can I transfer files from Mac to iPad without iTunes?
Definitely, yes! You can use the other methods from those mentioned earlier. Such as through iCloud, Airdrop, and Mac FoneTrans for iOS – the most excellent tool for your transferring needs.
To conclude, transferring files from Mac to iPad must not be that complicated. Mac FoneTrans for iOS is indeed the one that stands out the most among these techniques. We hope we've helped you with these easy and reliable methods discussed. It's also a pleasure to know what are your comments and suggestions. You can just write them below.
With FoneTrans for iOS, you will enjoy freedom to transfer your data from iPhone to computer. You can not only transfer iPhone text messages to computer, but also photos, videos and contacts can be moved to PC easily.
- Transfer photos, videos, contacts, WhatsApp, and more data with ease.
- Preview data before transferring.
- iPhone, iPad and iPod touch are available.
