- Convert AVCHD to MP4
- Convert MP4 to WAV
- Convert MP4 to WebM
- Convert MPG to MP4
- Convert SWF to MP4
- Convert MP4 to OGG
- Convert VOB to MP4
- Convert M3U8 to MP4
- Convert MP4 to MPEG
- Embed Subtitles into MP4
- MP4 Splitters
- Remove Audio from MP4
- Convert 3GP Videos to MP4
- Edit MP4 Files
- Convert AVI to MP4
- Convert MOD to MP4
- Convert MP4 to MKV
- Convert WMA to MP4
- Convert MP4 to WMV
How to Add Subtitles Using iMovie and Other Flexible Tools (2023)
 Updated by Lisa Ou / Oct 19, 2021 16:30
Watching a movie on your Mac computer is a fantastic deal, but you might don't understand what they are saying because you don't speak the same language as them, their voices are unclear, or there are some sound issues. For that reason, you will be unable to enjoy the movie you are watching. Also, that's the reason why you can always see the subtitles under the screen when you are watching TV shows or movies. In the same way, you can add subtitles to your recorded videos, social media videos, training content and others to help people understand these videos well. However, adding subtitles is a good approach to fix these issues, but on the other hand, it may be a challenging task. But, no matter how novice you are, this post will give you a number of tools and software as well as instructions on how to add subtitles in iMovie on your Apple device.

Guide List
Part 1. Why is it Necessary to Add Subtitles
As it turns out, adding subtitles to a video or movie clip provides various benefits. It can assist you in a variety of methods that will improve the quality of your viewing experience. With that in mind, we've put together a list of the most significant reasons why you should add subtitles before you go ahead and do it.
1. Because there are issues like sound problems, adding subtitles to a video or movie clip allows you to better understand what's going on and get the most out of your viewing experience.
2. The addition of subtitles provides the benefit of increasing the content's reach and accessibility to everybody. Anyone may view and engage with them, including the deaf and hard of hearing.
3. Lastly, adding subtitles will help you to aid comprehension or provide clarity because viewers won't be able to understand the complete circumstance until there is a subtitle, just as you won't be able to understand the full situation unless there is a subtitle when watching K-dramas for example.
Part 2. How to Add Subtitles
How to Add Subtitles in iMovie
iMovie is one of the popular software that was developed by Apple. It has tools for changing and enhancing video color settings, cropping and rotating video clips, stabilizing shaky movies, adding video transitions, and changing the tempo of clips, among other things. In our situation, it can be used to quickly add subtitles.
Steps to add subtitles in iMovie on iPhone or iPad:
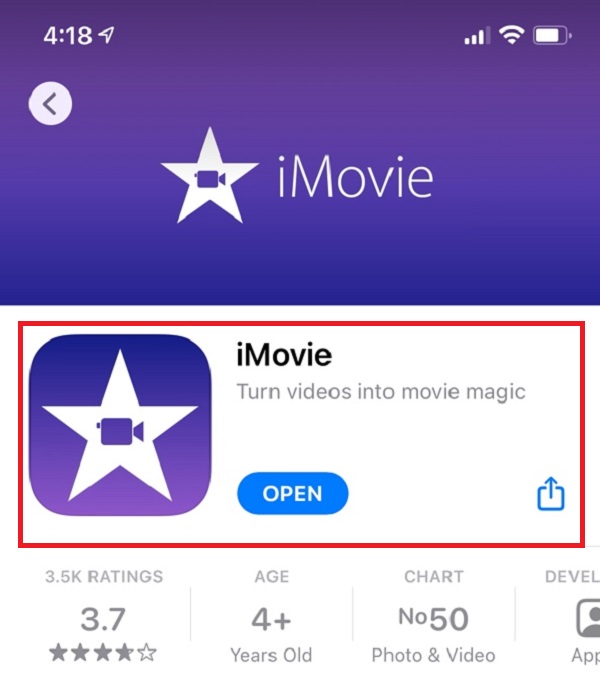
Step 1Download and install the iMovie on your iPhone or iPad on the App Store, then insert or add your video clip using the plus sign (+) button.
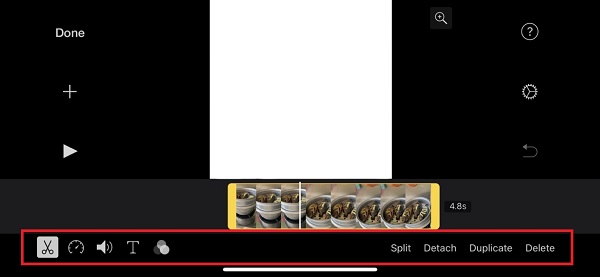
Step 2Tap the play button, navigate to the time period for which you wish to add subtitles, and then tap the bottom line to show the editing tools.
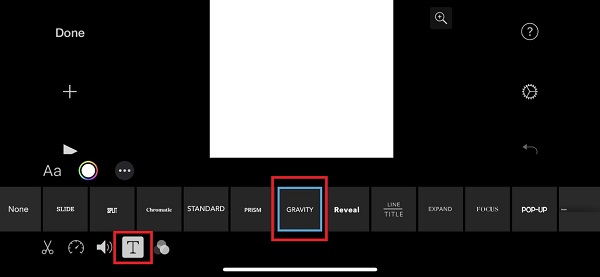
Step 3Tap the T button, choose the style and type the text in the box. Then, tap the Done button on the upper-left. Type the subtitles and repeat the process. After that, save your video and you’re done.
Steps to add subtitles in iMovie on Mac computer:
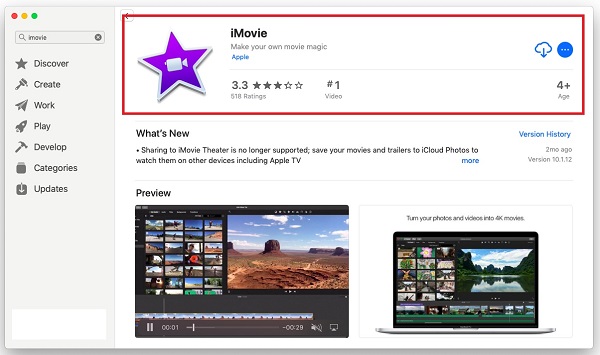
Step 1Download and install iMovie on your Mac computer, then launch the software.
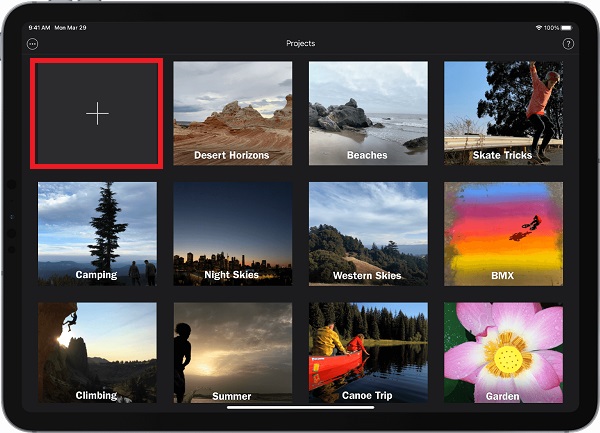
Step 2On the main interface, click New Project and import your video. After that, drag the video to the timeline area.
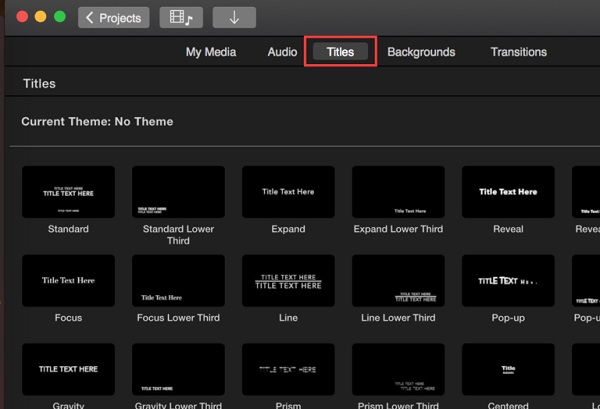
Step 3Then click Titles (T) type the text and adjust the duration and position. Type your subtitle you want to insert on the timestamp of your video.
Step 4Also, you are allowed to click Show Fonts and Change Fonts to change the font color, size, style and more. Repeat the process then save your video.
Note that the above-mentioned steps are also applicable if you want to know how to add subtitles in iMovie 10.
How to Add Subtitles with FoneLab Video Converter Ultimate
FoneLab Video Converter Ultimate is a video converter that can help you increase the quality of your videos. It also has an easy-to-use, clean, and adaptable design that makes it simple to complete your tasks. It also has a fast conversion speed, multi-format options, batch conversion, a broad compatibility range, and produces high-quality output. In our case, it is perfect for quickly adding subtitles to your video clip. What's more, it works on both Windows and Mac computers.
Video Converter Ultimate is the best video and audio converting software which can convert MPG/MPEG to MP4 with fast speed and high output image/sound quality.
- Convert any video/audio like MPG, MP4, MOV, AVI, FLV, MP3, etc.
- Support 1080p/720p HD and 4K UHD video converting.
- Powerful editing features like Trim, Crop, Rotate, Effects, Enhance, 3D and more.
Steps to add subtitle using FoneLab Video Converter Ultimate:
Step 1Install the FoneLab Video Converter Ultimate and launch it on your computer.
Step 2Add or drag a video file that you want to have a subtitle using to the plus sign (+) button or click the small Add File button in the top-right corner of the interface.
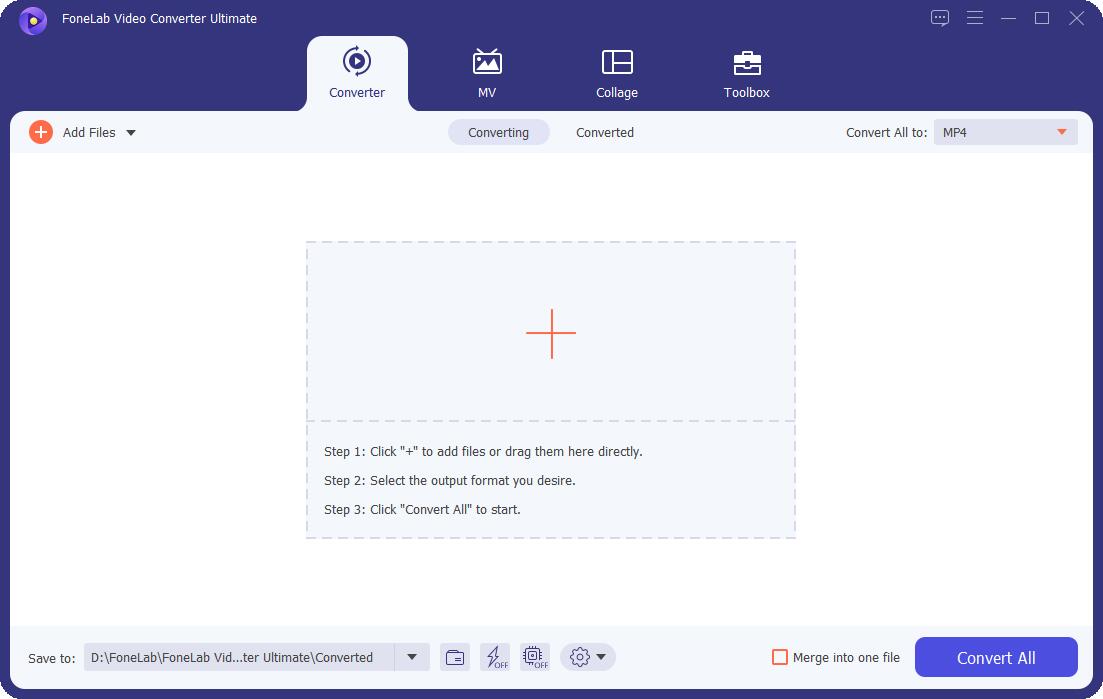
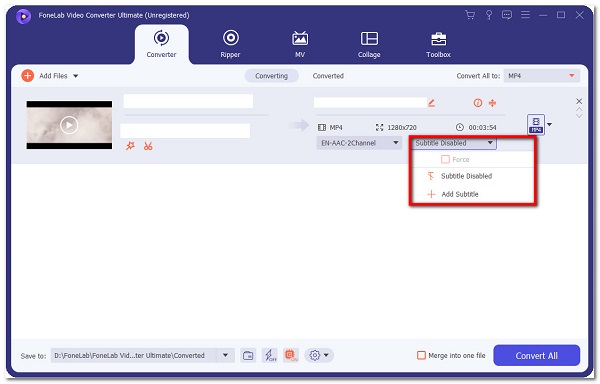
Step 3After that, click the Subtitle Panel under the output format menu. Choose subtitle files from the folder on your computer. It can save your time as you won’t be asked to type the words one by one.
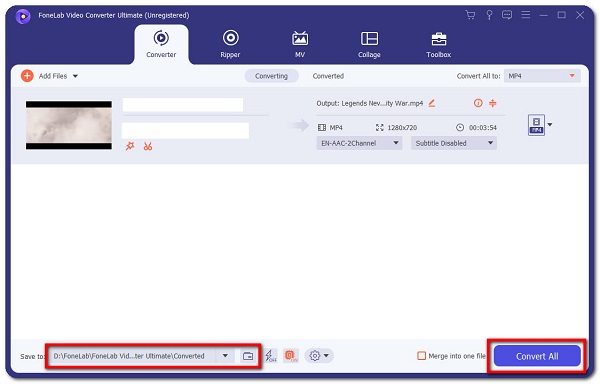
Step 4When done, just click the Convert All button on the lower part of the interface.
How to Add Subtitles with Adobe Tools
Adobe Premiere will be highly recommended if you are looking for a professional way to add subtitles to your video clip. It has a variety of organizational features for generating, adding audio and video effects, modifying, and exporting video content in a variety of formats. One of its remarkable functions is that it can be used for adding subtitles. With that, we have to follow in adding subtitles to make it easier for you.
Option 1. Steps to add subtitle using Adobe Premiere:
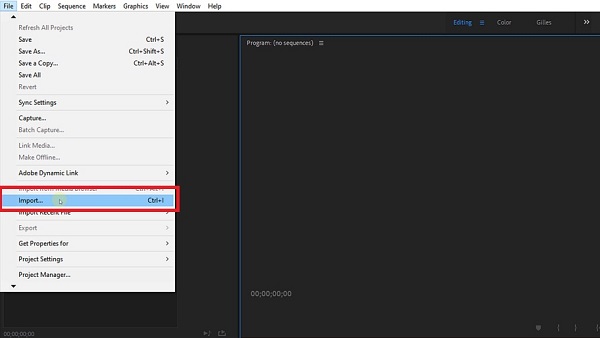
Step 1First, download and install Adobe Premiere on your computer. After that, launch the software and navigate the main interface. On the main interface, drag or insert your file on the File panel click the Import then Media.
Step 2Click again the File panel but this time, click the Captions. A small pop-up window will appear where to select Open Captions.
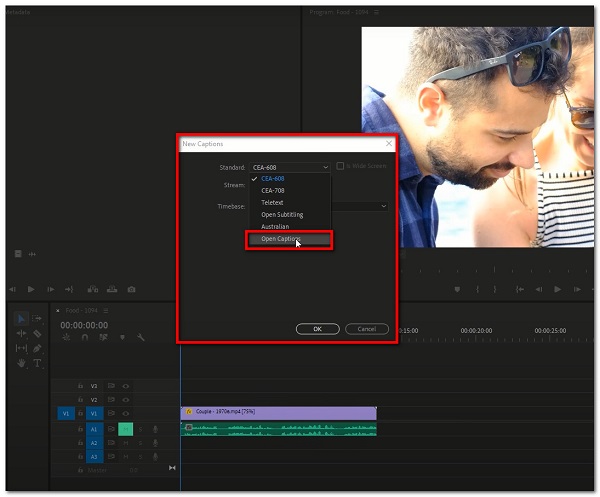
Step 3After that, drag your caption file to the timeline and make it align on your video clip. Then, double-click the black bar on the caption file to open the captions panel.
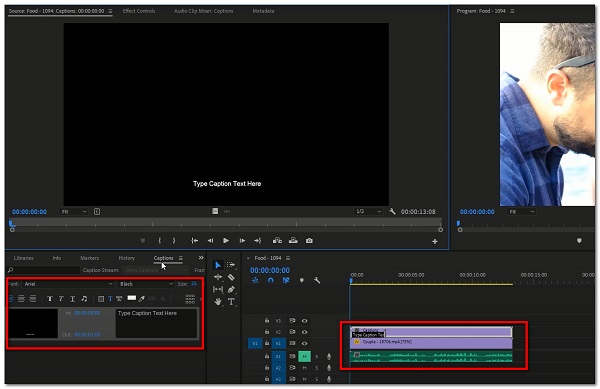
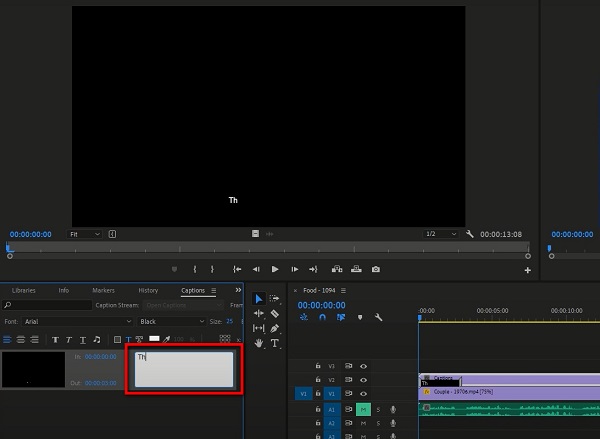
Step 4The next thing you will do is to type your subtitles in the box where it prompts you to. Make sure to adjust the duration of the subtitle by adjusting the dragging of the black caption bar.
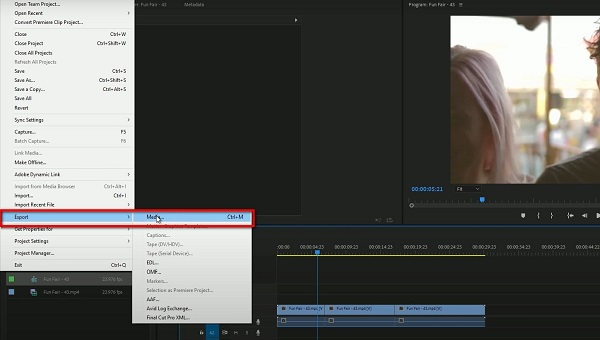
Step 5When done, just export your file by clicking again File panel, then Export Media.
Option 2. Steps to add subtitle using AdobeSpark:
Adobe Spark is software for creating visuals and films. It has simple buttons that allow you to easily add subtitles or captions to your video without needing to produce a separate caption file. Aside from that, it offers online services and apps for the iPhone, iPad, and Android, all of which may be used to add subtitles. The actions to take are as follows:
Steps to add subtitle using AdobeSpark Software on mobile phone:
Step 1Download and install Adobe Spark on your device.
Step 2On the interface, upload videos or images from your device, then arrange it in the timeline.
Step 3Then, using the editing tool, select from a variety of subtitle layout options and make any necessary text size adjustments. Just type your subtitles according to the time stamp.
Step 4When done, just click the Download button and it will be saved on your device.
Steps to add subtitle using AdobeSpark Online:
Step 1Go to spark.adobe.com. To use it, you should log-in first.
Step 2After that, click the plus sign (+) button to create a project. Then click the Video Project.
Step 3Then, click Start From Scratch. Then, add your video file by clicking the plus sign (+) button.
Step 4After you add your video file, click the Add Text (T), then type your subtitles according to the timestamp that you want.
Step 5When done, just click the Download button on the top center of the interface and you’re done.
How to Add Subtitles with Online
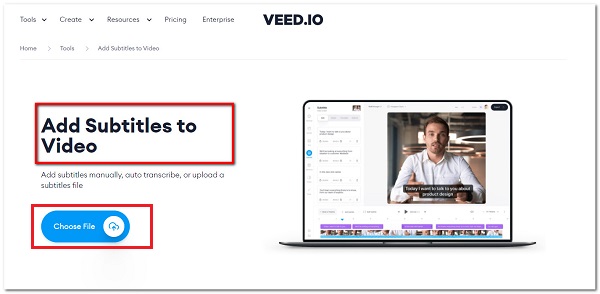
If you are looking for an alternative way to add subtitles to your video without downloading other tools, then VEED.IO can help you to do it. It won't ask you to download a program on the computer as FoneLab Video Converter Ultimate and Adobe Premiere do. It is a free tool that lets you add subtitles in three different ways: manually, auto-generated subtitles (using speech-recognition software) or upload a file and add it to your video. Regardless of which choice you select, you will be able to make simple changes to your subtitles.
Step 1Go to veed.io, then choose Add Subtitles. After that, choose the video file to which subtitles should be added.
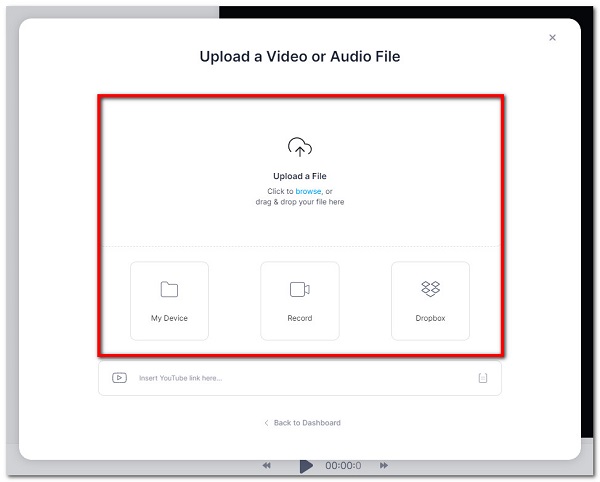
Step 2Then, simply drag and drop files from your computer.
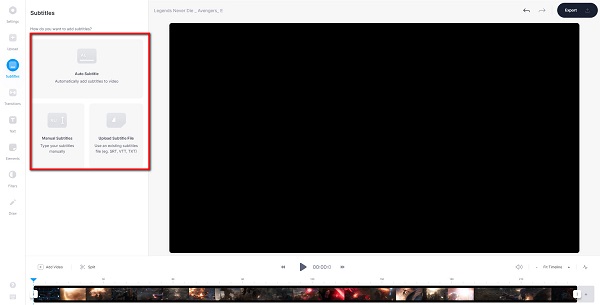
Step 3You can start typing your subtitles, use Auto Transcribe, or upload a subtitle file by clicking Subtitles in the sidebar menu. Use the editing tool to make any changes to the text, font, color, size, or timing.
Step 4When done just click the Export button and it will be downloaded to your device.

Video Converter Ultimate is the best video and audio converting software which can convert MPG/MPEG to MP4 with fast speed and high output image/sound quality.
- Convert any video/audio like MPG, MP4, MOV, AVI, FLV, MP3, etc.
- Support 1080p/720p HD and 4K UHD video converting.
- Powerful editing features like Trim, Crop, Rotate, Effects, Enhance, 3D and more.
Part 3. FAQs about Adding Subtitles
1. Does adding subtitles to a video clip increase file size?
Yes. Adding subtitles to a video clip increases its file size since you already calibrated the internal data of the video clip. If you are worried about the file size after you add subtitles, you can use FoneLab Video Converter Ultimate because it will allow you to do so with reasonable file size.
2. Does adding subtitles affect the video quality?
When you add subtitles to a video clip, it does not affect the resolution of the clip. More so, it also has no effect on the audio quality. But rather it only affects the file size.
3. Where should I put my subtitles?
If you want to add subtitles, all subtitles must stay within text safe areas. It should not block the happenings on the frame. Also, each subtitle can only have two lines of text. When two lines are utilized, the top line should be somewhat longer than the bottom line.
Video Converter Ultimate is the best video and audio converting software which can convert MPG/MPEG to MP4 with fast speed and high output image/sound quality.
- Convert any video/audio like MPG, MP4, MOV, AVI, FLV, MP3, etc.
- Support 1080p/720p HD and 4K UHD video converting.
- Powerful editing features like Trim, Crop, Rotate, Effects, Enhance, 3D and more.
So that's how you can add titles to your video files quickly and easily. With the help of the solutions above, your subtitles should now be clear and understandable. As a result, we still strongly advise you to use FoneLab Video Converter Ultimate because it has been shown to be really beneficial to add subtitble to MKV and any other format, even do whatever you want accordingly by many people.
