Tutorial: Best Audio Recorder for Windows/Mac/iPhone/Android
 Posted by Lisa Ou / March 01, 2021 16:00
Have no idea how to record music or vocals on your mobile phone or computer? From this article, you can learn how to record screen video with audio on different devices step by step.
No matter which digital device you use, you can always get your best audio recorder.

Well, you will not see any audio recorder here. Because you need to suffer many restrictions and damages, such as time limit, Internet connection speed, privacy and more.

Guide List
1. How to Record Audio on Windows
For Windows 10 users, there is no need to use any third-party audio recorder. You can use the built-in Xbox app to record audio activities in Windows 10 for free.
Well, you can regard Xbox as the best recording app for PC.
Step 1 Start the Windows audio recorder
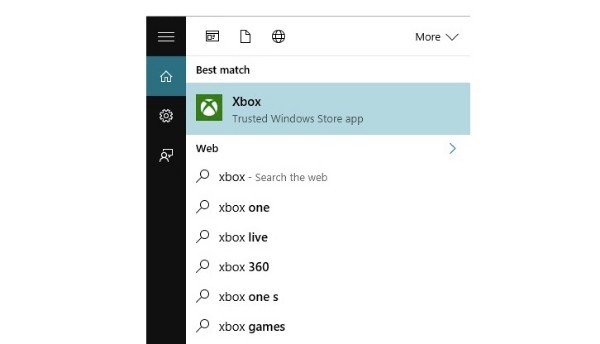
Open the Start menu. Type Xbox app in the search box. Press the Enter key to get all related options. Under the Best match category, you can see the green icon with Trusted Windows Store app. Then run the Xbox app.
Step 2 Open Game bar
Locate the audio or window you want to record. Later, press the Windows and G keys on your keyboard at the same time. You will be prompted with Do you want to open Game bar?. Mark before Yes, this is a game. It does not matter if you want to record other audio instead of gameplay.

Step 3 Manage audio recording options
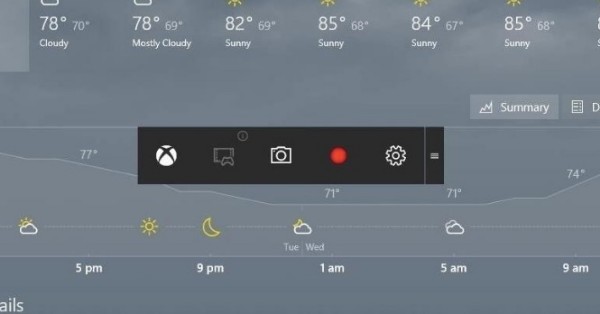
You can see 5 icons at the bottom, which are Xbox, Record that, Screenshot, Start recording and Settings from left to right. Well, you can hover your mouse above each icon to get the certain hotkey combinations. Do not forget to enable audio recording option in the Settings before recording.
Step 4 Record the screen video with audio
Click the Start recording icon after all preparations. Your recorded video will be saved in the C drive by default. You can find the destination folder through C/Users/Videos/Captures.
2. How to Record Audio on Mac
QuickTime Player is the default media player for all Mac users. You can get powerful audio recording features utilities for free.
To some degree, QuickTime Player can be your best audio recorder for Mac. You can capture sound from the built-in microphone and external microphone on Mac easily.
Step 1 Open QuickTime Player
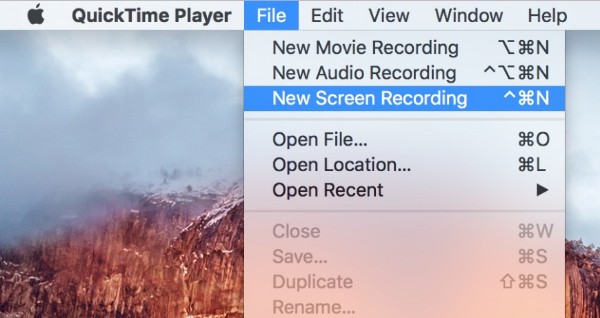
Run QuickTime Player on your Mac computer. If you want to capture Mac’s audio, you can choose New Screen Recording from the File drop-down menu on the top.
If you want to record webcam videos, you can choose New Movie Recording instead.
Step 2 Manage audio recording settings.
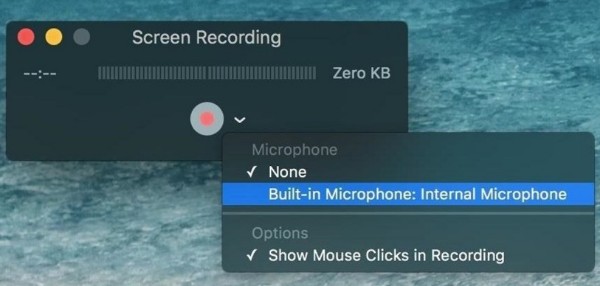
There is a small downside arrow next to the Record option. From this drop-down menu, you can set the input audio source. Volume up or down based on your need.
In addition, you can decide whether to show mouse clicks in recording or not. Later, you can draw on the screen to set the capture area.
Step 3 Make a audio recording
Click the Record icon to start recording. When you stop recording on Mac, QuickTime Player will open the recording playback automatically.
Thus, you can preview, edit, save or share the recording file freely.
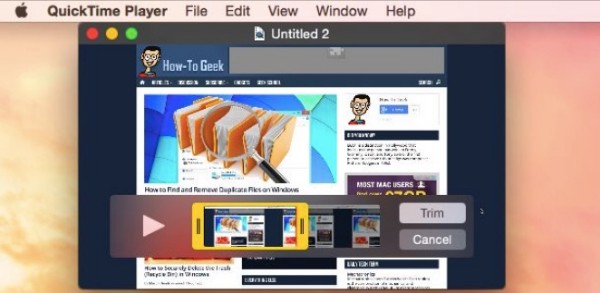
Note: For iOS 8 and later users, you can plug your iPhone, iPad or iPod touch to the Mac computer with a lightning port. Later, you can use the best audio recorder for video to record iOS activities too.
You can also find a quicktime recorder to record audio on mac.
3. How to Record Audio on iPhone
You can get many voice recorder apps for iOS devices in the market. Well, you can also use the built-in screen recording feature for iOS 11 and later versions. You can also regard it as the best voice recorder app for iPhone.
Yes, you can record iPhone screen videos and audios for free.
Step 1 Add screen recording to Control Center
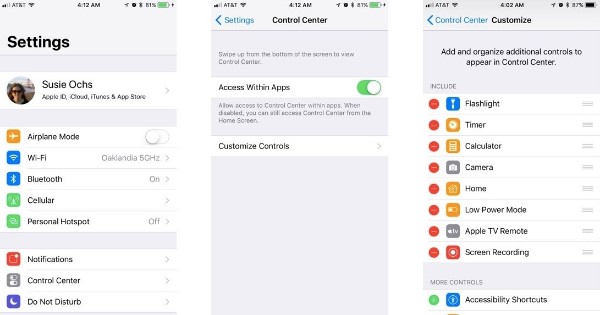
Open the Settings app. Choose Control Center. Tap Customize Controls. Find Screen Recording and choose the green + icon.
Later, you can see Screen Recording under the Include list. If you want to disable this feature, you can tap the red ‑ icon whenever you want.
Step 2 Open Control Center
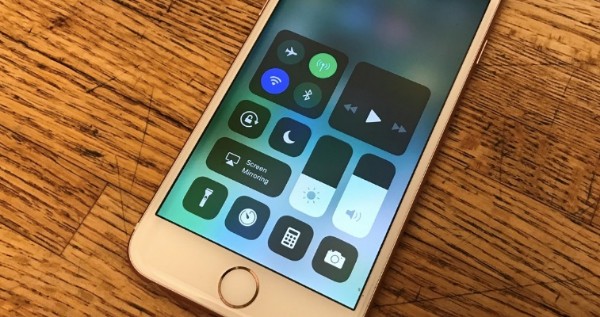
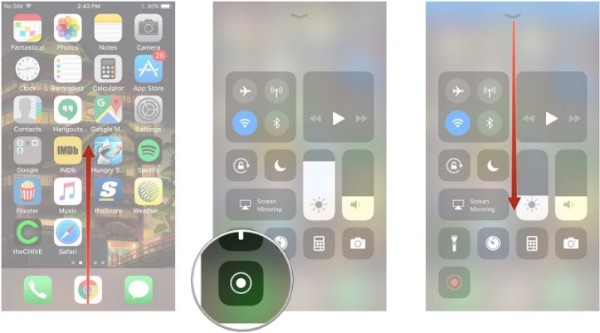
Go back to the Home screen of your iPhone. Swipe up from the bottom to locate Control Center.
For iPhone X and later iOS models running iOS 12, you can swipe down from the upper-right corner of the screen instead.
Step 3 Record iPhone audio
Press the Record icon. Choose the Microphone icon to enable the audio recording feature. Later, tap Start Recording to record your iPhone audio with your voice after the 3-second countdown.
When you want to stop recording, you can find the red stop icon on the top left corner of your iOS device. Choose Stop when you are prompted with Stop Screen Recording.
Finally, you can go to the Photos app to get the screen recording file.
4. How to Record Audio on Android Phone
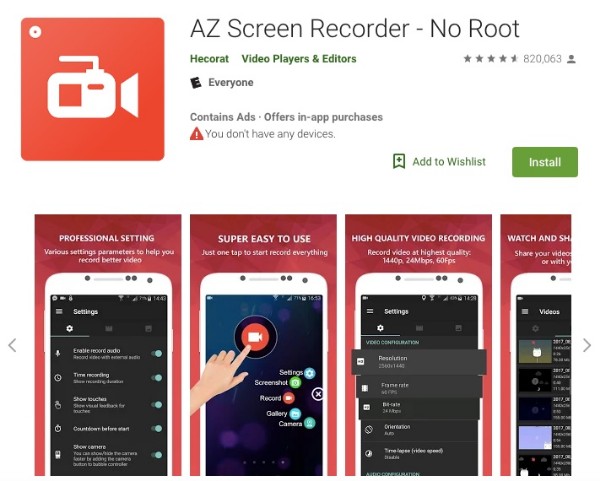
As for Android users, you need to turn to other screen recorder apps for help. During this time, you can run AZ Screen Recorder as your best audio recorder app.
There is no need to root your Android phone or tablet. You can record audio from the microphone and capture screen video with no time limit. Of course, you need to pay for certain functions.
Step 1 Install the screen recorder app
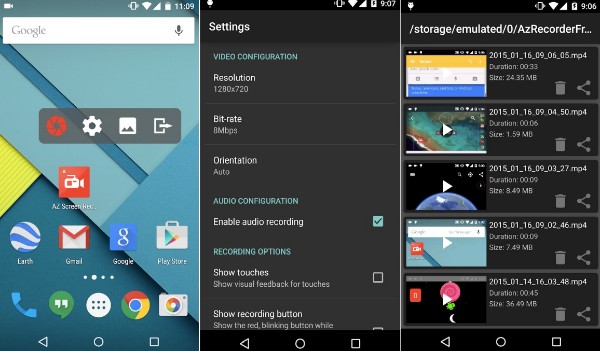
Free download voice recorder app from Google Play Store. Run the Android video and audio recorder after the installation. An overlay appears automatically.
Step 2 Record Android audio
Tap the gear Settings icon. You can adjust video resolution, frame rate, bit rate and other preferences.
In addition, turn on the Enable record audio option. It can help you record video with external audio on Android. Then you can tap the Record icon to start recording video on Android.

Step 3 Export the Android recording file
If you want to finish the audio recording process, you can pull down the AZ notification shade. Choose the Stop icon and save the video recording file.
Additionally, you can share the video to YouTube and other sites by choosing from the More menu besides.
5. Ultimate Audio Recorder Software You Should Not Miss
If you want to record system sound coming from your computer or your own voice, you should not miss FoneLab Screen Recorder. Compared with common screen recorders, you can record all kinds of videos and audios on your computer without lag.
Yes, it is your best free music recording software. You can extract audio tracks directly.
It is true that you can record studio professionally with digital audio recorders. However, you need to spend hundreds of dollars on portable voice recorders for lectures, singings, etc.
Well, you can get similar output quality with this best voice recorder software too. Just make sure the speaker or audio source is close to your computer.
- Record system and microphone voice with adjustable volumes.
- Capture videos with customized screen size.
- Take screenshots to capture any moment.
- Use hotkeys to start or stop the record instantly.
- Export the video, audio or snapshot in high quality.

FoneLab Screen Recorder allows you to capture video, audio, online tutorial, etc on Windows/Mac, and you can easily customize size, edit the video or audio, and more.
- Record video, audio, webcam and take screenshots on Windows/Mac.
- Preview data before saving.
- It is safe and easy to use.
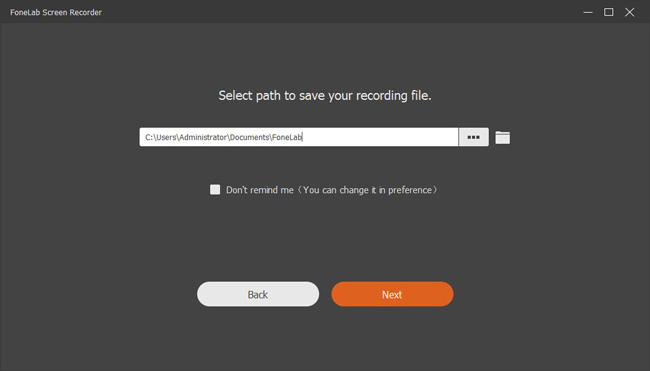
Step 1 Go to Preferences and choose the desired parameters before recording computer audio.

Step 2 Choose Video Recorder or Audio Recorder according to your needs.

Step 3 Click the REC button to record the videos in a high quality.
Step 4 Save the recording file.
Conclusion
All in all, FoneLab audio recorder software can be your best audio recording software for Mac and Windows. You can capture audios with no quality loss. The default output audio format is MP3. You can manage other recording settings manually in advance.
Whenever you encounter any problem about video or audio recording, you can feel free and leave messages below.
FoneLab Screen Recorder allows you to capture video, audio, online tutorial, etc on Windows/Mac, and you can easily customize size, edit the video or audio, and more.
- Record video, audio, webcam and take screenshots on Windows/Mac.
- Preview data before saving.
- It is safe and easy to use.
