Capture video, audio, online tutorial, etc on Windows/Mac, and you can easily customize size, edit the video or audio, and more.
How to Add Screen Record on iPhone [Full Guide]
 Updated by Lisa Ou / Oct 31, 2023 13:20
Greetings! I have something to show my best friend about the game I played this past few weeks. She is interested to know how it works. She told me to screen-record it and send it to her. However, I do not know where to locate the screen recorder on my iPhone. How do I add screen record to my iPhone? Thank you!
![How to Add Screen Record on iPhone [Full Guide]](/images/screen-recorder/how-to-add-screen-record-on-iphone/how-to-add-screen-record-on-iphone.jpg)
There are times that the screen recorder on the iPhone is not accessible on its Control Center. Luckily, we have found and listed the detailed tutorial to make it appear. Please scroll down below to see more information about the built-in screen recorder of the iPhone.
FoneLab Screen Recorder allows you to capture video, audio, online tutorial, etc on Windows/Mac, and you can easily customize size, edit the video or audio, and more.
- Record video, audio, webcam and take screenshots on Windows/Mac.
- Preview data before saving.
- It is safe and easy to use.

Guide List
Part 1. How to Add Screen Record on iPhone
Are you one of the iPhone users whose screen recorder does not appear on the Control Center? Well, this method is for you! To give you a brief background about the process, you only need to put the screen recorded to the active tiles. You will see these active tiles icons once you swipe down the Control Center.
You may be wondering if the process will be complicated. Learning how to add the screen record button on iPhones is easy. You will only navigate the settings of your phone. Don’t worry. The detailed instructions about it will be shown below. Please follow them accordingly.
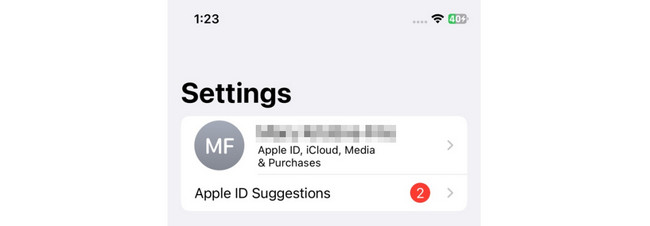
Step 1Please locate the Settings app on your iPhone. After that, swipe down and find the Control Center among the options. Tap it once you already see it.

Step 2You will see the active tiles at the top of the main interface. You will see them with the Minus icon on the left. On the other hand, the inactive tiles will appear at the bottom of the screen. Since the screen recording tool is not on the Control Center, it will be on the inactive tiles list. Please locate it and tap the Plus icon to add it to the active tiles of the Control Center.
Part 2. How to Screen Record on iPhone
After you learn how to add a record button on iPhones, you must know how to use it. We will introduce 2 methods to screen record on your iPhone. The first is the iPhone built-in tool, and the second is its best alternative, FoneLab Screen Recorder. To know more about them, please scroll down below.
Way 1. Built-in Screen Recorder
After putting the screen recorder tool of the iPhone on its Control Center, it is now easy to navigate. You only need to swipe down the Control Center and tap the screen recorder icon. The good thing about this tool is that it will record your iPhone screen as it is. It means that the recording will be of high quality and not blurry.
Additionally, there will be no lag upon activating it. If so, the recording will be smooth. In addition, you do not need to download additional tools to make it work.
Anyway, it is time to learn how to use the built-in screen recorder of the iPhone. See how below.
Step 1Please go to the screen that you want to record on your iPhone. After that, please swipe down the Control Center of your iPhone at the top. Please locate the Screen Recording icon and tap it. You can also long-press the icon to access the microphone button accordingly.
You will see the tool that counts from 3-1 seconds. It is a feature of the built-in tool to give you enough time to prepare the screen of your iPhone.
Step 2Once you are recording, the icon color will change to red. Please take your time in screen recording. After that, tap the Screen Recording icon to stop the recording of your iPhone screen. Later, your iPhone will notify you that the recording was saved at the top. It will also mention where it saves the recorded video.
Way 2. Use FoneLab Screen Recorder
Do you know that you can record the screen of your iPhone on a computer? That’s because of the FoneLab Screen Recorder! It can mirror your iPhone screen to a Windows or Mac and record its screen afterward. The good thing about this software is that you do not have to download additional tools to your phone. It means the process will only require you to connect your iPhone wirelessly.
FoneLab Screen Recorder allows you to capture video, audio, online tutorial, etc on Windows/Mac, and you can easily customize size, edit the video or audio, and more.
- Record video, audio, webcam and take screenshots on Windows/Mac.
- Preview data before saving.
- It is safe and easy to use.
Moreover, FoneLab Screen Recorder can record audio and system sound while recording the iPhone screen. It is so convenient, right? Let us know how this tool functions as we list its detailed steps below. Move on.
Step 1Download the tool first on your computer. You only need to tick the Free Download button on its official website. After that, set it up and launch it to familiarize yourself with its interface and tools.

Step 2You will see the recording tools on the first interface of the software. Since you will record your iPhone screen, please choose the Phone icon on the right of the main interface. 2 supported operating systems will appear on the screen. Since you are using an iPhone, please select the iOS Recorder icon on the left.

Step 3You will see the Current Net and IP Address where the computer is connected. Please connect the iPhone with them. After that, choose the Screen Mirroring button at the top.

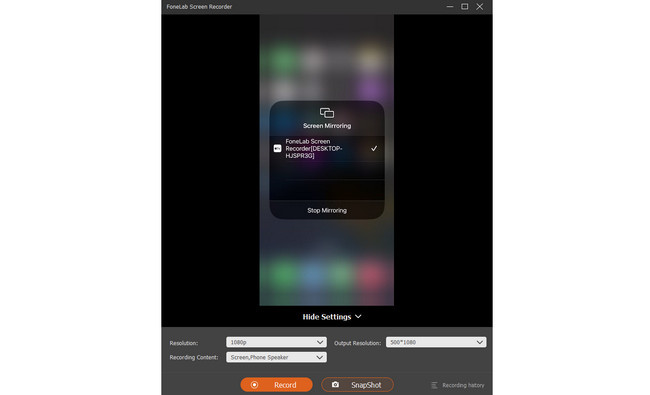
Step 4Go to your iPhone. After that, please swipe down the Control Center location at the top. After that, please tap the Screen Mirroring icon among the active tiles on the screen. Later, choose the FoneLab Screen Recorder on the options. You will see the iPhone screen on the computer. Please click the Record icon at the bottom to start the recording.

FoneLab Screen Recorder allows you to capture video, audio, online tutorial, etc on Windows/Mac, and you can easily customize size, edit the video or audio, and more.
- Record video, audio, webcam and take screenshots on Windows/Mac.
- Preview data before saving.
- It is safe and easy to use.
Part 3. FAQs about How to Add Screen Record on iPhone
1. Can you screen record on iPhone for 2 hours?
Yes. Using its built-in tool, you can screen record on your iPhone for 2 hours. The iPhone's built-in screen recorder has no limitations or time limits. It will only depend on the available storage space of your phone and battery percentage. The good thing is that the screen recorder will stop once there's no storage.
2. How much space does iPhone screen recording take?
The higher the iOS version, the higher the file size of the screen recording files. The size of the videos that you screen-recorded will be 3 to 4 times larger than before. For example, the 5-minute recording before will only be in 300MB. But today's iOS version will be approximately 1.17GB.
We hope you learned much about how to add screen record on iPhone 13 and other models. Also, we hope that you considered using the FoneLab Screen Recorder. Do you have more questions about the tool and the above topic? Please comment on your queries in the comment section below. Thank you so much!
FoneLab Screen Recorder allows you to capture video, audio, online tutorial, etc on Windows/Mac, and you can easily customize size, edit the video or audio, and more.
- Record video, audio, webcam and take screenshots on Windows/Mac.
- Preview data before saving.
- It is safe and easy to use.
