Simple Guide to Snipping Tool on Windows with Alternatives
 Updated by Lisa Ou / Sept 13, 2024 16:30
Have you already encountered the Snipping Tool in Windows? If so, you must know that this program is designed to take screenshots on a Windows computer screen. Like mobile devices, capturing the screen is also helpful for computer users for various purposes. But unlike your Android or iPhone, Windows doesn't only have one way of capturing the screen. Besides its built-in screenshot feature, the Snipping Tool is also pre-installed to offer more functions, making screenshots more advantageous. You are at the right article if it's your first time hearing about it.
The following parts will tackle what the Snipping Tool is about to help you understand and navigate the program better. With the information below, you can also optimize its function thanks to the features we will introduce later. Afterward, the correct procedure for using the screenshot tool will be revealed to guide you. That's not all. The later parts of this post also contain the best program alternatives to capture your screen. Although the Snipping Tool is easy and accessible, it would still be best to have other options, especially if they are better.


Guide List
Part 1. What is The Snipping Tool on Windows
As mentioned, the Snipping Tool is a pre-installed screenshot program on Windows computers. Unlike the normal screenshot feature, this tool doesn’t simply capture the entire screen after pressing certain keys. You will still need to press the designated keys later, but it will offer screenshot modes, including the free-form snip, rectangular snip, window snip, and full-screen snip. Thus, it’s unsurprising that many prefer using it, especially since it provides more features.
Besides the capture modes, this free Snipping Tool for Windows lets you set a delay of up to 5 seconds before taking a screenshot, which is advantageous in certain situations. Moreover, you can enjoy the program’s basic annotation and editing features to enhance the screenshot output you have captured on the screen. Afterward, the Snipping tool will let you save the screenshot to your chosen image format, as it offers a few: JPEG, PNG, and GIF.
Meanwhile, despite its accessibility, convenience, and other advantages, drawbacks are still inevitable. Unfortunately, the Snipping Tool lacks advanced features, including photo editing functions. It can only do simple things like cropping and rotating, so it might not help much if you’re trying to explore your photo editing skills to improve the screenshot output. Aside from that, some users experience occasional lags or delays, especially with larger screenshots.
FoneLab Screen Recorder allows you to capture video, audio, online tutorial, etc on Windows/Mac, and you can easily customize size, edit the video or audio, and more.
- Record video, audio, webcam and take screenshots on Windows/Mac.
- Preview data before saving.
- It is safe and easy to use.
Part 2. How to Use Snipping Tool on Windows
After gathering information about the Snipping Tool, you are probably curious how it functions. Luckily, you won’t have difficulty figuring it out since this program's process for taking snapshots or screenshots is quick and trouble-free. As mentioned, the screenshot tool is already on the computer, so you won’t need to run any installation. Once you open the Snipping Tool, its functions will immediately be ready for users to utilize, making everything convenient.
Mimic the comfortable task below to determine how to use Snipping Tool on Windows:
Step 1The Snipping Tool is pre-installed but is not usually displayed on the desktop. Thus, you must click the search bar at the bottom left, then type ‘Snipping Tool’ to find the program. Once it’s shown on the results, click it to view the screenshot program’s interface.

Step 2Next, you will see screenshot options on the interface, so set them up accordingly. You may change the snipping mode, add up to 5 seconds of delay, etc. When ready, you can finally click the New tab on the left to manage the crosshair and take a quick screenshot. The output will then be shown on the program screen. You can modify it first before ticking the Save option.
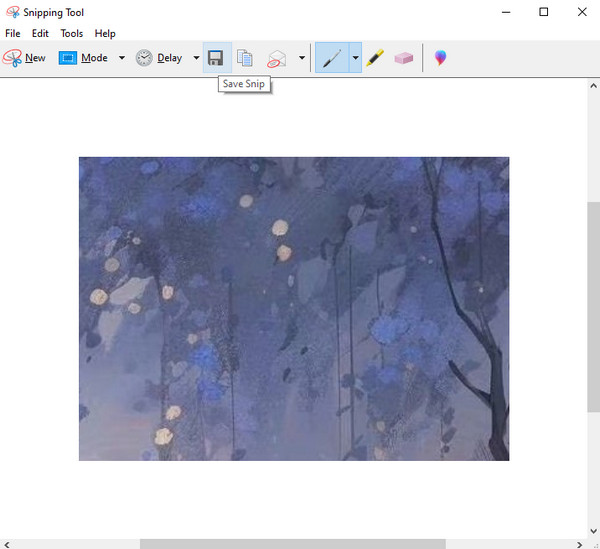
We understand how convenient the Snipping Tool must be since it doesn’t need an installation and offers a few basic features to improve your screenshot. However, we still suggest checking the alternatives below. Some users prefer screenshot programs that provide what the Snipping Tool can’t, so you might also want to discover other tools that can help you take screenshots.
Part 3. Best Alternatives to Snipping Tool on Windows
As you can see, the Snipping Tool might not have everything you need in a screenshot program; thus, some users look for alternatives that offer more advantages. Because of that, we listed the most trusted and beneficial ones you can try so you no longer have to explore other platforms. The tools or features you will discover below will be helpful in many situations.
Option 1. FoneLab Screen Recorder
The leading alternative to the Snipping Tool is the FoneLab Screen Recorder program. When discussing the best tools for capturing a computer screen, many often mention it as one of the best. Because, like the Snipping Tool, this program can help you take high-quality screenshots on your computer. It doesn’t matter if you’re trying to capture only a portion or the entire screen because it supports both. Besides, taking snapshots with this tool can finish within seconds.
FoneLab Screen Recorder allows you to capture video, audio, online tutorial, etc on Windows/Mac, and you can easily customize size, edit the video or audio, and more.
- Record video, audio, webcam and take screenshots on Windows/Mac.
- Preview data before saving.
- It is safe and easy to use.
On the other hand, FoneLab Screen Recorder doesn’t simply take screenshots. It also offers numerous editing functions to enhance the photos afterward. Meanwhile, you must have noticed the program’s name, which is a recorder. That’s because, besides taking snapshots, this tool can also record computer screens. Regardless of whether you’d like to record a video, tutorial, or any activity, it will give you a quality output. You may also take screenshots while doing so.
Recognize the painless operation underneath as a model of how to screenshot on Windows snipping tool alternative, FoneLab Screen Recorder:
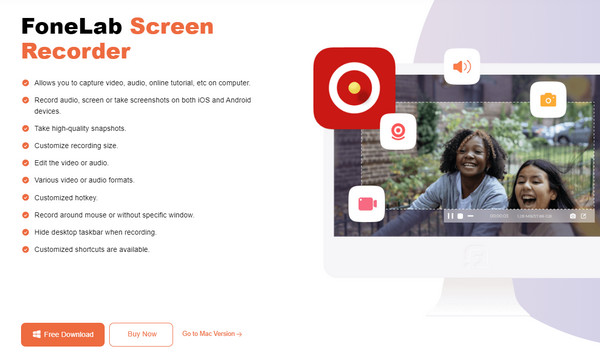
Step 1Visit the FoneLab Screen Recorder webpage. Its left section has a Free Download button, which you should select to obtain the installer. By default, the file will be inside the Downloads folder, so open and manage it for the installation to arise. You can watch the status bar below until it is complete, and once the Start tab is shown, press it to launch the recorder.
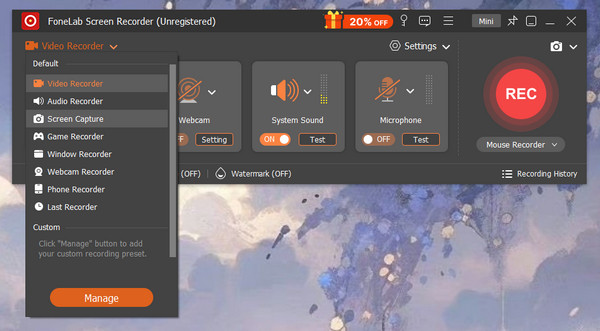
Step 2The tool’s initial screen will display the Video Recorder feature first, so you should select the down arrow at the top left to see the other functions. Once shown, hit the Screen Capture option, and the crosshair for taking screenshots will immediately appear. Drag it while holding the mouse’s left button until you have taken the screen you wish to capture.
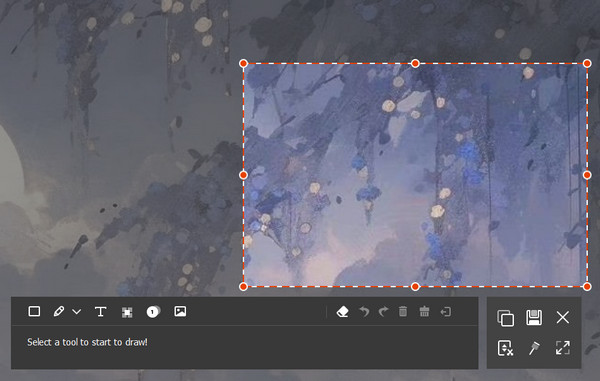
Step 3Once the photo is taken, a bar containing the screenshot options will appear. Use the editing functions to enhance the photo. You may add text, shapes, drawings, etc. When satisfied, hit the Save button on the right to save the output.
FoneLab Screen Recorder allows you to capture video, audio, online tutorial, etc on Windows/Mac, and you can easily customize size, edit the video or audio, and more.
- Record video, audio, webcam and take screenshots on Windows/Mac.
- Preview data before saving.
- It is safe and easy to use.
Option 2. Xbox Game Bar
Meanwhile, the Xbox Game Bar is another screenshot feature on Windows. As mentioned, Windows computers don’t offer only one but multiple ways to capture the screen. The Xbox Game Bar is among them, and you can easily set it up in the Settings section. Like the Snipping Tool, you don’t need to install it since the feature only requires an activation, making it easy to access. But what’s more advantageous about this game bar is that it provides more features, particularly for gamers. While playing, you can enjoy its screen capture, recording, audio control, and other features. You can even customize its interface and functionalities accordingly.
Bear in mind the unexacting steps below to utilize the alternative to the Snipping Tool in Windows, Xbox Game Bar:
Step 1First, activate the Xbox Game Bar by ticking the Windows button on the lowermost left corner and hitting the gear symbol to open Settings. Next, pick the Gaming tab on the screen.
Step 2Enable the slider at the top of the Game Bar section to activate it. Once turned on, press Windows + G to launch the feature. Click the Capture button on the pop-up bar, and the Capture window will appear. Finally, select its Camera button to capture your screen.
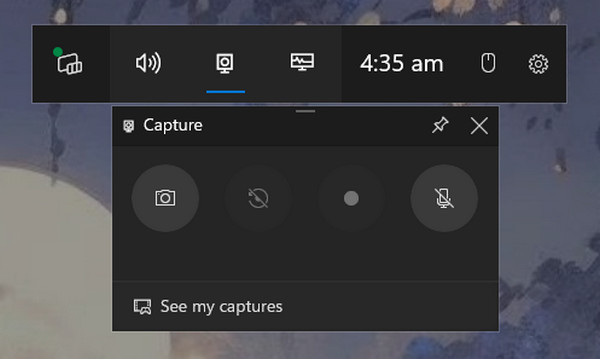
However, like other screenshot features, you must also expect some drawbacks, especially since it is free and built into the computer. First, this screenshot feature is only available for Windows 10 and 11 users. Second, it has various limitations, such as the lack of editing features, and is incompatible with all games and other computer programs.
FoneLab Screen Recorder allows you to capture video, audio, online tutorial, etc on Windows/Mac, and you can easily customize size, edit the video or audio, and more.
- Record video, audio, webcam and take screenshots on Windows/Mac.
- Preview data before saving.
- It is safe and easy to use.
Part 4. FAQs about Snipping Tool on Windows
1. Can the Snipping Tool screen record on Windows 10?
Unfortunately, it can't. Whether your computer runs Windows 10 or 11, the Snipping Tool can't record a computer screen. It wasn't built for recording, so we recommend installing FoneLab Screen Recorder instead. It can record screens and take snapshots, so we guarantee it will be worth installing.
2. Why can't I find the Snipping Tool on Windows?
You might be using an older Windows version because, as mentioned, it is only for Windows 10 and 11. Meanwhile, some issues must have also caused it to be removed or disabled.
Listening to the suggestions above will let you take high-quality screenshots with or without the Snipping Tool. Hence, don't be reluctant to use them on your computer.
FoneLab Screen Recorder allows you to capture video, audio, online tutorial, etc on Windows/Mac, and you can easily customize size, edit the video or audio, and more.
- Record video, audio, webcam and take screenshots on Windows/Mac.
- Preview data before saving.
- It is safe and easy to use.
