- Empty Trash
- Delete Mail App
- Clear Cache on Mac
- Get More Storage on Mac
- Make Chrome Use Less RAM
- Where is Disk Utility on Mac
- Check History on Mac
- Control + Alt + Delete on Mac
- Check Memory on Mac
- Check History on Mac
- Delete An App on Mac
- Clear Cache Chrome on Mac
- Check Storage on Mac
- Clear Browser Cache on Mac
- Delete Favorite on Mac
- Check RAM on Mac
- Delete Browsing History on Mac
Comprehensive Guide About Microsoft Remote Desktop for Mac
 Updated by Lisa Ou / August 08, 2024 16:30
Hi, guys! I want to know more about the Mac Microsoft Remote Desktop. I need to access my other Macs from my main one. I do not know if the program mentioned is available on Mac because I only used it for my Windows computers. Can you help me learn about the Microsoft Remote Desktop? Thank you in advance!
The mentioned program is one of the helpful programs on your computers that can control one another. This post has the full guide about using it and what it is. Do you want to know more about the topic? Please continue reading this post below.

Guide List
Part 1. Is There A Microsoft Remote Desktop Mac
Microsoft Remote Desktop is commonly used for Windows operating systems. One of the main reasons is that Microsoft is designed for the mentioned operating system. In addition, it functions well because of its compatibility. Macs are also among the computers supported by the Microsoft Remote Desktop. Yes, you read that right! The program is available on macOS operating systems.
The functionality of the programs mentioned for the Windows operating system and macOS is the same. The only difference is that you download them to install them on your computers. It is recommended that you perform the Microsoft Remote Desktop Mac download on their official website to avoid obtaining viruses and malware on your computers.
With FoneLab Mac Sweep, you will Clear system, email, photo, iTunes junk files to free up space on Mac.
- Manage similar photos and dulplicate files.
- Show you the detailed status of Mac with ease.
- Empty trash bin to get more storage.
Part 2. How to Use Microsoft Remote Desktop Mac
You might think learning how to use Microsoft Remote Desktop on a Mac is difficult. If that’s your perspective, you might be wrong. Using the program mentioned is easy once you have downloaded it on your Mac. We suggest performing the Microsoft Remote Desktop Mac download on the App Store for a smooth and safe procedure. If so, you will need a strong internet connection to download it.
Furthermore, setting up the Mac on another computer will require a stable internet connection. Another good thing about Microsoft Remote Desktop is that it does not require a powerful computer because it does not contain extensive data and files.
Below are the detailed steps to learn how to use the mentioned program in this post. See them as you scroll down below.
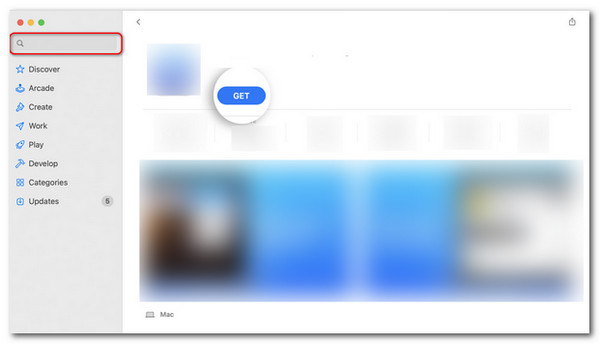
Step 1Open the App Store to see its main interface. You may use the Mac Spotlight feature or the Launchpad program. Then, click the Search Bar icon at the top left of the screen. It will reveal the suggested programs afterward. Later, type the Microsoft Remote Desktop keyword and click one of the results. Alternatively, hit the Enter key to input the search. Finally, choose the Microsoft Remote Desktop icon and click the Get button under its name.
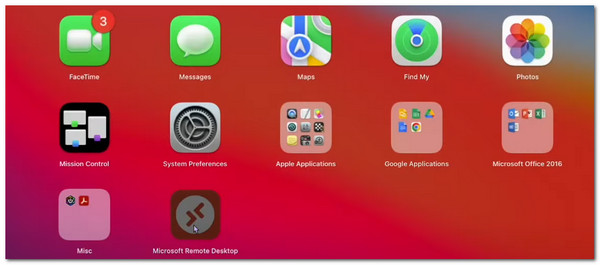
Step 2Wait for the downloading procedure to end and click the Open button under its name to launch it. Alternatively, you can close the App Store and locate the Microsoft Remote Desktop on the Mac Home Screen. Now, you will see the software's main interface and need to familiarize yourself with a faster procedure.
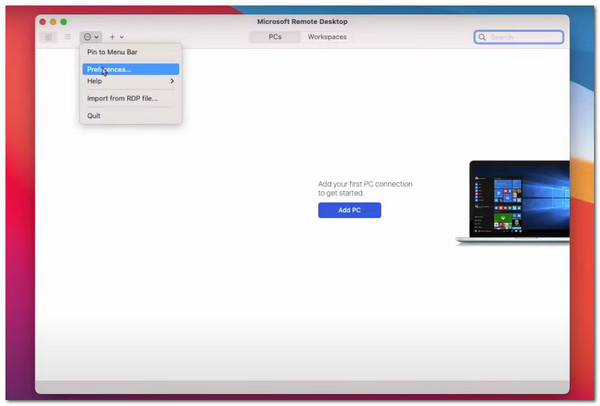
Step 3It is time to add a user account to the software. To do so, click the Arrow icon at the top left of the screen. Then, drop-down options will appear. Please click the Preferences button to see a new dialog box on the Mac screen. Click the User Accounts tab on the new interface to see more options. Tick the Plus icon at the bottom left and fill out the needed information. Choose the Add icon at the bottom right to continue.
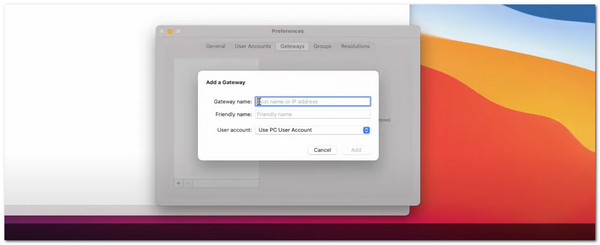
Step 4Click the Gateways tab at the top of the screen. Then, tick the Plus icon at the bottom left of the screen. A new dialog box will be shown on the Mac screen. Enter the Gateway Name, Friendly Name, and User Account information. These are the computer information you need to input to have access. Tick the Add button at the bottom right of the screen to save it.
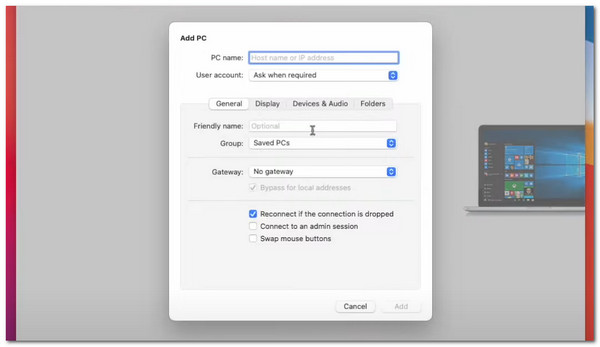
Step 5Click the Add PC button on the first interface. Then, the needed information about the PC will be shown. Fill them out and click the Add button at the bottom right to start controlling the other computer on your Mac.
Part 3. Clear Mac Storage with FoneLab Mac Sweep
Inevitably, when using a Mac, temporary or permanent files are created that take up memory. Over time, your Mac becomes slower and slower or even develops various problems. Then, you can try FoneLab Mac Sweep to clean up your Mac's memory. This will not only help your Mac run faster but will also avoid some of the problems that arise because of memory.
With FoneLab Mac Sweep, you will Clear system, email, photo, iTunes junk files to free up space on Mac.
- Manage similar photos and dulplicate files.
- Show you the detailed status of Mac with ease.
- Empty trash bin to get more storage.
FoneLab Mac Sweep is a user-friendly tool that can help you easily clear junk files, uninstall software, organize and clear duplicate photos, and remove large files. It's really handy for people who are not familiar with computers anymore.
So let's move on to the exact steps on how to use FoneLab Mac Sweep to clean up your computer memory.
Step 1Download FoneLab Mac Sweep and then drag and drop it to the appropriate location to install this tool on your Mac.
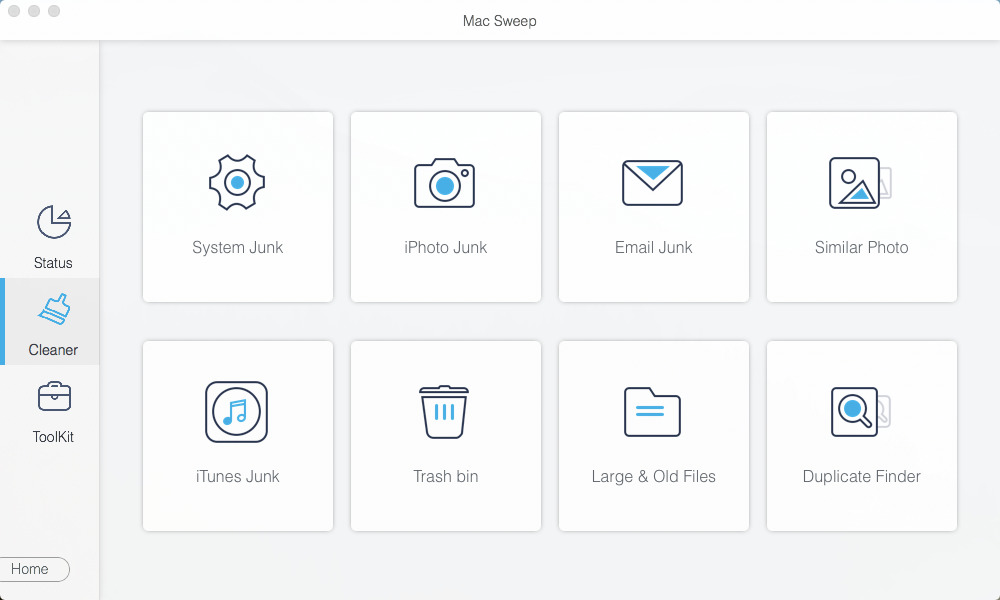
Step 2Run this software and click the Scan button, and it will start scanning your computer.
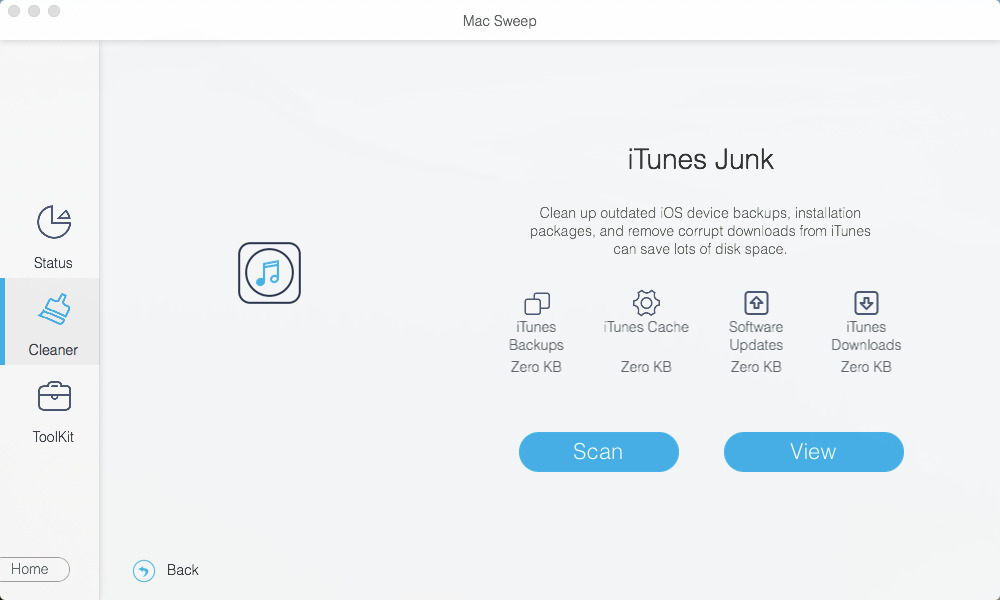
Step 3After scanning, you will see the exact data. Select the data you need to clear and click the Clean button, and you are done.
With FoneLab Mac Sweep, you will Clear system, email, photo, iTunes junk files to free up space on Mac.
- Manage similar photos and dulplicate files.
- Show you the detailed status of Mac with ease.
- Empty trash bin to get more storage.
Part 4. FAQs about Microsoft Remote Desktop Mac
1. What are the system requirements for the Microsoft Remote Desktop on Mac?
The system requirements of Microsoft Remote Desktop on Mac differ from those of Windows operating systems. One of the main requirements for macOS is to have version 10.14 Mojave or later. If not, the program will not be supported on your computer, and you cannot download it. In addition, your Mac must have a strong and stable internet connection to ensure smooth Microsoft Remote Desktop performance.
2. Can I perform a Microsoft Remote Desktop Mac download without App Store?
Yes. You can download the Microsoft Remote Desktop without the App Store. You may download the cracked version of the program on the website. However, this technique is not recommended since your Mac might encounter dangerous viruses and malware. If you do not want to experience it, it is suggested that you download the Microsoft Remote Desktop on the App Store.
3. How to get more storage on a Mac?
You need to delete some unimportant files on your Mac to free up its storage space. You can use its Finder program to locate the files. Then, right-click the files and choose the Delete button. Alternatively, you can use FoneLab Mac Sweep to delete multiple data types on your Mac.
Microsoft Remote Desktop for Mac is a program that lets Mac users connect to a remote computer. It allows access to another computer's programs, data, and network resources. Users can set up multiple connections, transfer data, and use local resources such as printers and folders. This post teaches you how to perform a Microsoft Remote Desktop Mac download and how to use it. Do you have more questions? Leave them in the comment section below. Thank you!
With FoneLab Mac Sweep, you will Clear system, email, photo, iTunes junk files to free up space on Mac.
- Manage similar photos and dulplicate files.
- Show you the detailed status of Mac with ease.
- Empty trash bin to get more storage.