Fix iPad Stuck on Guided Access Using Top Repair Methods
 Posted by Lisa Ou / Feb 01, 2024 09:00
 Greetings! My iPad is stuck on Guided Access, and I'm unsure how to quit it. I used the feature so that I could concentrate on the activity I was doing. However, it seemed to have done more bad than good. I don't want to press the device buttons unknowingly, as it may cause more damage instead. Does anyone have suggestions on how I can fix this? Thanks.
Guided Access is a practical feature on Apple devices to help users concentrate on a certain app they currently use. That's because turning this function on restricts the iPad to your chosen app, and you can set which features will be available. Guided Access is usually used when you want to stay immersed in a task without being distracted by other device apps.

On the other hand, this feature is also useful when someone borrows your device, and you allow them to access only the app they need. However, some users complain that their iPad screen has been stuck on Guided Access. If you are among them, consider yourself lucky by entering this article. The following parts it contains will help you get through this situation.

Guide List
FoneLab enables you to fix iPhone/iPad/iPod from DFU mode, recovery mode, Apple logo, headphone mode, etc. to normal state without data loss.
- Fix disabled iOS system problems.
- Extract data from disabled iOS devices without data loss.
- It is safe and easy to use.
Part 1. How to Use and Quit Guided Access on iPad Properly
Before diving into the fixes for your iPad, which is stuck in Guided Access, we recommend you learn the proper navigation of the feature first. Perhaps you unintentionally pressed the wrong buttons or selections, causing such a problem to your device. In this case, you must grasp the correct steps to quit the Guided Access properly. Meanwhile, the right directions for using the feature will also be included. This way, you will know the procedures you have done that may have gone wrong and avoid doing them again next time.
Emulate the safe guidelines below to use and quit the Guided Access feature properly on iPad:
Step 1Enter Settings and navigate to the Accessibility section. Then, if you scroll down, the Guided Access tab will be shown, so tap it and enable its slider on the next screen. Once turned on, open the app you will use, then triple-press the Top button.
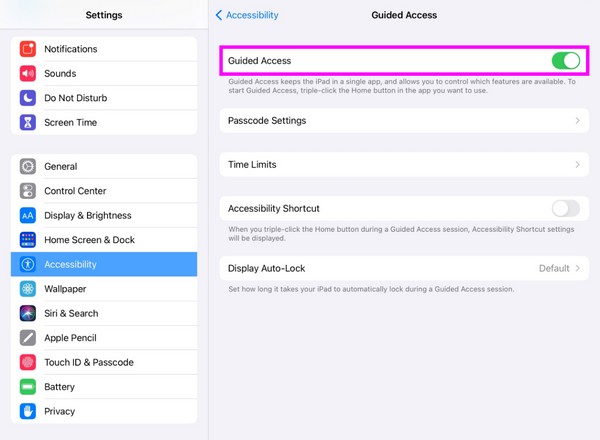
Step 2The Accessibility Shortcuts will then pop up; thus, tap Guided Access to set it up. Tap Options at the bottom left and pick your preferred feature. For instance, you have chosen Time Limit. Set the timer accordingly, then select Start to set a passcode.
Step 3In this case, the Guided Access will automatically exit once the timer runs out. But if you wish to exit manually, triple-press the Top button and enter the passcode you have set.

As you may have noticed, using the Guided Access feature is very convenient, and its navigations are hassle-free. But if you have made a wrong move before finding these correct instructions, please see the following fixes below and solve the issue quickly.
FoneLab enables you to fix iPhone/iPad/iPod from DFU mode, recovery mode, Apple logo, headphone mode, etc. to normal state without data loss.
- Fix disabled iOS system problems.
- Extract data from disabled iOS devices without data loss.
- It is safe and easy to use.
Part 2. How to Fix iPad Stuck in Guided Access through A Reboot
A reboot is the primary solution for your iPad being stuck on the Guided Access screen, especially if it’s only because of a minor issue. For instance, your iPad has been stuck due to glitches, bugs, or other basic problems. Rebooting will easily solve your Guided Access issue without installation and complex procedures. Aside from that, it can also be performed to eliminate other minor issues, like this one, as it is the general solution for many device complications. This technique usually works regardless of your iPad model, iPhone, etc.
Take to heart the painless steps underneath to perform an iPad reboot if your iPad is stuck in Guided Access:
iPad without a Home button: Press the Volume Up key once, then the Volume Down key. Afterward, long-press the Top key and release once you see the iPad screen reboot.
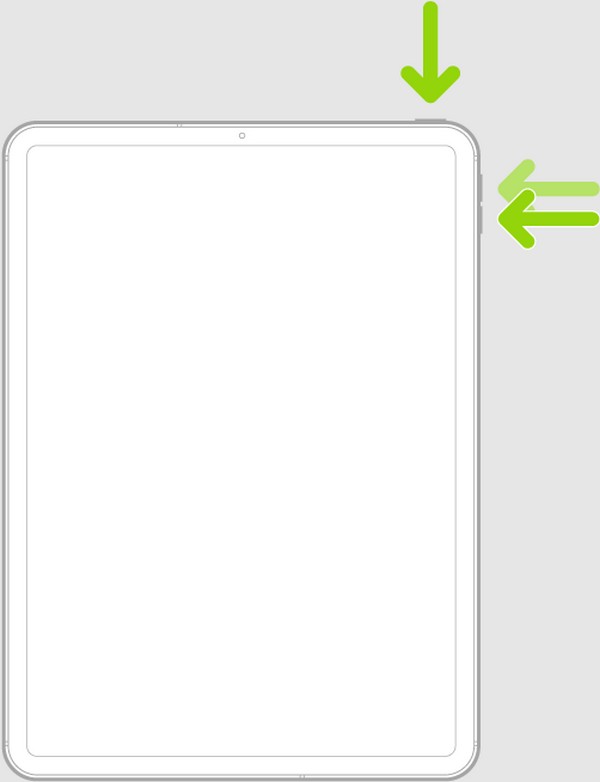
iPad with a Home button: Long-press your iPad’s Top and Home keys simultaneously. Then, let the buttons go once the screen presents the Apple logo.

If this method has failed to fix your iPad problem, a professional tool might be needed, which will be introduced below. As mentioned, a reboot is a repair technique only for simple issues. Thus, if a more complex matter causes your Guided Access problem on iPad, it may not be the appropriate solution. Instead, check out the program introduced below.
Part 3. How to Fix iPad Stuck in Guided Access Using FoneLab iOS System Recovery
Regarding device repair programs, FoneLab iOS System Recovery is among the most sought-after tools to install on the computer. It is a known repair technique with a high success rate, so many iPad and other iOS device users put their trust in it. Navigating this tool on your desktop will repair your iPad, which is stuck on the Guided Access screen regardless of its system problem. It even offers Standard and Advanced repair modes, allowing you to decide whether to erase your content and settings or keep them safe and secure on the iPad.
FoneLab enables you to fix iPhone/iPad/iPod from DFU mode, recovery mode, Apple logo, headphone mode, etc. to normal state without data loss.
- Fix disabled iOS system problems.
- Extract data from disabled iOS devices without data loss.
- It is safe and easy to use.
FoneLab iOS System Recovery supports almost all iOS devices, and you can install it even if you use a macOS or Windows computer. Besides, it doesn’t only fix the Guided Access issue on the iPad. It also works for other system problems, including the touch screen that’s not working, an iPhone with no service, waiting for activation, can’t turn on, stuck verifying updates, and more. Hence, it will be very advantageous whenever you face various issues.
Understand the manageable steps below to fix stuck in guided access on iPad issue using FoneLab iOS System Recovery:
Step 1Head to the program’s official site to click Free Download and obtain the FoneLab iOS System Recovery installer. Next, open it to maneuver the installation, downloading the essential components. It will quickly finish, so launch the tool on your desktop afterward.
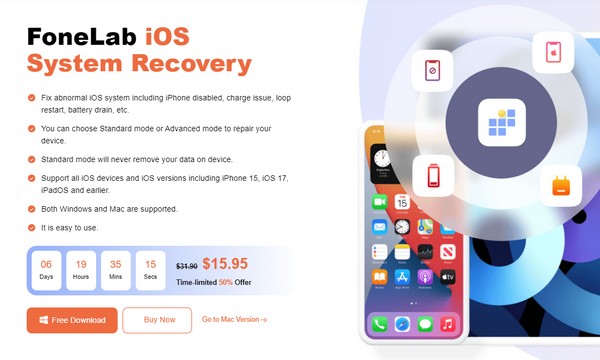
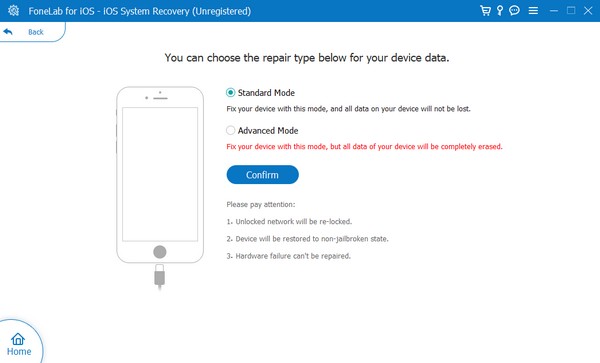
Step 2The program’s top right interface contains the iOS System Recovery feature. Click it to proceed, then hit the Start button immediately. This way, the repair types will be displayed. Choose Advanced or Standard mode from there, but ensure you understand their descriptions. Then, select Confirm.
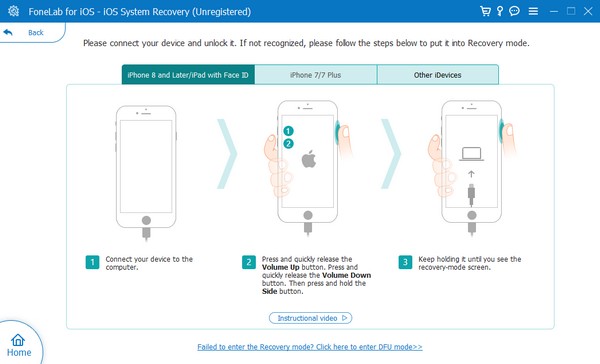
Step 3Get a USB cable and attach its ends to your iPad and computer. The program will detect your device, so put it in Recovery mode through the on-screen guidelines on the next interface. When the firmware package is downloaded, use it to fix your iPad with the Guided Access issues.
Part 4. FAQs about How to Fix An iPad Stuck in Guided Access
Does the Guided Access end when the battery dies?
Yes, it does. Thus, if you're using the Guided Access feature for an important task, you must keep your iPad battery charged.
How do you exit the Guided Access feature when it freezes and can't reboot?
Use a tool like FoneLab iOS System Recovery. It is navigated on the computer, so it doesn't matter if your iPad screen has frozen. It only needs to be linked to the program to be fixed.
Those are the leading repair strategies if your iPad has experienced such an issue. If you face other simple or complex problems on your device, go to the FoneLab iOS System Recovery site.
FoneLab enables you to fix iPhone/iPad/iPod from DFU mode, recovery mode, Apple logo, headphone mode, etc. to normal state without data loss.
- Fix disabled iOS system problems.
- Extract data from disabled iOS devices without data loss.
- It is safe and easy to use.
