- Empty Trash
- Delete Mail App
- Clear Cache on Mac
- Get More Storage on Mac
- Make Chrome Use Less RAM
- Where is Disk Utility on Mac
- Check History on Mac
- Control + Alt + Delete on Mac
- Check Memory on Mac
- Check History on Mac
- Delete An App on Mac
- Clear Cache Chrome on Mac
- Check Storage on Mac
- Clear Browser Cache on Mac
- Delete Favorite on Mac
- Check RAM on Mac
- Delete Browsing History on Mac
Mac Unarchive - Best Mac Unarchive Utility with Leading Alternatives
 Updated by Lisa Ou / Oct 16, 2023 09:15
Hi, guys! I compress some of my files to transfer them easily to my Mac and save storage. It includes my videos from my wedding. The files turned out to be compressed files. The thing is. I am really excited to view these files again. However, I can not open file as archive. Can you help me unarchive these files so that I can access them? Thank you so much in advance!
Compressing the files can help you big time in transferring files. It can reduce the files' size, leading to a faster transfer process. However, if you do not know how to unarchive the compressed files, you cannot access them.
The purpose of this post is to help you unarchive files. Upon reading the post, you will see the best unarchive utility of Mac with its alternative. Move on.


Guide List
Part 1. Best Mac Unarchive Utility Tool - FoneLab Mac Sweep
The best tool that you can use to unarchive files on Mac is FoneLab Mac Sweep. It is very user-friendly because it uses the drag-and-drop technique to import your compressed files into the software. It will decompress them only in a few seconds. Moreover, it can also be a convenient Mac archive utility if you want.

With FoneLab Mac Sweep, you will Clear system, email, photo, iTunes junk files to free up space on Mac.
- Manage similar photos and dulplicate files.
- Show you the detailed status of Mac with ease.
- Empty trash bin to get more storage.
Additionally, the tool can also be used to free up storage space on a Mac. If so, there are chances that you can optimize the performance of your Mac. In addition, this software can detect and delete duplicate files existing on your Mac.
Discover this tool on how FoneLab Mac Sweep works to unarchive Mac files. See how below.
Step 1Go to the official website of FoneLab Mac Sweep. After that, please click the Free Download button to download the software. Click the Arrow-Down button at the top right corner of the main interface. You will see the downloaded file. Click it to set it up and launch it on the Mac.

Step 23 functions will be shown on the screen. It includes the Status, Cleaner, and Toolkit icons. Please choose the Toolkit icon on the right. After that, 6 additional features will appear on the screen. Please familiarize yourself with the features. You can use them as a future reference, like cleaning up your Mac. Please choose the Unarchiver button at the bottom right corner. You will see its description afterward.
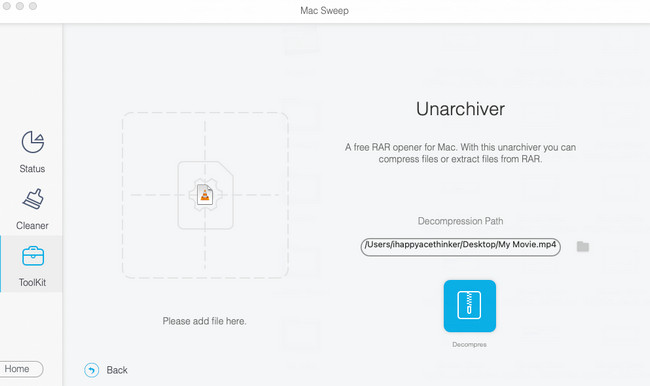
Step 3On the left side, the Please Add File Here broken box will appear. Once you click it, the Finder tool will appear on the screen. Select the files that you want to unarchive. Alternatively, you can find the files and then drag and drop them into the Broken Box to import them. You will see the destination of your file in the Decompression Path section.
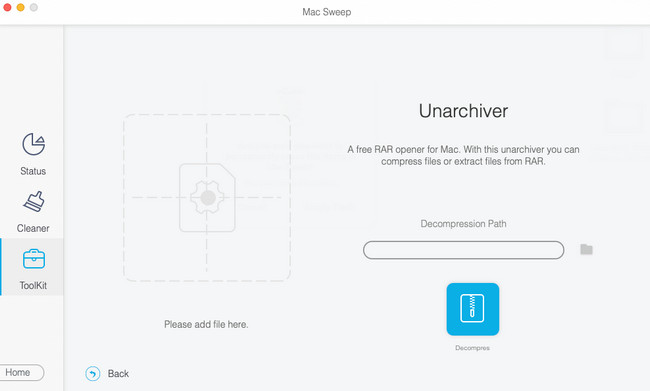
Step 4Click the Decompress button under the Decompression Path section. After that, the tool will start to unarchive the files you chose to process. Do not interrupt the procedure for best results.

With FoneLab Mac Sweep, you will Clear system, email, photo, iTunes junk files to free up space on Mac.
- Manage similar photos and dulplicate files.
- Show you the detailed status of Mac with ease.
- Empty trash bin to get more storage.
Part 2. Third-Party Mac Unarchive Tools Alternatives
Aside from FoneLab Mac Sweep, there are other unarchive utility tools for Mac. However, they are not as convenient and multifunctional as the software above. Anyway, scroll down below to discover the alternatives to unarchive utility tools.
Option 1. The Unarchiver
This first unarchive utility tool alternative is The Unarchiver. The interface of this tool is simple. It will only show you the files that are compressed and their locations. However, you will not know how to process the compressed files because there’s no instruction given on its interface. Also, it contains advanced settings for your compressed files settings. If you are a novice, you will not understand them easily.
Anyway, please see the detailed steps on how to use the tool. Please perform them accordingly for the best results.
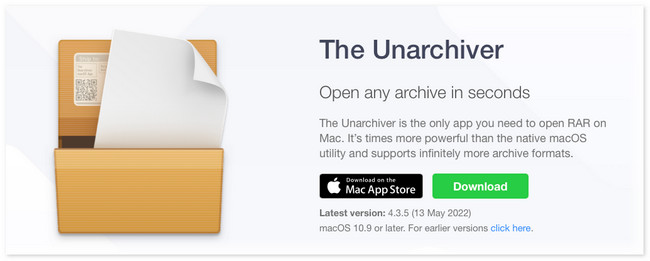
Step 1Download the software on your Mac. Click the Download or Get button. You can get it on its official website or search it from the Mac App Store. The downloading process will last for more than a minute. After that, set it up and launch the tool on your Mac. The software will show you its permission interface. You only need to allow all the permissions it asks.
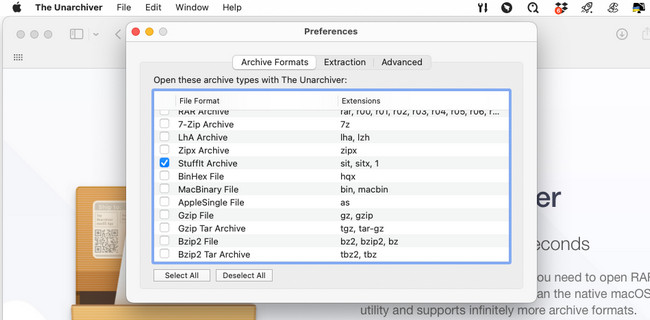
Step 2You will see the compressed file folders in the Archive Formats section. Tick the Select All icon at the bottom left corner of the main interface. Later, click the File button in the Menu Bar at the top. New options will be shown afterward. Please select the Unarchive to Current Folder button. The software will decompress the compressed files immediately.
Option 2. Decompressor
Decompressor is a tool that can be found on the Mac App Store. Based on its name, it is designed as a decompressor for your archived files on Mac. However, nothing will pop up on the screen once you launch this program. The Menu Bar is the only thing that will change on the Mac. If so, you will think that the program is lagging or crashing. But it is not.
Anyway, let’s see below how Decompressor unarchive compressed files. Move on.
Step 1You can download the program on the App Store. You only need to search for it using the Search Bar on the left top corner of the main interface. After that, type Decompressor and press the Enter or Return key on your Mac.
Step 2The results will appear on the right side of the tool. Please locate the Decompressor button with the Pink icon. Click the Get button to download the program. It will last for more than a minute. Later, please click the Install button to launch the software afterward.
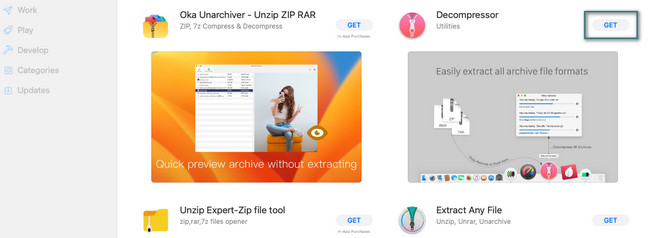
Step 3When the program is launched, the Menu Bar will also change. Please click the Decompress Archive button on the options. After that, the Finder tool on your Mac will appear. Locate the compressed files among all of their folders. After that, confirm them, and the software will start the unarchiving process immediately.


With FoneLab Mac Sweep, you will Clear system, email, photo, iTunes junk files to free up space on Mac.
- Manage similar photos and dulplicate files.
- Show you the detailed status of Mac with ease.
- Empty trash bin to get more storage.
Part 3. FAQs about Mac Archive Utility
1. Why I cannot open files as archive?
There are common reasons why you cannot open files as archives. The file may experience incomplete downloads before you have it on your Mac. There may be an improper compression. Viruses and malware may also interfere and cause the issue. Check also if your device supports the file extension of the file.
2. Is there a built-in Mac archive utility?
Yes. There is a built-in archive tool on Mac called Archive Utility. It is a built-in tool placed on the macOS operating system. You can use it to compress and expand files without launching the tool itself. You can access the built-in tool by searching it on the Mac Spotlight and /System/Library/CoreServices/Applications folder.
We hope that you successfully unarchive the files you wish to access. Also, if you have more questions about the best Mac unarchive utility tool, which is FoneLab Mac Sweep, comment below. We'll answer your query as soon as we possibly can. Thank you!

With FoneLab Mac Sweep, you will Clear system, email, photo, iTunes junk files to free up space on Mac.
- Manage similar photos and dulplicate files.
- Show you the detailed status of Mac with ease.
- Empty trash bin to get more storage.
