- Unlock Apple ID
- Bypass iCloud Activation Lock
- Doulci iCloud Unlocking Tool
- Factory Unlock iPhone
- Bypass iPhone Passcode
- Reset iPhone Passcode
- Unlock Apple ID
- Unlock iPhone 8/8Plus
- iCloud Lock Removal
- iCloud Unlock Deluxe
- iPhone Lock Screen
- Unlock iPad
- Unlock iPhone SE
- Unlock Tmobile iPhone
- Remove Apple ID Password
How to Reset AirPods from Previous Owner Efficiently
 Updated by
 May I know how to reset AirPods Pro from a previous owner? I bought mine second-hand, but the previous owner forgot to disconnect theirs. Thus, I'd like to ask anyone for help to remove their device from the AirPods, which is now mine, to ensure it will no longer be associated with others. Besides, it is also for privacy since it may still be linked to their Apple ID. Please help.
Suppose you have purchased a second-hand device, whether AirPods, iPhone, iPad, or more; unlinking it from the previous owner is the initial thing you must do. This way, aside from the apparent reason that the AirPods will only be connected to you, it will also protect your privacy. If you keep it linked to the last owner, they may still see the AirPods' activities on their account.
Therefore, resetting and disconnecting your AirPods from their previous owner is essential for different reasons. The question is, what is the proper method you should use? You don't have to overthink because the following sections already give answers. Understand and use each part's information and processes to reset your AirPods from the previous owner without a problem.


Guide List
Part 1. How to Reset AirPods from Previous Owner
Resetting the AirPods from its previous owner is primarily done on the Find My page. Since it hasn't yet been disconnected from their account, they must be the ones to remove or reset it from their iCloud Find My. Hence, all you must do is ask the previous owner for this favor, especially since their account credentials will be required when signing into the website. After all, the procedure will only be quick, especially with the Find My page's comprehensive interface and options. The previous owner will immediately grasp the AirPods reset process, and they can do the reset remotely. Thus, you won't have to return it first to complete the steps.
Obey the user-oriented instructions below to grasp how to reset AirPods from a previous owner:
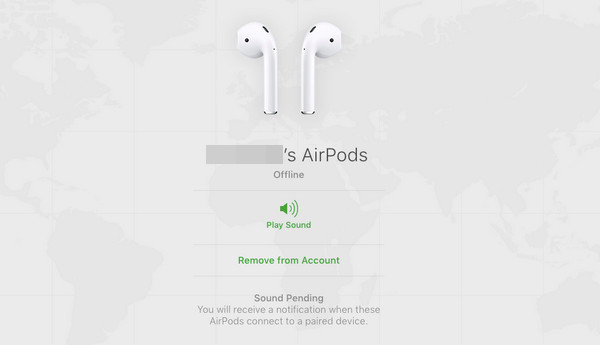
Step 1First, the previous owner must log into iCloud using their Apple credentials on a browser. Once the homepage appears, advance to the Find My section to view its main page.
Step 2After that, display the linked devices to the account by clicking All Devices. Then, choose the AirPods and click Remove from Account to reset and unlink it from the last owner.
What if you can no longer communicate with the previous owner? Unfortunately, some users immediately lose contact once they receive the product in good condition. The problem is that they fail to notice the AirPods are still linked to the last owner. You don't have to sulk if you are among them, because another solution is prepared for such a situation. Check it out next.
FoneLab Helps you unlock iPhone screen, Removes Apple ID or its password, Remove screen time or restriction passcode in seconds.
- Helps you unlock iPhone screen.
- Removes Apple ID or its password.
- Remove screen time or restriction passcode in seconds.
Part 2. How to Remove Apple ID from AirPods without Previous Owner
Failing to contact the previous owner is not a problem if you'd like to remove their Apple ID from your AirPods. Apple designed it with specific management buttons, which you can use to solve your concerns. Hence, you don't need to communicate with them and ask for a favor since you can remove their Apple ID and reset the AirPods yourself. Besides, the process only requires the AirPods' case with the physical buttons, and you are free to maneuver the steps effortlessly. Once you complete the process, the AirPods will be removed and disconnected from the owner's Apple ID and vice versa, allowing your Apple device to be the only one to connect.
Act under the secure navigation below to determine how to remove Apple ID from AirPods without a previous owner:
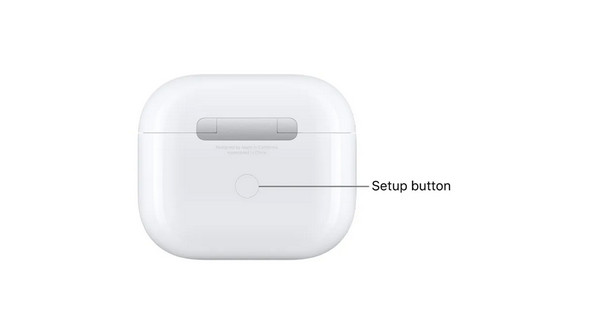
Step 1Ensure the AirPods are in their case and close the lid. Once ready, long-press the Setup button at its back. You must only release it after 15 seconds to let it reset.
Step 2A light will flash once the reset process completes. Hence, it is a sign that the previous owner's Apple ID has been removed from the AirPods, and you can finally enjoy them.
FoneLab Helps you unlock iPhone screen, Removes Apple ID or its password, Remove screen time or restriction passcode in seconds.
- Helps you unlock iPhone screen.
- Removes Apple ID or its password.
- Remove screen time or restriction passcode in seconds.
Part 3. How to Connect AirPods to A New iPhone
After disconnecting and resetting your AirPods from the previous owner, it's time to connect them to your device. Hence, we prepared further procedures to help you link and finally enjoy using it on your iPod Touch, iPhone, iPad, etc. Like the prior processes, connecting AirPods to an Apple device is painless. It requires only a few navigations, especially since it is no longer connected to the previous owner's devices. You must only perform the steps as instructed, and afterward, your AirPods will be linked to your Apple device without a problem. You also won't have to deal with complex terms or technicalities since the connecting process is effortless.
Conform to the simplified directions below to connect the AirPods to your iPhone:
Step 1Display the Home screen of your iPhone, then open the AirPods case's lid next to the device. Once a setup animation appears on the screen, choose the Connect tab below.
Step 2After that, further instructions and prompts will emerge on your iPhone screen. Hence, use them correctly until the AirPods successfully connect to your device.

Aside from the processes above, we included a bonus tip for removing an Apple ID you may no longer need on your iOS or iPadOS device. Feel free to browse its information, as it can significantly help later if you experience concerns, such as forgotten Apple account passwords, etc. The entire procedure is also provided, so don't hesitate to check it for later.
FoneLab Helps you unlock iPhone screen, Removes Apple ID or its password, Remove screen time or restriction passcode in seconds.
- Helps you unlock iPhone screen.
- Removes Apple ID or its password.
- Remove screen time or restriction passcode in seconds.
Part 4. Bonus Tip - Remove Apple ID from Your iOS or iPadOS Device
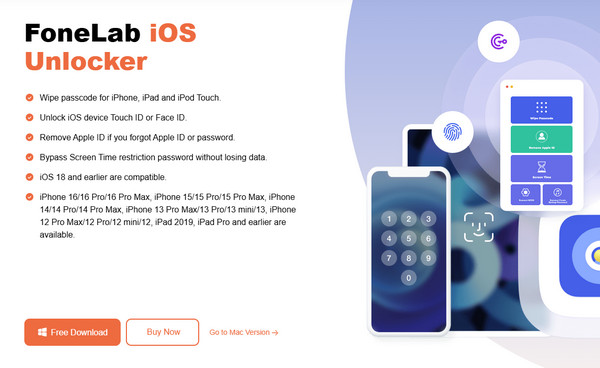
Various reasons exist as to why many users prefer removing the Apple ID from their devices. They may have forgotten their password, no longer need the Apple account, would like to create a new Apple ID, etc. Regardless of the reason, you can depend on the FoneLab iOS Unlocker. It offers different features that can be helpful for passwords, locks, and other concerns, including the Remove Apple ID. As the name suggests, it will let you erase the account from your device.
FoneLab Helps you unlock iPhone screen, Removes Apple ID or its password, Remove screen time or restriction passcode in seconds.
- Helps you unlock iPhone screen.
- Removes Apple ID or its password.
- Remove screen time or restriction passcode in seconds.
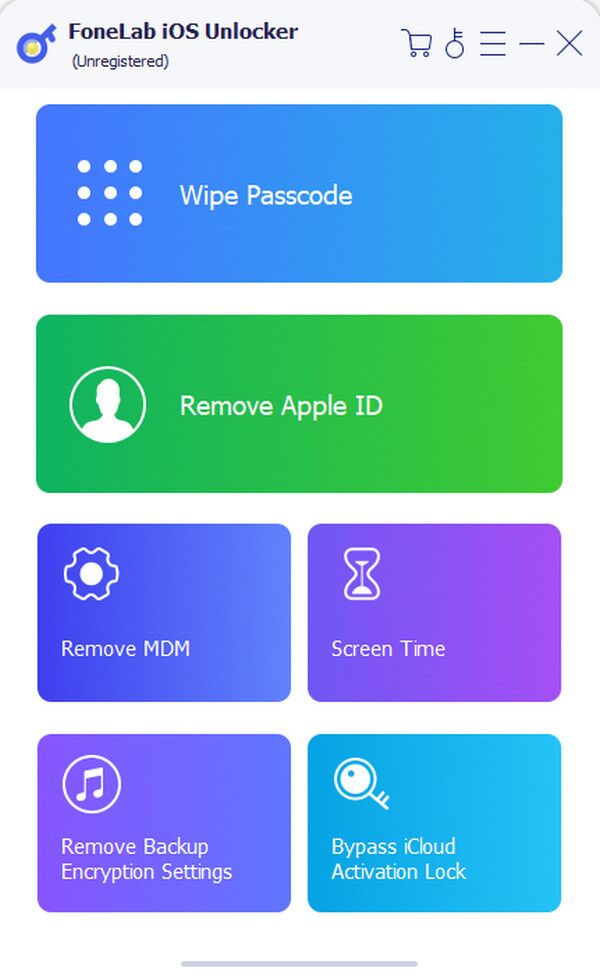
Meanwhile, although professional, FoneLab iOS Unlocker wouldn't even let you face complex procedures due to technicalities. That's because its interface caters to beginners and all users. Hence, advanced knowledge or prior experience is unnecessary; you will quickly grasp its features even at first use. Aside from the Apple ID remover, you will also benefit from the other functions later, including the Wipe Passcode, Remove MDM, Screen Time, and more.
Discern the suitable procedure underneath as a sample for removing an Apple ID from your iOS or iPadOS device with FoneLab iOS Unlocker:
Step 1Use a reliable browsing program to reach the FoneLab iOS Unlocker website. Then, you can expect the Free Download selection on its initial page, so click it to let the program installer save and proceed to the Downloads section. When the file is ready, initialize it and manage the installation. It won't take long before the Start button appears; thus, select it.
Step 2The unlocker's initial interface will immediately emerge on your computer desktop afterward, displaying the primary features. You will see the Remove Apple ID box in the upper section, so opt for it to see the following display prompting you to connect your iOS or iPadOS device. You may also hit Device connected but not recognized if you need more help.
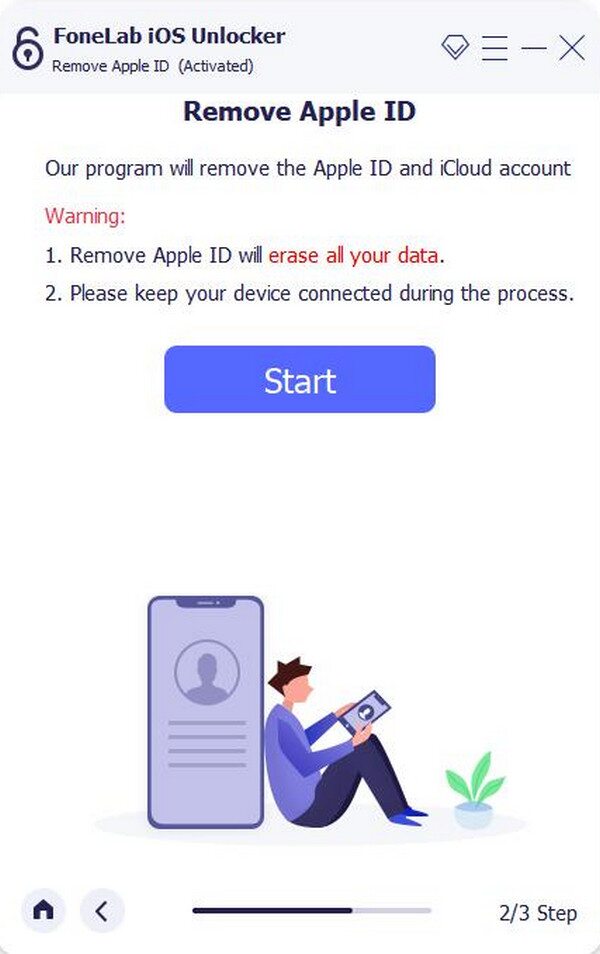
Step 3Once connected, it's time to click the Start tab that appears on the following interface. Then, do as the on-screen instructions say to move forward. If needed, you must also turn off the Find My feature. When you finish the prompts, the Apple ID will finally be eliminated from your iOS or iPadOS device.
FoneLab Helps you unlock iPhone screen, Removes Apple ID or its password, Remove screen time or restriction passcode in seconds.
- Helps you unlock iPhone screen.
- Removes Apple ID or its password.
- Remove screen time or restriction passcode in seconds.
Part 5. FAQs about How to Reset AirPods from Previous Owner
Why won't my AirPods reset?
Your AirPods may fail to reset if the battery is low. Like other devices, AirPods won't function properly if their battery is drained; hence, you may have to charge them first and ensure it has enough energy before resetting or disconnecting them from the previous owner's device.
Can the previous owner still track my AirPods after a reset?
No, they can't. If you have reset the AirPods properly, the previous owner's account will no longer be able to monitor or track them. So, ensure you abide by the above procedures to safeguard your AirPods' security.
All the information needed for resetting an AirPods from its previous owner is already given above. You must only understand and use them properly to resolve your concerns.