fix iPhone/iPad/iPod from DFU mode, recovery mode, Apple logo, headphone mode, etc. to normal state without data loss.
iMessage Ultimate Guide
 Updated by Lisa Ou / February 01, 2021 10:40
I like using iMessage to chat with friends, and it won’t charge me with internet connection.
People might know iMessages, but not very well. There are something new and interesting you can use in iMessage, such as iMessage effects, games, payments, etc.


Guide List
1. What is iMessage
iPhone Message app has another built-in feature, which allows you to send iMessage between iPhone users. People can use them as an instant-chatting app with other iPhone contacts, so they can send and receive text, photo, video, location, sticker and more through it.
- How to Check If Someone Has Blocked You on iMessage
- How to Fix iMessage Activation Error
- iPhone Won't Send Picture Messages? Fix it Now
- How to Send Text Message Instead Of iMessage on iPhone
- iMessage Not Working? How to Fix iMessage Not Working on iPhone
2. How to Turn on iMessage
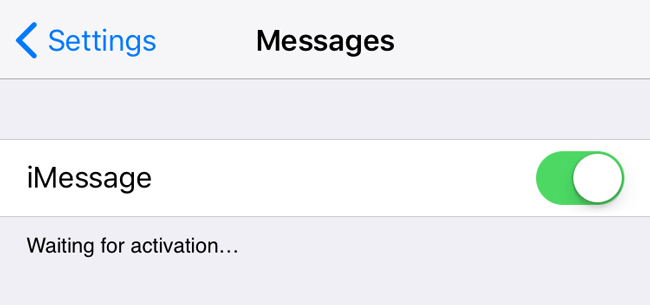
It requires user to enable it before using. Therefore, you should go to Settings > Messages to locate iMessage, and then enable it by tapping the button beside it to activate iMessage.
Tap OK on the pop-up window when it alerts you that Your carrier may charge for SMS messages used to activate iMessage.
If you don’t want to use iMessage and want to turn off it, you can follow above-mentioned way to deactivate iMessage.
3. How to Set Up iMessage
Send Read Receipts
Send Read Receipts is a function that to notify people when you have read their iMessages when it is on. It won’t be apply for text messages. You can simply turn it off if you don’t want to be like that.
Below is how to turn on Send Read Receipts on iMessage.
Step 1 Go to Settings > Messages.
Step 2 Locate iMessage > Send Read Receipts, and then turn it on.

Send as SMS
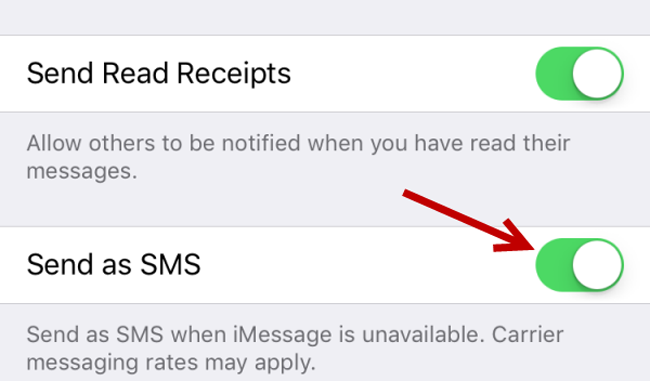
iMessage allows you to send it as SMS when iMessage is unavailable, you can go to Settings > Messages > Send as SMS to enable it.
From then on, you can send text instead of iMessage by disabling your internet connection.
Send and Receive
This is your choice to decide the phone number or email address to be reached by iMessage.
Step 1 Access Settings > Messages > Send and Receive.
Step 2 Check the one you don’t want.

Audio Messages
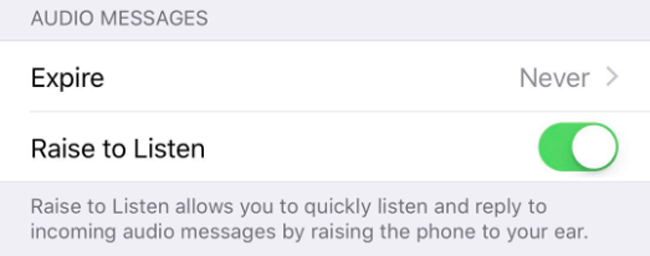
You can choose audio messages expire time through Settings > Messages > AUDIO MESSAGE > Expire. There are 2 options, you can choose After 2 Minutes or Never as you like.
Another feature is called Raise to Listen, which you can use to quickly listen and reply to incoming audio messages by raising the phone to your ear conveniently.
Hide Alerts
iMessage can hide alters for specific contacts if you don’t like to be notified by someone’s iMessages anymore.
Step 1 Tap your Messages app on your iPhone screen.
Step 2 Locate the one you want to hide alerts.
Step 3 Tap the info icon on the top right corner, and then turn on Hide Alerts.
4. How to Use iMessage
How to Send iMessage
Send Text iMessage
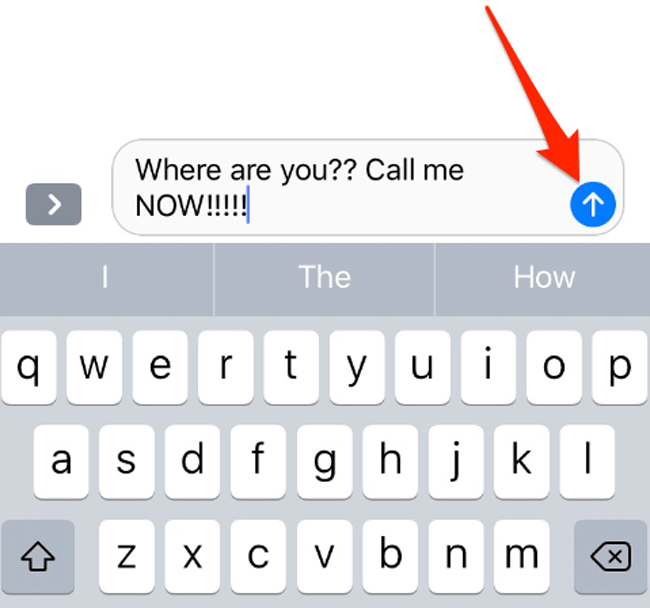
Sending text iMessage is easy as message, you can simply type what you want to say in the box, and then send it out.
iMessage Send Failure? Learn 6 methods to fix the issue.
How to Use iMessage Effects
Send the iMessage out directly, it seems the same as normal messages. You should know that iMessage allows you to add effects to make them more interesting.
Step 1 Ensure you are using iMessage, and type what you want in the box.
Step 2 Tap the send button and hold it until the screen is blur, and then press it.
Step 3 You can see different effects, you can choose one and tap the send button next to your text.
Send Audio Message
If you want to send audio message instead of text, you can press and hold the audio icon in the typing box, and then say something and send out.
Share Photo/Videos/Documents
You can also send photos, videos, documents, stickers, etc. via iMessage. Sharing photos or videos on iPhone, just tap the camera icon on the left of the typing box, choose the items and send.
In addition, you can choose data from other apps and share them with contacts with a few taps.
Make Payment
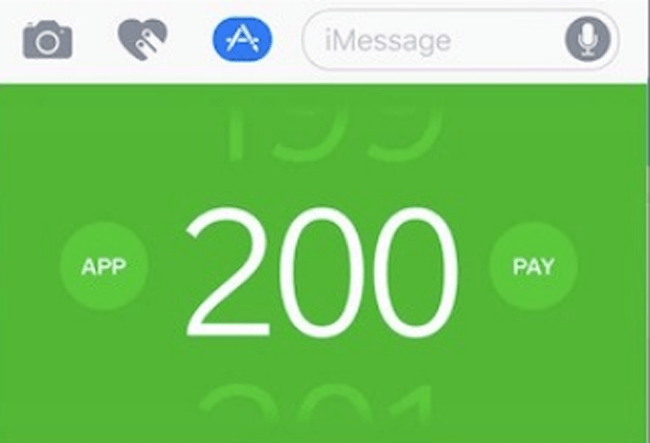
Making payment is available on iMessage now, you can easily choose the payment app through the options, and then finish the process safely.
How to Resend iMessage
Sometimes you might see a red alert icon next to the iMessage that be sent failed. There are different reasons to cause iMessage send failure. Such as unstable internet connection, device errors, system delay and more.
If you want to resend the iMessage, please tap the alert icon to send it again.
How to Block iMessage
iPhone uses always have questions about how to block someone, after that you won’t receive iMessage or call from the contacts as you want.
Step 1 Go to the contact’s info page through Messages > the conversation of whom you want to block.
Step 2 Tap info icon > [contact name].
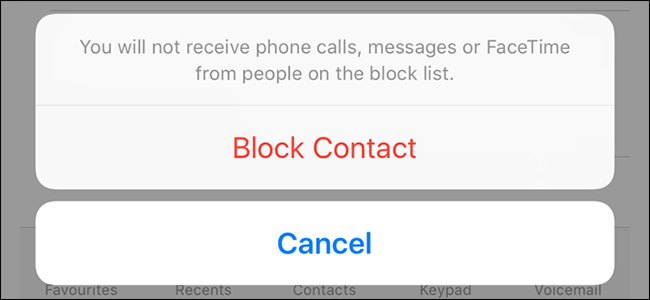
Step 3 Scroll down to tap Block this Caller > Block Contact, and then you will not receive phone calls, messages, or FaceTime from this people.
How to Delete iMessage
If you want to delete contents in the dialog, you can follow below steps to delete iMessages.
Step 1 Open the Messages app and locate the conversation.
Step 2 Press the iMessage you want to delete, select More from the pop-up options.
Step 3 Choose the items you want to delete, and tap the delete icon on the bottom left corner.
How to Backup iMessage
If the iMessage conversations are important for you, you should make a backup for them regularly so that you won’t be risking to loss them.
Here we will talk about 4 ways to backup iMessages on iPhone.
Option 1. Backup to iTunes
iTunes is the way you can simply connect computer and iPhone with USB cable and then manage data between them.
Backing up and restoring are available with it, please keep in mind that you will be asked to transfer the completely backup files without options.
Step 1 Launch iTunes on computer, download from official site if you don’t have one.
Step 2 Connect iPhone to this computer, and then tap Trust on iPhone screen if it is the first connection between this computer and iPhone.
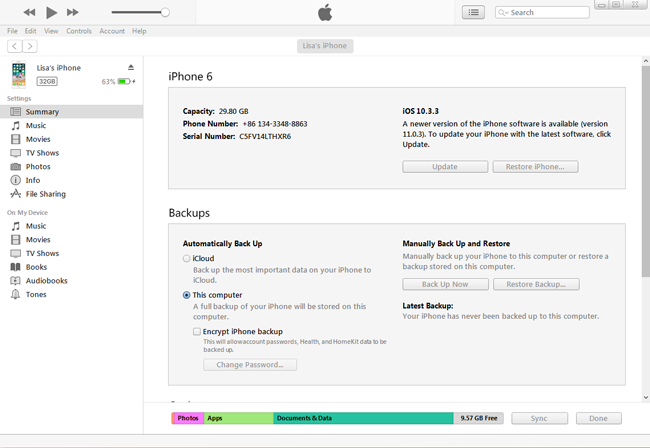
Step 3 After iTunes detects the iPhone, click device icon > Summary, and then locate Backups section.
Step 4 Click Back Up Now.
If you don’t have a computer by your side, you can easily choose iCloud to backup iPhone data to iCloud.
Option 2. Backup to iCloud
Another Apply way, which is called iCloud, allows you to backup iPhone data with iCloud without computer.
Step 1 Go to Settings > [Your name] > iCloud > iCloud Backup, if you are an iOS 10.2 and earlier, you should go through Settings > iCloud > iCloud Backup.
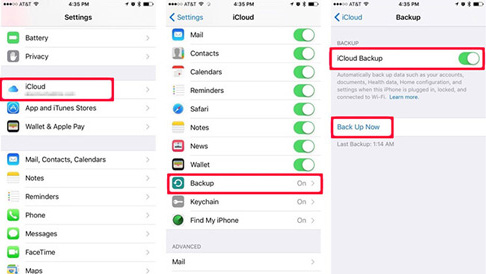
Step 2 Tap the button next to iCloud Backup.
Step 3Tap Back Up Now.
As you can see, neither iTunes nor iCloud allows users to choose what data to be backed up during the operation.
There are cloud services you might figure out to store iPhone data with options so that you can choose certain items to upload or download.
Option 3. Backup to Google Drive/OneDrive/Dropbox
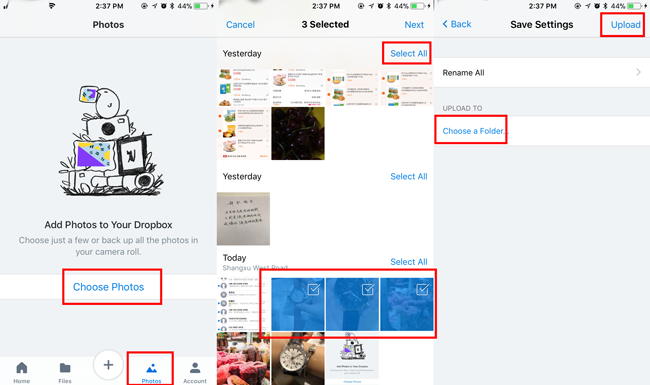
Step 1 Download and install Google Drive/OneDrive/Dropbox on your iPhone.
Step 2Tap Upload icon and then select the right data to backup to cloud service.
Option 4. Backup iPhone Data with FoneLab iOS Data Backup & Restore
FoneLab iOS Data Backup & Restore enables users to backup and restore data with password selectively. In addition, the backup file will be saved as a DATA. file, which won’t take too much space on your computer.
First, you should download and install the program on your computer, and then follow below steps to backup iPhone data.
FoneLab enables you to backup and restore iPhone/iPad/iPod without data loss.
- Backup and restore iOS data to your PC/Mac easily.
- Preview data in detail before you restore data from backups.
- Backup and restore iPhone, iPad and iPod touch data Selectively.
Step 1 Choose iOS Data Backup & Restore > iOS Data Backup on the interface.
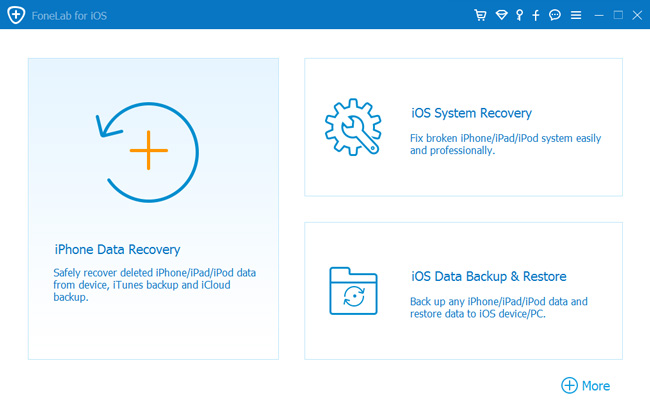
Step 2 Connect the iPhone to computer via USB cable.
Step 3 Choose backup types, and click Start.
Step 4 Select data type you want to backup, and tap Next.
It also enables users to restore iPhone data to computer or device according to your needs. You don’t have to restore entire backup file, and the existing data won’t be overwritten anymore. You don’t need to worry about data loss after restoring.
Step 1 Choose iOS Data Backup & Restore > iOS Data Restore on the interface.
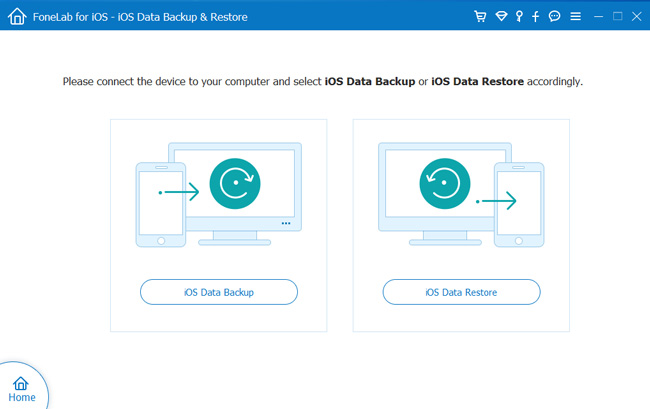
Step 2 Select the backup file you want to restore from the list, and click View Now.
Step 3 Select the data you want to restore from the scanning result, click Restore to PC or Restore to Device.
How to Recover iMessages
Before diving into the recommended FoneLab iOS Data Backup & Restore to recover data without backup files, let’s have a small talk about some common methods people like.
Option 1. Restore from iTunes
Please note that,
If you want to restore iPhone data from iTunes backup files, the current existing data on iPhone will be overwritten by the backup data.
Below is the demonstration to restore iPhone from iTunes.
Step 1 Open iTunes and then click device icon > Summary.
Step 2 Locate Backups section, click Restore from iPhone.
Option 2. Restore from iCloud
iCloud is convenient, but the same as iTunes that the recovered data will overwrite the previous data on iPhone.
Below is how to recover iMessage to iCloud.
Step 1 Factory reset iPhone through Settings > General > Reset > Reset All Settings.
Step 2 Wait for the iPhone restarts, choose Restore from iCloud backup in the App & Data page, and then follow the instruction to set it up.
Option 3. Restore from Google Drive/OneDrive/Dropbox
Step 1 Install the app on your iPhone, and then open it.
Step 2 Access the data you want to restore, and then download and save them to your iPhone.
Above-mentioned ways require that you have backed up iPhone before, then you can easily access your backup files and get them back.
What if you don’t do that before?
It is obvious that you should need a data recovery tool to help you get lost data back on this situation.
So, how can you choose from tons of options?
Option 4. Restore with FoneLab
FoneLab iPhone Data Recovery helps you get data back from iPhone, iTunes or iCloud backup files. It supports iPhone, iPad and iPod touch, and photos, videos, contacts, notes, documents and more are available. No matter you have made a backup file before or not, you can feel free to download and have a try.
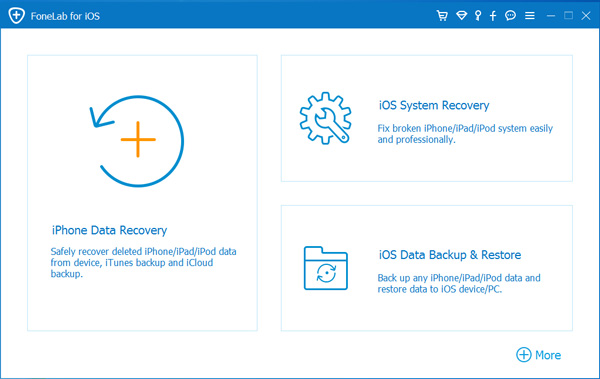
Step 1 Download and install FoneLab iPhone Data Recovery on your computer, and then it will be launched automatically.
With FoneLab for iOS, you will recover the lost/deleted iPhone data including photos, contacts, videos, files, WhatsApp, Kik, Snapchat, WeChat and more data from your iCloud or iTunes backup or device.
- Recover photos, videos, contacts, WhatsApp, and more data with ease.
- Preview data before recovery.
- iPhone, iPad and iPod touch are available.
Step 2 Choose iPhone Data Recovery > Recover from iOS Device, if you want to recover from backup files, you can choose Recover from iTunes Backup File or Recover from iCloud Backup File.
Step 3 Choose the data type you want to scan, and then click Scan.
Step 4 Select the items you want to recover, and click Recover.
5. Location on iMessage
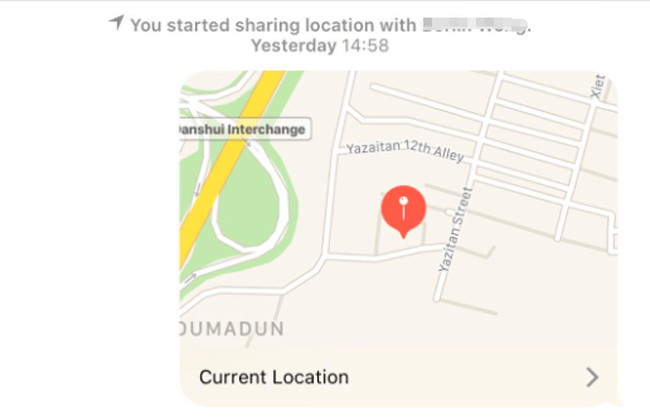
Location is one of the privacy for people, but sometimes you would like to share location with friends.
So,
How to Share Location to Friend on iMessage?
Step 1 Open Messages app on iPhone, tap and open the conversation of whom you want to share location with.
Step 2 Tap the info icon on the top right corner.
Step 3 Tap Share My Location, and then choose Share for One Hour, Share Until End of Day or Share Indefinitely.
How to Send Location to Friend on iMessage?
Another option you can choose is to send your current location to friends via iMessage.
Step 1 Tap Messages app, and then choose contact from the list.
Step 2 Tap info icon > Send My Location.
6. iMessage Games
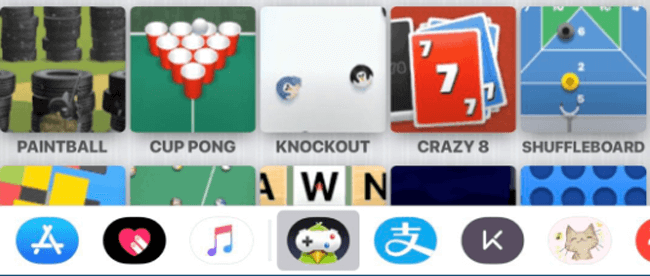
You can play games in iMessage, these games to play through text don’t require downloading other apps.
How to Play Games in iMessage?
Step 1 Open Messages app, and then tap a conversation.
Step 2 Tap the App Store icon on the left of the typing box, and then tap Visit Store.
Step 3 Tap the search icon to enter and find GamePigeon or simply scroll down to download it.
Step 4 Back to the conversation, tap the GamePigeon icon, choose one game from the choices, and send it out.
Step 5 Tap the sent game and start to play.
7. iMessage Tricks
How to Know If Someone Blocked You on iMessage
You have learnt how to block someone on iMessage, then you should would like to ask related question about how to know if someone blocked you on iMessage.
Option 1. Check the Color of iMessage You Sent
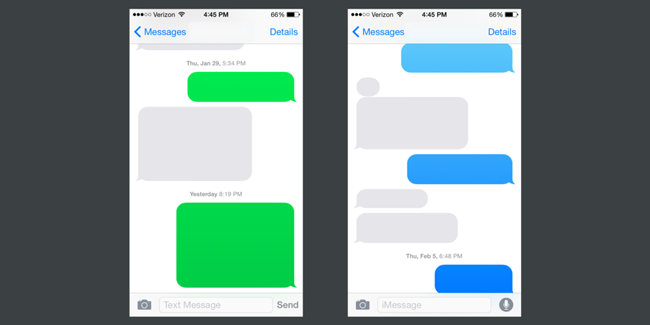
You should have noticed the difference of SMS and iMessages. iMessages are in blue, SMS texts are green.
It is not definite that you have been blocked by a simple color sign, as you know, there are different reasons to cause sending SMS texts instead of iMessage.
Here are the second way you can use to confirm that if the receiver has blocked you or not.
Option 2. Check the Status of iMessage You Sent
You should know that the status of iMessage show you whether the iMessage has been delivered or not no matter the receiver has enable to send read receipts or not.

Therefore, you can check the status of the iMessage has been sent. If there are not a Delivered sign under the bubble, it might means that he or she has blocked you on iMessage.
iMessage Errors
iMessage Errors are not strange to iPhone users as you might have encountered some situations with unknown reasons, such as iMessage wont activate, iMessage doesn’t say delivered, iMessage not working, iMessage send failure.
Here we will introduce 4 workable methods to fix iMessage errors.
Option 1. Restart iPhone
Step 1 Tap the power button until the screen becomes black.
Step 2 Wait a while until the iPhone turns off. Then press the power button to reboot iPhone.
Option 2. Check Internet Connection Status
Step 1 Open Settings app on iPhone.
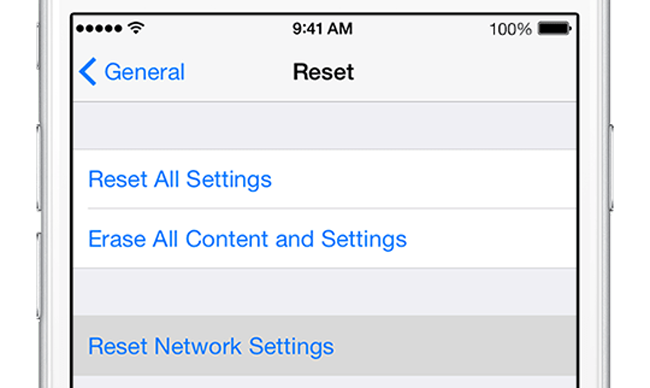
Step 2 Locate Wi-Fi or Cellular to confirm the internet connection status. If the network is unavailable, please choose other stable network or go to Settings > General > Reset Nerwork Settings to reset network.
Option 3. Re-activate iMessage
Step 1 Open Settings, and then tap Messages.
Step 2 Tap the button next to iMessage to turn it off if it is on.
Step 3 Wait for a few seconds, tap it again to enable it.
Option 4. Use FoneLab iOS System Recovery
FoneLab iOS System Recovery is helpful for users to solve iPhone problems and extract data after that. Therefore, you can fix these iMessages issues easily with FoneLab.
Step 1 Download and then install the program on computer, and then launch the program.
FoneLab enables you to fix iPhone/iPad/iPod from DFU mode, recovery mode, Apple logo, headphone mode, etc. to normal state without data loss.
- Fix disabled iOS system problems.
- Extract data from disabled iOS devices without data loss.
- It is safe and easy to use.
Step 2 Choose iOS System Recovery in the interface.
Step 3 Click Start in the interface and then choose the correct information of your device and click Repair.

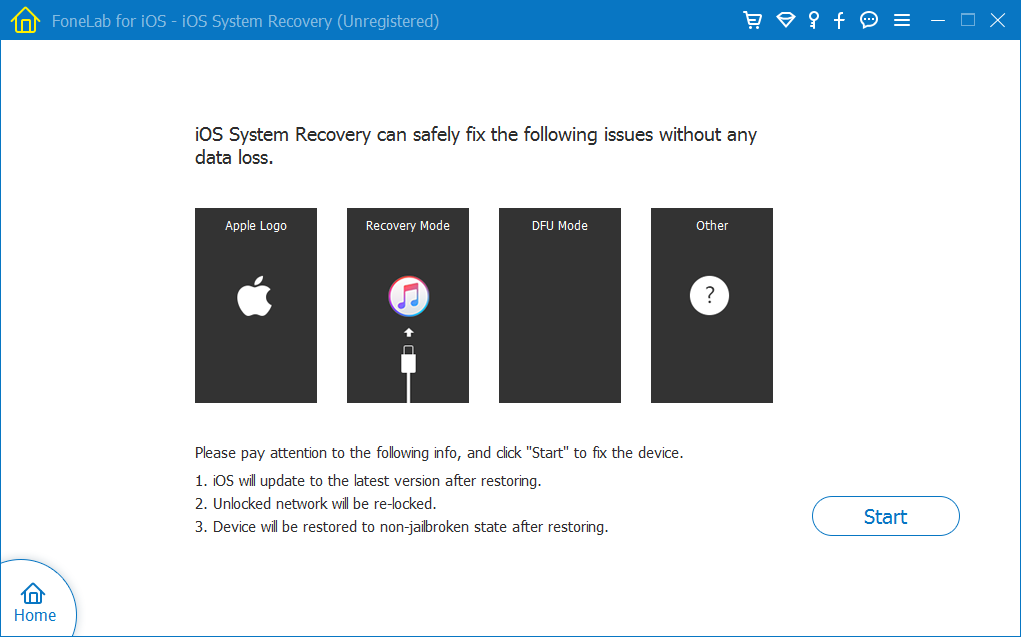
Step 4 Then it will begin to download the plugin, please don’t disconnect the device during the procedure.
That’s all.
You can download and have a try now!
